
How to Play the Guitar: Beginner’s Guide to Chords, Strumming, and Basic Techniques
Learning how to play the guitar can be a rewarding experience. Whether you’re a complete beginner or have some experience, mastering the basics is essential to becoming a competent player. In this article, I’ll guide you through the chords, strumming patterns, and basic techniques you need to know to get started.
Getting Started
Before you start playing, you need to have a guitar. You can either buy one or borrow from a friend. There are various types of guitars available, such as electric, acoustic, and classical. For beginners, an acoustic guitar is recommended as it’s easy to play and doesn’t require any additional equipment. Once you have your guitar, you need to tune it. You can use an electronic tuner or tune it manually.
Chords
Chords are the foundation of guitar playing. They are a combination of two or more notes played together. Learning basic chords such as C, G, D, and A is essential to playing most songs. You can find chord charts online or in guitar books.
Strumming
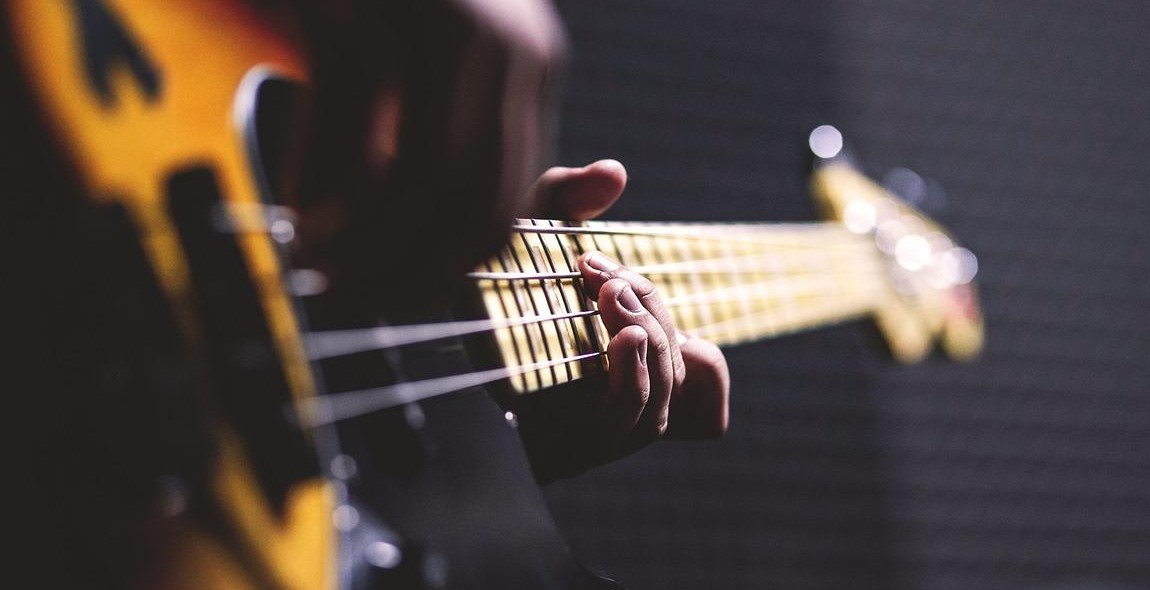
Strumming is the act of playing the guitar strings with a pick or your fingers. It’s important to learn basic strumming patterns such as downstrokes and upstrokes to accompany chords.
Basic Techniques
There are various techniques you can learn to improve your playing, such as fingerpicking, hammer-ons, pull-offs, and slides. These techniques can add depth and complexity to your playing.
By following this guide, you’ll be on your way to playing the guitar in no time. Remember, practice makes perfect, so don’t get discouraged if you don’t get it right the first time.
Choosing the Right Guitar
Choosing the right guitar can be a daunting task, especially for beginners. There are two main types of guitars: acoustic and electric. Acoustic guitars produce sound acoustically, without the need for an amplifier, while electric guitars require an amplifier to produce sound.
Acoustic vs. Electric Guitars
Acoustic guitars are great for beginners because they are portable, affordable, and produce a natural sound. They are also great for practicing fingerpicking and strumming techniques. On the other hand, electric guitars are more versatile and allow for a wider range of sound effects. They are great for playing rock, blues, and metal music.
When choosing between an acoustic and electric guitar, it’s important to consider the type of music you want to play and your budget. Acoustic guitars are generally more affordable than electric guitars, but you will need to invest in an amplifier if you want to play electric guitar.
Guitar Sizes
Guitars come in different sizes, and it’s important to choose the right size for your body type. A full-size guitar is usually the best option for adults, while children and teenagers may need a smaller size. It’s also important to consider the width of the neck and the distance between the strings, as these factors can affect your playing comfort.
| Guitar Size | Age Group |
|---|---|
| 1/4 Size | 4-6 years old |
| 1/2 Size | 6-9 years old |
| 3/4 Size | 9-12 years old |
| Full Size | 12 years old and above |
Overall, choosing the right guitar is a personal decision that depends on your musical preferences and budget. Take the time to research and try out different guitars before making a purchase, and don’t be afraid to ask for advice from experienced guitar players or music store staff.
Basic Guitar Anatomy
Before we dive into playing the guitar, it’s important to understand the basic anatomy of the instrument. Here are the parts of the guitar:
| Headstock: | The top part of the guitar where the tuning pegs are located. |
| Tuning Pegs: | The small knobs on the headstock used to tune the guitar. |
| Nut: | The small piece of material (usually plastic or bone) located between the headstock and the fretboard that guides the strings to the tuning pegs. |
| Fretboard: | The long, thin piece of wood (usually rosewood or maple) that sits on top of the neck and is divided into frets. |
| Frets: | The raised metal strips on the fretboard that divide it into different notes. |
| Neck: | The long, thin piece of wood that connects the headstock to the body of the guitar. |
| Body: | The large, curved part of the guitar that houses the sound hole, pickups (if electric), and bridge. |
| Sound Hole: | The circular hole in the body of the guitar that allows the sound to escape. |
| Bridge: | The piece of material (usually plastic or bone) that sits on the body of the guitar and holds the strings in place. |
Tuning the Guitar
Before you start playing, it’s important to make sure your guitar is in tune. Here’s how to do it:
- Start by tuning the thickest string (the low E string) to the correct pitch using a guitar tuner or pitch pipe.
- Next, tune the A string to the correct pitch by fretting the 5th fret on the low E string and matching the pitch of the A string to that note.
- Continue tuning the remaining strings in the same way: fretting the 5th fret on the string below it and matching the pitch to the open string above it.
- Once all the strings are tuned, play a chord or two to make sure everything sounds good.
It’s important to tune your guitar every time you play, as changes in temperature and humidity can cause the strings to go out of tune.
Playing Your First Chords
Playing your first chords on the guitar can be a bit challenging, but with practice and patience, you’ll get the hang of it in no time. There are two types of chords you’ll need to learn: open chords and barre chords.
Open Chords
Open chords are the easiest chords to learn and are played using open strings. Here are some of the most common open chords:
| Chord | Finger Position |
|---|---|
| C | 1st finger on the 1st fret of the B string, 2nd finger on the 2nd fret of the D string, 3rd finger on the 3rd fret of the A string |
| G | 1st finger on the 2nd fret of the A string, 2nd finger on the 3rd fret of the E string, 3rd finger on the 3rd fret of the B string |
| D | 1st finger on the 2nd fret of the G string, 2nd finger on the 2nd fret of the E string, 3rd finger on the 3rd fret of the B string |
Practice switching between these chords until you can do it smoothly without looking at your fingers.
Barre Chords
Barre chords are a bit more difficult than open chords, but they allow you to play any chord on the guitar by moving the same shape up and down the fretboard. To play a barre chord, you’ll use your index finger to press down all the strings on a particular fret.
Here’s an example of a barre chord:
- F barre chord – Place your index finger across all the strings on the 1st fret, 2nd finger on the 2nd fret of the G string, 3rd finger on the 3rd fret of the A string, and 4th finger on the 3rd fret of the D string.
Practice these chords regularly, and you’ll be playing your favorite songs in no time!

Strumming Techniques
One of the most important aspects of playing the guitar is strumming. It’s the foundation of most songs and creates the rhythm that drives the music forward. There are two basic strumming techniques: downstrokes and upstrokes.
Downstrokes and Upstrokes
Downstrokes are when you strum the guitar strings in a downward motion, towards the ground. Upstrokes are when you strum the strings in an upward motion, towards the sky. It’s important to practice both techniques to be able to play a variety of strumming patterns.
Strumming Patterns
Strumming patterns are a combination of downstrokes and upstrokes that create a specific rhythm. There are countless strumming patterns, but some of the most common ones include:
- Down, Down, Up, Up, Down, Up
- Down, Up, Down, Up
- Down, Down, Down, Up
- Down, Up, Up, Down, Up
Practice these patterns slowly at first and gradually increase your speed as you become more comfortable. It’s important to keep a steady rhythm and avoid rushing or slowing down during the pattern.
| Tip: | Try practicing strumming patterns without playing any chords at first. This will allow you to focus solely on your strumming technique and rhythm. |
|---|
Remember, practice makes perfect. Don’t get discouraged if you’re struggling with a specific strumming pattern. Keep practicing and eventually, it will become second nature.
Basic Techniques
Fingerpicking
Fingerpicking is a technique used to pluck the strings of the guitar using your fingers instead of a pick. To begin, rest your thumb on the top string and use your index, middle, and ring fingers to pluck the other strings. Start with a simple pattern, such as plucking the strings in order from the lowest to the highest note, and gradually increase in complexity.
Here is a basic fingerpicking pattern:
| String | Finger |
|---|---|
| 6th (low E) | Thumb |
| 5th (A) | Index |
| 4th (D) | Middle |
| 3rd (G) | Ring |
| 2nd (B) | Middle |
| 1st (high E) | Index |
Palm Muting
Palm muting is a technique used to dampen the strings of the guitar with the palm of your strumming hand. This creates a muted, percussive sound. To palm mute, lightly rest the side of your palm on the bridge of the guitar and strum the strings. Experiment with the pressure and placement of your palm to achieve different levels of muting.
Here is a basic palm muting pattern:
- Rest your palm on the bridge of the guitar
- Strum the strings using a downstroke
- Release the pressure on your palm and strum the strings again using a downstroke
- Repeat steps 2-3
Practice Tips
As a beginner, learning to play the guitar can seem like a daunting task. However, with the right approach and mindset, you can make significant progress in a short amount of time. Here are some practice tips that can help you achieve your goals:
Setting Goals
The first step to becoming a proficient guitar player is to set realistic goals. Whether you want to learn a specific song or master a particular technique, it’s important to have a clear idea of what you want to achieve. Write down your goals and break them down into smaller, more manageable steps. This will help you stay motivated and track your progress.
Developing Muscle Memory
One of the most important aspects of learning to play the guitar is developing muscle memory. This involves training your fingers to move quickly and accurately between chords and notes. To do this, practice slowly and deliberately, focusing on proper finger placement and technique. Repeat each chord or note several times until it becomes automatic. Over time, your muscle memory will improve, and you’ll be able to play more complex songs and techniques.
Practice Schedule
Consistency is key when it comes to learning the guitar. Set aside a specific time each day to practice, even if it’s only for a few minutes. This will help you establish a routine and make progress more quickly. Use a timer to track your practice sessions and gradually increase the amount of time you spend playing each day.
| Tip | Description |
|---|---|
| Use a metronome | A metronome can help you improve your timing and rhythm. |
| Record yourself | Recording yourself can help you identify areas that need improvement. |
| Take breaks | It’s important to take regular breaks to avoid fatigue and prevent injury. |
By following these practice tips, you can develop the skills and confidence you need to become a proficient guitar player. Remember to be patient and consistent, and don’t be afraid to ask for help or guidance along the way. With practice and dedication, you can achieve your goals and enjoy the many benefits of playing the guitar.