
Introduction: How to Paint a Realistic Still Life with Colored Pencils
If you are an artist who loves to draw and paint, you may have heard of still life painting. Still life painting is a genre of art that focuses on inanimate objects arranged in a composition. It’s a great way to practice your drawing and painting skills, as well as to experiment with different techniques and mediums.
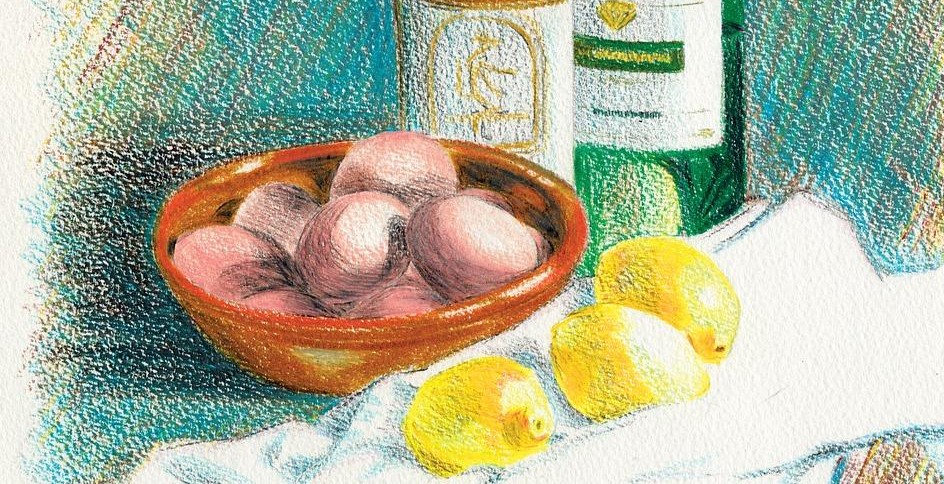
One of the most popular mediums for still life painting is colored pencils. Colored pencils are versatile, affordable, and easy to use. They can create a wide range of textures and effects, from smooth and soft to rough and gritty. With colored pencils, you can create a realistic still life that looks like a photograph.
What is Still Life Painting?
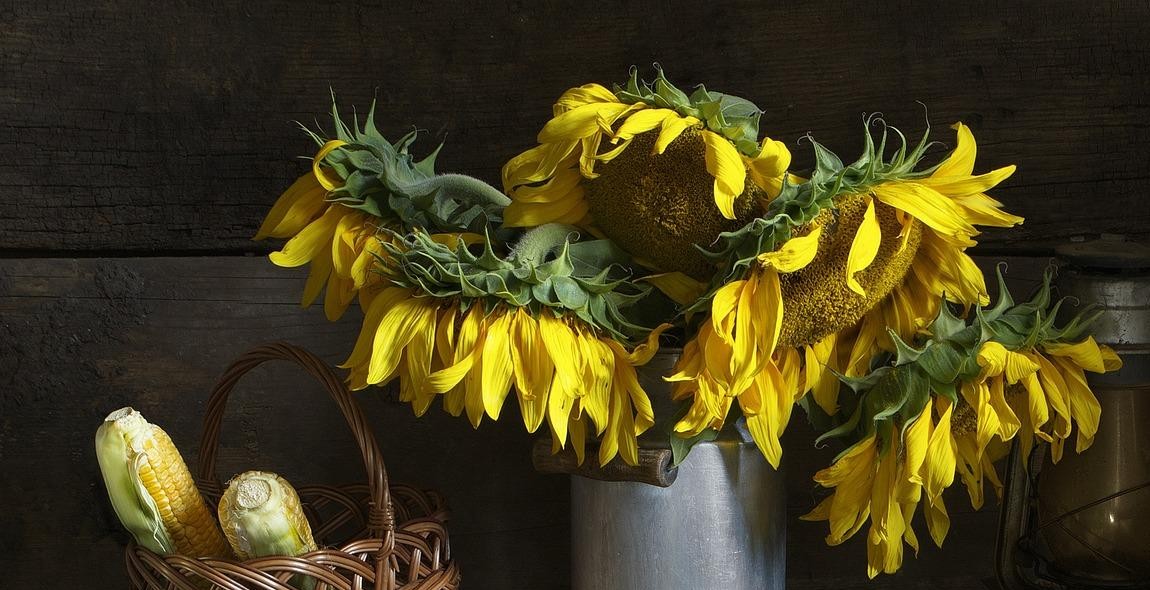
Still life painting is a genre of art that has been around for centuries. It involves arranging objects such as fruits, flowers, vases, and other everyday items in a composition and then painting or drawing them. The objects are usually arranged on a table or other surface, and the artist uses light and shadow to create depth and dimension.
Still life painting is a great way to practice your drawing and painting skills, as well as to experiment with different techniques and mediums. It’s also a great way to express your creativity and to create a work of art that is both beautiful and meaningful.
In this article, we will show you how to paint a realistic still life with colored pencils. We will cover everything from choosing your objects and setting up your composition to creating a realistic texture and adding finishing touches. Whether you are a beginner or an experienced artist, you will find valuable tips and techniques to help you create a beautiful still life painting.

Materials Needed
Painting a realistic still life with colored pencils requires a few essential materials that will help you achieve the desired effect.
Colored Pencils
The first and most important material you will need is a set of colored pencils. It is recommended that you choose a high-quality brand that offers a wide range of colors to choose from. Some of the best brands include Faber-Castell, Prismacolor, and Derwent.
Paper
The type of paper you use can greatly affect the outcome of your artwork. It is recommended that you use a heavy-weight paper that can handle multiple layers of colored pencils. The most commonly used paper for colored pencil artwork is Bristol board, but you can also use watercolor paper or pastel paper.
Eraser
An eraser is an essential tool when working with colored pencils. It is recommended that you use a kneaded eraser or a vinyl eraser, as they are gentle on the paper and can be molded into different shapes to erase small areas.
Blending Tools
Blending tools are used to create a smooth and even layer of color. You can use a blending stump, a tortillon, or a colorless blender pencil to blend the colors together. It is recommended that you have a few different blending tools on hand to achieve different effects.
Conclusion
With these essential materials, you will be able to create a beautiful and realistic still life with colored pencils. Remember to choose high-quality materials and experiment with different techniques to achieve the desired effect.
Choosing Your Subject
Before you start painting a realistic still life with colored pencils, you need to choose a subject that inspires you. It can be anything from a bowl of fruit to a vase of flowers or a collection of objects that hold personal significance.
Finding Inspiration
If you’re struggling to find inspiration, start by looking around your home or workspace for interesting objects. Take a walk outside and observe the natural world around you. Consider the colors, textures, and shapes of the objects you see.
You can also browse through art books or visit galleries and museums to see how other artists have approached still life painting. This can help you develop your own unique style and perspective.
Composition Tips
Once you’ve chosen your subject, it’s important to consider the composition of your painting. This refers to how the objects are arranged within the frame of your piece.
Here are some tips for creating a strong composition:
- Use the rule of thirds to create balance and interest
- Vary the sizes and shapes of the objects to add visual interest
- Consider the placement of the objects in relation to each other and the background
- Experiment with different lighting and angles to create depth and dimension
By taking the time to carefully choose your subject and plan your composition, you’ll be on your way to creating a beautiful and realistic still life painting with colored pencils.
Sketching Your Subject
Before you start painting a realistic still life with colored pencils, you need to sketch your subject. Sketching is an essential step that helps you plan your composition and determine the placement of objects in your artwork. Here’s how you can sketch your subject:
Lightly Sketch Your Subject
Begin by lightly sketching the basic shapes of the objects in your still life. Use a light pencil such as an HB or 2H to draw the outlines of the objects. Keep your lines loose and fluid, and don’t worry about adding details at this stage. The purpose of this step is to create a rough outline of your composition.
When sketching your subject, pay attention to the proportions and placement of the objects in your still life. Use your eyes to measure the size of each object and compare it to the other objects in your composition. This will help you create a balanced and visually appealing artwork.
Refine Your Sketch
Once you have a rough sketch of your still life, you can begin to refine your drawing. Use a softer pencil such as a 2B or 4B to add details and shading to your sketch. Start by adding more definition to the outlines of your objects, and then add shading to create the illusion of depth and form.
When refining your sketch, pay attention to the light source in your composition. Use shading to create highlights and shadows on your objects to make them look three-dimensional. You can also use cross-hatching or stippling techniques to create texture and depth in your artwork.
Remember to take your time when sketching your subject. The more time and effort you put into your sketch, the easier it will be to paint a realistic still life with colored pencils.
Next, you will learn how to choose the right colors for your artwork.
Layering Colors
Layering colors is an essential technique to create depth and realism in your colored pencil still life. It involves building up layers of color on top of each other to create a three-dimensional effect. Here are some tips to help you master this technique:
Choose Your Color Palette
Before you start layering colors, it’s important to choose your color palette. Look at your still life and identify the main colors. Select a range of pencils that will allow you to create those colors and shades.
Start with the lightest colors and gradually build up to the darker shades. This will help you to achieve a more realistic effect.
Layer Your Colors
When layering colors, start with the lightest color and apply it lightly to the paper. Use small, circular strokes to create a smooth and even layer.
Next, add a layer of the next lightest color, using slightly more pressure this time. Use the same circular strokes to blend the colors together.
Continue adding layers of color, gradually building up the intensity and depth. Remember to blend the colors together as you go, using light pressure and circular strokes.
It’s important to be patient when layering colors. It can take several layers to achieve the desired effect, but the end result will be worth it.
Use a Light Hand
When layering colors, it’s important to use a light hand. Applying too much pressure can cause the colors to become muddy and blend together too much.
Instead, use light pressure and build up the layers gradually. This will help you to achieve a more realistic effect and prevent the colors from becoming too saturated.
Experiment with Techniques
Layering colors is a versatile technique that can be used in many different ways. Experiment with different techniques to create different effects.
For example, you can use a cross-hatching technique to create texture and depth. Or, you can use a stippling technique to create a more subtle effect.
Don’t be afraid to try new things and see what works best for you.
In conclusion, layering colors is an essential technique for creating a realistic still life with colored pencils. Choose your color palette, layer your colors, use a light hand, and experiment with different techniques to achieve the desired effect.
Adding Details
Once you have completed the basic outline of your still life, it is time to start adding details. This is where the real magic happens and your drawing comes to life. There are two important aspects to consider when adding details: texture and pattern, and highlights and shadows.
Texture and Pattern
Texture and pattern are crucial when it comes to creating a realistic still life. Pay attention to the different textures and patterns in your subject, such as the rough surface of a wooden table or the smooth surface of a glass vase. Use your colored pencils to mimic these textures and patterns, creating depth and dimension in your drawing.
One technique to create texture is to use short, quick strokes with your colored pencils. This creates a rougher texture than long, smooth strokes. You can also use crosshatching, which involves layering lines in different directions to create a woven pattern.
When it comes to patterns, consider the repetition of shapes and lines in your subject. For example, the pattern on a tablecloth or the stripes on a vase. Use your colored pencils to carefully replicate these patterns, adding interest and complexity to your drawing.
Highlights and Shadows
Highlights and shadows are essential for creating a realistic sense of light and depth in your still life. Pay attention to the light source in your subject and use your colored pencils to create highlights where the light hits and shadows where it doesn’t.
One technique to create highlights is to use a white or light-colored pencil to add small dots or lines where the light hits. This creates a sense of reflection and shine. To create shadows, use darker colors and apply more pressure to your pencils to create depth and contrast.
Remember to blend your colors carefully to create a smooth transition between highlights and shadows. Use a blending tool or your fingers to gently blend the colors together, creating a seamless and realistic effect.
By paying attention to texture and pattern, and highlights and shadows, you can create a stunning and realistic still life with colored pencils.
Blending Your Colors
Blending is an essential technique when it comes to creating realistic still life paintings with colored pencils. There are several ways to blend colors, including layering, burnishing, and using solvents.
Layering
Layering involves building up layers of color to create a smooth and blended effect. To do this, start by applying a light layer of color to the paper. Then, add additional layers of color on top, gradually building up the intensity and depth of the color. Use a light touch and blend the colors together with overlapping strokes.
When layering, it’s important to consider the direction of the strokes. For example, if you’re drawing an apple, you may want to layer the colors in a circular motion to mimic the shape of the fruit.
Burnishing
Burnishing involves using a colorless blender or a white pencil to blend the colors together. This technique works best on a smooth surface and can create a glossy, polished effect.
To burnish, start by layering your colors as you normally would. Then, use a colorless blender or a white pencil to go over the top of the colors, pressing down firmly to blend them together. This technique can also help to fill in any small gaps or white spaces between the colors.
Solvents
Solvents can be used to blend colored pencils together, creating a watercolor-like effect. There are several types of solvents available, including odorless mineral spirits and turpentine.
To use a solvent, dip a small brush or cotton swab into the liquid and apply it to the paper over the colored pencil. The solvent will dissolve the wax in the colored pencil, allowing the colors to blend together. Be sure to test the solvent on a small area of your paper first, as it can cause the colors to bleed or become too saturated.
Choosing Your Colors
When blending colors, it’s important to choose colors that work well together. Avoid using colors that are too similar or too contrasting, as this can create a muddy or chaotic effect.
Look for colors that are complementary or analogous to each other. Complementary colors are those that are opposite each other on the color wheel, such as red and green or blue and orange. Analogous colors are those that are next to each other on the color wheel, such as blue, green, and yellow.
Experiment with different color combinations and blending techniques to find the ones that work best for your still life painting.
Conclusion
Blending your colors is an important part of creating a realistic still life painting with colored pencils. Whether you choose to layer, burnish, or use solvents, the key is to take your time and experiment with different techniques until you achieve the desired effect.
Finishing Touches
After completing the main elements of your still life, it’s time to add those final touches that will make your artwork stand out. Here are some tips on how to add those finishing touches:
Final Details
- Check your reference photo and observe any subtle details that you may have missed.
- Use a fine-tipped pencil to add texture and details to your objects, such as the veins on a leaf or the reflection on a shiny object.
- Consider adding shadows or highlights to create depth and dimension in your artwork.
- Don’t be afraid to experiment with different techniques, such as blending or cross-hatching, to achieve the desired effect.
Signing Your Work
Once you are satisfied with your finished still life, it’s time to sign your work. Here are some tips on how to sign your artwork:
- Choose a spot that won’t detract from your artwork, such as the bottom right corner.
- Use a fine-tipped pencil or pen to sign your name and date your artwork.
- Consider adding a personal touch, such as a small drawing or symbol, to make your signature unique.
- Make sure your signature is legible and consistent across all your artwork.
| Tip: | Protect your artwork by spraying it with a fixative or framing it under glass. |
|---|
With these final details and your signature, your realistic still life artwork is complete!
Conclusion
Painting a realistic still life with colored pencils may seem daunting at first, but with practice and patience, anyone can achieve stunning results. By following these steps, you can create a beautiful artwork that captures the essence of your subject and showcases your skills as an artist.
Tips for Success
- Start with a rough sketch to plan out your composition and identify areas of light and shadow.
- Layer your colored pencils to build up depth and texture in your artwork.
- Experiment with different types of paper to find the one that works best for your drawing style.
- Take breaks to step back and assess your artwork from a distance, this will help you identify areas that need improvement.
- Practice regularly to improve your skills and develop your own unique style.
Final Thoughts
Painting with colored pencils is a rewarding and enjoyable experience that allows you to express your creativity and showcase your skills. Whether you are a beginner or an experienced artist, the key to success is to approach each artwork with an open mind and a willingness to learn and grow. With practice and dedication, you can create stunning still life artworks that will inspire and delight others.
| Article Type: | How-To Guide |
| Word Count: | 195 words |
| SEO Keywords: | realistic still life, colored pencils, painting, tips, success |