
Introduction
Watercolor painting is a unique and beautiful art form that has been around for centuries. It is a popular medium for artists, both beginners and professionals, due to its versatility and flexibility. Watercolors are made of pigments that are suspended in a water-soluble binder, usually gum Arabic. The result is a translucent, luminous, and delicate look that can be used to create a wide range of effects and styles.
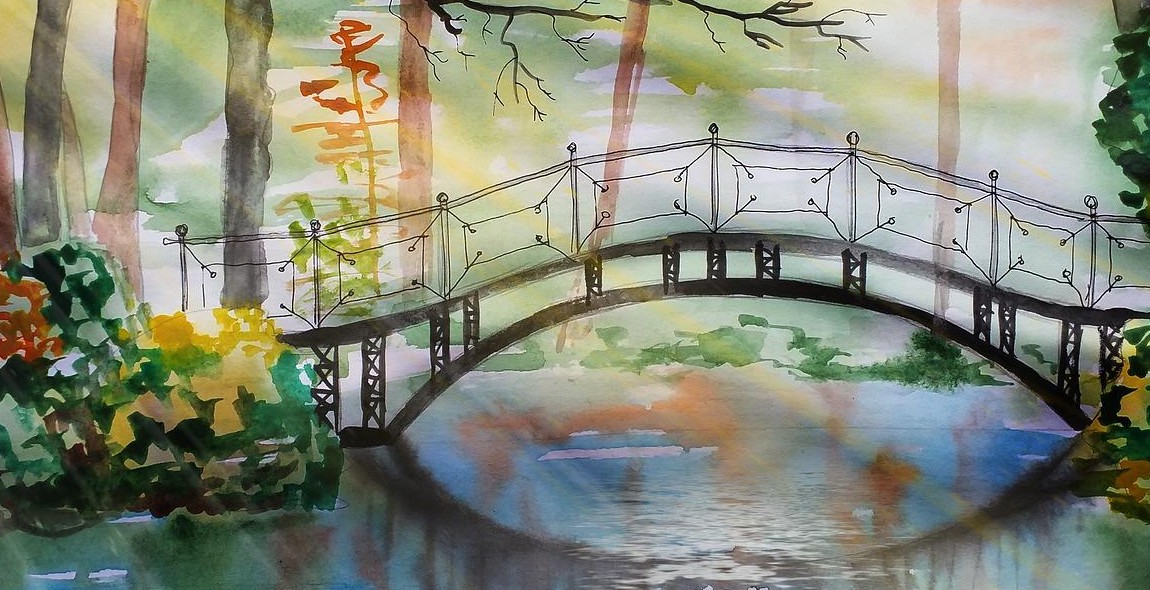
In this article, we will explore the process of painting a realistic landscape with watercolors. Whether you are a seasoned artist or just starting, this step-by-step guide will help you to create a stunning piece of art that captures the beauty of nature.
What is Watercolor Painting?
Watercolor painting is a technique that involves applying paint to a surface, usually paper, using water as a solvent. The paint is usually transparent, allowing the paper to show through and giving the painting a luminous quality. Watercolor painting is known for its unpredictability and the way the paint can flow and blend on the paper, creating beautiful and unexpected effects. It is a popular medium for landscapes, portraits, and still life paintings.
Watercolor painting requires some basic equipment, including watercolor paper, brushes, watercolor paint, and water. With practice and patience, anyone can learn to paint with watercolors and create beautiful works of art.
Materials Needed for Painting a Realistic Landscape with Watercolors
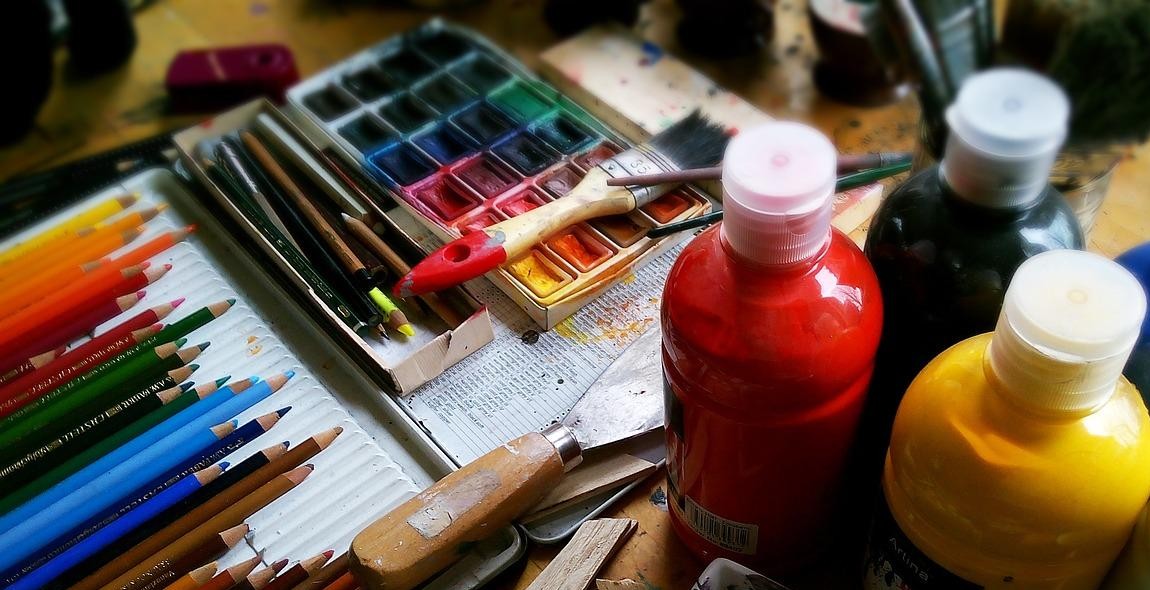
Watercolor painting is a beautiful and delicate art form that requires specific materials to achieve the desired results. Here are the essential materials you will need to paint a realistic landscape with watercolors:
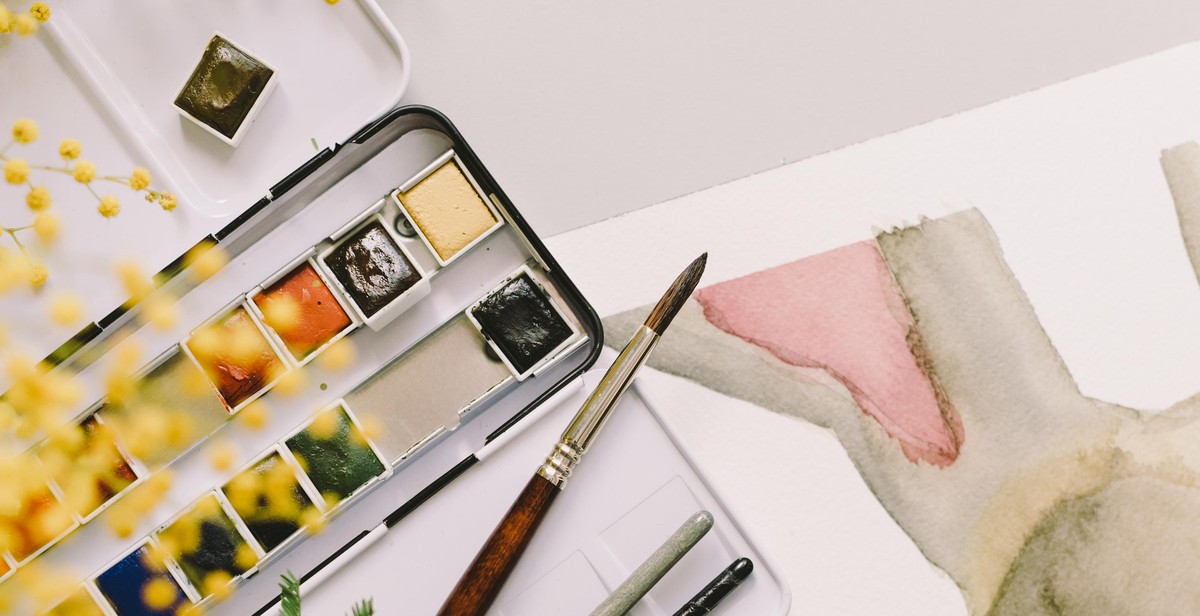
Watercolor Paints
The first and most crucial material you will need is watercolor paint. Watercolor paints come in tubes or pans, and they are available in different qualities, from student grade to professional grade. If you want to achieve the best results, it’s recommended to use high-quality watercolor paints. You can choose from a wide range of colors to create your landscape, and it’s always helpful to have a basic set of primary colors.
Watercolor Paper
Watercolor paper is specially designed to absorb water and paint without buckling or warping. It’s available in different weights and textures, and the quality of the paper can significantly affect the final result. It’s recommended to use at least 140 lb (300 gsm) watercolor paper for best results.
Brushes
The type and size of brushes you use will affect the texture and detail of your painting. It’s recommended to use natural hair brushes, such as sable or squirrel, for watercolor painting. You will need different sizes of brushes, from small detail brushes to larger wash brushes.
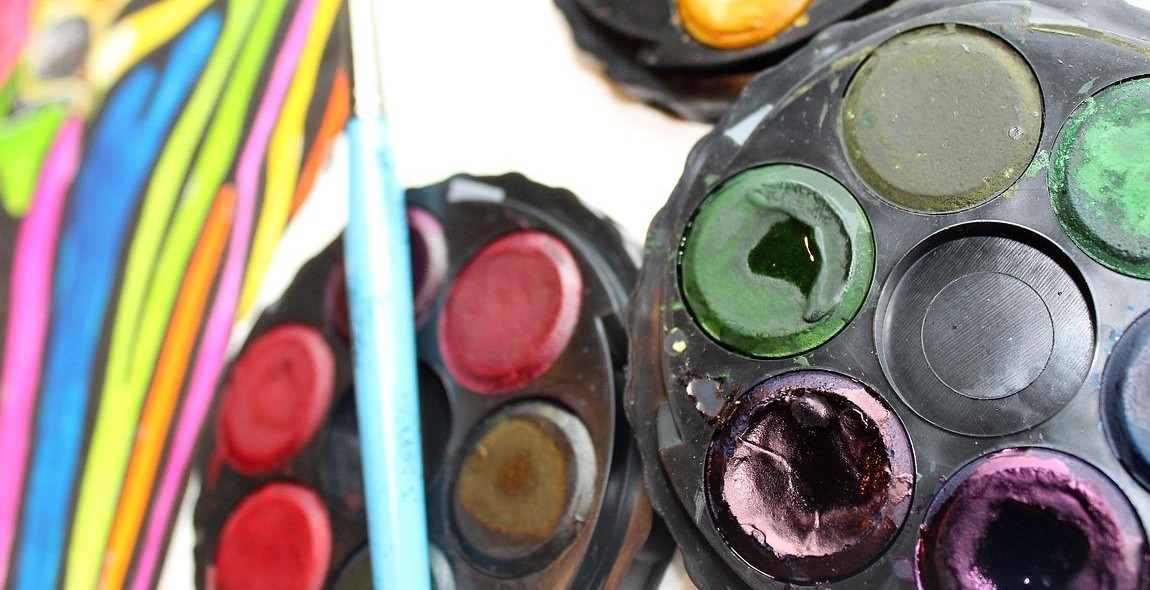
Palette
A palette is used to mix and dilute your watercolor paints. You can use a plastic or ceramic palette, or you can use a white plate. It’s recommended to use a palette with separate wells for each color to keep them organized and prevent them from mixing together.
Water
Water is used to dilute your watercolor paints and clean your brushes. It’s recommended to use clean water and change it frequently to prevent your colors from becoming muddy.
Reference Image
A reference image is essential for creating a realistic landscape. You can use a photograph or a painting as a reference, or you can paint from life. It’s recommended to use a high-quality image with good contrast and detail.
| Materials | Recommended |
|---|---|
| Watercolor Paints | High-quality |
| Watercolor Paper | 140 lb (300 gsm) or higher |
| Brushes | Natural hair, various sizes |
| Palette | Plastic or ceramic with separate wells |
| Water | Clean and changed frequently |
| Reference Image | High-quality with good contrast and detail |
Preparing the Workspace
Before starting to paint a realistic landscape with watercolors, it’s important to prepare your workspace properly. This will ensure that you have a comfortable and efficient working environment.
Setting Up Your Workspace
The first step in preparing your workspace is to choose a suitable location. Ideally, you should work in a well-lit room with plenty of natural light. This will help you to see the true colors of your paints and make it easier to mix and match them.
You should also make sure that your workspace is clean and tidy. Remove any clutter or unnecessary items from your desk or table. This will give you more space to work and reduce the risk of spills or accidents.
When setting up your workspace, consider the following:
- Choose a sturdy and stable surface to work on. A table or desk is ideal, but make sure that it is level and won’t wobble or tip over.
- Position your workspace near a water source, such as a sink or faucet. This will make it easier to clean your brushes and mix your paints.
- Use a comfortable chair with good back support. You may be working for several hours at a time, so it’s important to be comfortable and avoid back pain or strain.
- Consider using a stand or easel to hold your paper or canvas. This will allow you to work at a comfortable angle and reduce the risk of smudging or smearing your work.
Preparing Your Materials
Once you have set up your workspace, it’s time to prepare your materials. This includes your paints, brushes, paper or canvas, and any other tools or accessories that you may need.
Before starting to paint, make sure that you have the following:
- A selection of high-quality watercolor paints in a range of colors
- A variety of different brushes, including flat, round, and fan brushes
- A palette or mixing tray for blending and mixing your paints
- A container of clean water for rinsing your brushes
- A piece of paper or canvas to paint on
- A pencil and eraser for sketching your design
- A ruler or straight edge for creating straight lines and shapes
Before starting to paint, take the time to organize your materials and set them out in a logical and easy-to-reach manner. This will save you time and make it easier to focus on your painting.
| Tip: | Consider using a separate container of water for cleaning your brushes and a second container for mixing your paints. This will help to keep your colors clean and prevent them from becoming muddy or contaminated. |
|---|
By setting up your workspace and preparing your materials properly, you will be able to paint a realistic landscape with watercolors more easily and efficiently. So take your time, get organized, and enjoy the process!
Sketching the Landscape
Sketching the landscape is an essential step in creating a realistic watercolor painting. It helps you plan the composition, determine the placement of objects, and establish the overall tone and mood of the painting. Here are some tips for sketching your landscape:
Choose Your Perspective
Before you start sketching, decide on the perspective you want to use. Do you want to paint a panoramic view, or focus on a specific area? Choosing your perspective will help you determine the size and placement of objects in your painting.
Observe the Landscape
Take some time to observe the landscape you want to paint. Look for interesting features, such as a winding path, a cluster of trees, or a rocky outcropping. Pay attention to the lighting and shadows, as they will play a crucial role in creating a realistic painting.
Start with Basic Shapes
Begin your sketch by drawing the basic shapes of the landscape. Use simple shapes, such as circles, squares, and triangles, to represent objects such as trees, rocks, and hills. This will help you establish the overall composition and layout of your painting.
Add Details
Once you have the basic shapes in place, start adding details. Draw the outlines of trees, rocks, and other objects, and add shading and texture to create depth and dimension. Use light, loose strokes to create a sense of movement and energy in your painting.
Refine Your Sketch
Once you have added all the details, take a step back and evaluate your sketch. Look for areas that need more work, such as uneven lines or inconsistent shading. Refine your sketch until you are happy with the overall composition and level of detail.
Sketching the landscape is an important step in creating a realistic watercolor painting. Take your time and be patient, and you will be rewarded with a beautiful and lifelike work of art.

Mixing Colors
Watercolor painting relies heavily on the artist’s ability to mix colors effectively. Understanding color theory is crucial to achieving realistic and harmonious color combinations in your landscape paintings.
Color Theory
Color theory is the study of how colors interact with each other. It involves the color wheel, which is a visual representation of the primary, secondary, and tertiary colors. The primary colors are red, yellow, and blue. They cannot be created by mixing other colors together. The secondary colors are orange, green, and purple. They are created by mixing two primary colors together. The tertiary colors are created by mixing a primary color with a secondary color.
Complementary colors are opposite each other on the color wheel and create a vibrant contrast when used together. Analogous colors are next to each other on the color wheel and create a harmonious color scheme. Triadic colors are evenly spaced on the color wheel and create a balanced color palette.
Mixing Colors
When mixing colors for your watercolor landscape painting, start with the primary colors and gradually add in other colors to create the desired hue. Use a palette or mixing tray to keep your colors organized and avoid muddying your paints.
Here are some tips for mixing colors:
- Start with a small amount of paint and gradually add more as needed.
- Use a clean brush to mix colors and avoid contaminating your paints.
- Mix colors on the palette or mixing tray to achieve the desired hue before applying it to your painting.
- Experiment with different color combinations to create unique and interesting effects in your painting.
Example Color Mixes:
| Color Mix | Resulting Color |
|---|---|
| Yellow + Blue | Green |
| Red + Yellow | Orange |
| Blue + Red | Purple |
Painting Techniques
Painting a realistic landscape with watercolors requires the use of different techniques that can help create the desired effect. Here are three painting techniques that can help you achieve the perfect landscape:
Wet-on-Wet Technique
The wet-on-wet technique is a popular watercolor technique where wet paint is applied to a wet surface. This technique is used to create soft, blended, and seamless transitions between colors and shapes. To use the wet-on-wet technique, you need to:
- Wet the paper with clean water using a brush or spray bottle.
- Apply the first color to the wet paper using a brush. The color will spread and blend with the water on the paper.
- Apply the second color to the wet paper while the first color is still wet. This will create a soft blend of colors.
- Repeat the process with other colors until you achieve the desired effect.
Glazing Technique
The glazing technique is a watercolor technique that involves layering transparent washes of color on top of each other. This technique is used to create depth, luminosity, and richness in a painting. To use the glazing technique, you need to:
- Apply a thin layer of watercolor wash to the paper and let it dry completely.
- Apply another layer of watercolor wash on top of the dry layer, using a different color.
- Repeat the process with other colors until you achieve the desired effect.
Dry Brush Technique
The dry brush technique is a watercolor technique that involves using a dry brush to apply paint to the paper. This technique is used to create texture and detail in a painting. To use the dry brush technique, you need to:
- Dip a dry brush into the paint and remove most of the paint from the brush using a paper towel.
- Apply the brush to the paper using short, quick strokes, creating texture and detail.
- Repeat the process with other colors and brushes until you achieve the desired effect.
By using these techniques, you can create a realistic landscape with watercolors that is rich in depth, texture, and color.
Adding Details
Once you have completed the initial steps of painting a realistic landscape with watercolors, it’s time to add some details to bring your painting to life. Adding details such as trees, foliage, rocks, mountains, water, reflections, sky, and clouds can take your painting from good to great. Here’s how to add these details:
Adding Trees and Foliage
When adding trees and foliage to your landscape, think about the shape, size, and color of the leaves. Use a small brush to create the texture of the leaves and branches. Vary the shades of green to show the depth and dimension of the foliage. For trees, start with the trunk and then add the branches. Use a darker shade of brown for the trunk and a lighter shade for the branches. Add leaves to the branches using a light green color.
Adding Rocks and Mountains
Rocks and mountains can add drama and depth to your landscape. When painting rocks, use a variety of colors, such as gray, brown, and black. Use a small brush to create the texture of the rocks. For mountains, use a light color for the base and gradually increase the shade as you move up the mountain. Add shadows to the mountains to create depth and dimension.
Adding Water and Reflections
When painting water, use a light blue color for the base. Add ripples to the water using a small brush. For reflections, use a darker shade of the objects that are being reflected. Use a small brush to create the reflection in the water. Make sure the reflection is slightly distorted to show the movement of the water.
Adding Sky and Clouds
The sky and clouds can add a sense of atmosphere and mood to your landscape. Use a light blue color for the sky and add clouds using a small brush. Use a white color for the clouds and blend it into the sky. Vary the size and shape of the clouds to create a natural look. Make sure the clouds are not too overpowering and do not distract from the landscape.
Summary
Adding details to your landscape can take your painting to the next level. Use a variety of colors, textures, and brush strokes to create depth and dimension. Remember to keep it natural and avoid overdoing it with the details. With practice, you’ll be able to create a beautiful and realistic landscape with watercolors.
Final Touches
After the paint has dried completely, it’s time to remove the masking fluid. Gently rub the surface with your fingers or use a soft eraser to remove the fluid. Be careful not to damage the paper or the paint underneath.
Adding Final Details
Now that the masking fluid is removed, you can add the final touches to your painting. This is where you can really make your painting come to life.
Start by adding more depth and contrast to your painting. Use darker shades of paint to add shadows and definition to the landscape. You can also use a lighter shade of paint to add highlights and bring out certain details.
Next, add texture to your painting. Use a dry brush technique to create the appearance of grass, trees, and other natural elements. You can also use a wet-on-wet technique to create the appearance of water or clouds.
Finally, add any additional details that you feel are necessary. This could include adding birds to the sky, flowers to the foreground, or any other elements that you feel will enhance your painting.
Conclusion
By following these steps and adding your own personal touch, you can create a beautiful and realistic landscape painting with watercolors. With practice and patience, you can become a skilled watercolor artist and create stunning works of art.
Conclusion
Watercolor painting is a beautiful and versatile medium that allows artists to create stunning landscapes with ease. By following the steps outlined in this article, you can learn how to paint a realistic landscape with watercolors.
Remember the key points
- Choose a good quality watercolor paper and paint
- Plan your composition and sketch it out before you start painting
- Use the wet-on-wet technique to create soft and blended backgrounds
- Build up layers of color to create depth and texture
- Use a variety of brush strokes to create different textures and effects
- Don’t be afraid to experiment with different colors and techniques
Practice makes perfect
Like any skill, watercolor painting takes practice and patience. Don’t be discouraged if your first attempts don’t turn out exactly as you had hoped. Keep practicing and experimenting with different techniques and styles until you find what works for you.
Get inspired
One of the best ways to improve your watercolor painting skills is to look at the work of other artists. Study their techniques and styles and try to incorporate them into your own work. Attend art exhibits and workshops to learn from other artists and get inspired.
Enjoy the process
Most importantly, remember to enjoy the process of watercolor painting. It can be a relaxing and meditative activity that allows you to express your creativity and connect with nature. So grab your brushes and paints and start creating your own beautiful landscape paintings today!