
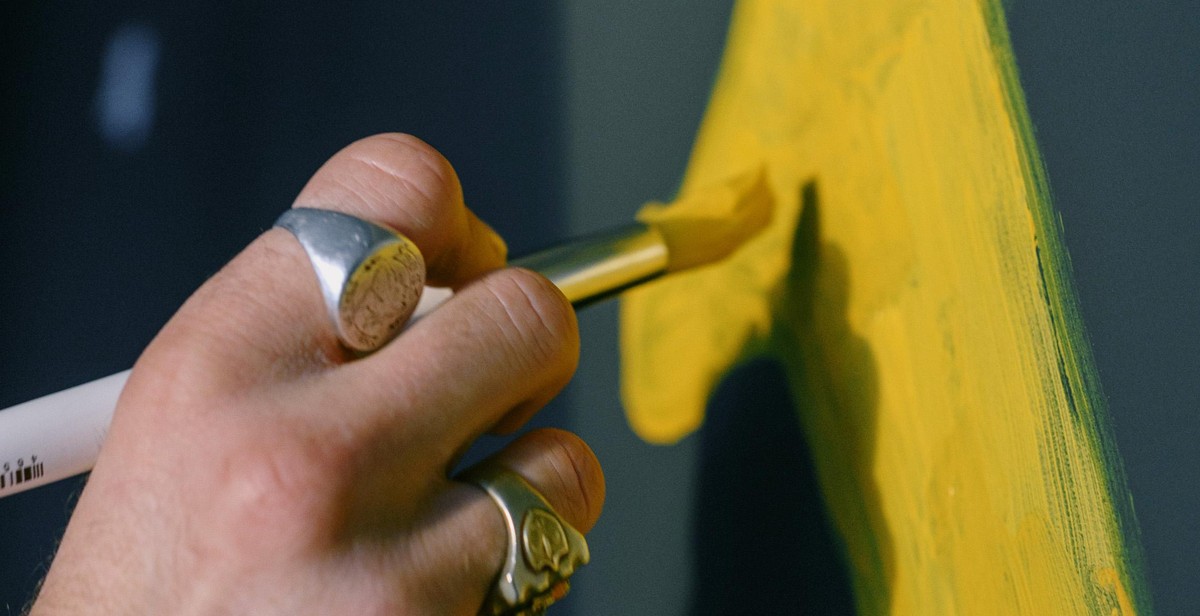
Introduction: How to Paint a Realistic Landscape with Gouache
Gouache is a type of paint that has been used by artists for centuries. It is a water-based paint that is similar to watercolor, but it has a thicker consistency and a more opaque finish. Gouache is a versatile medium that can be used to create a wide range of effects, from delicate washes to bold, opaque strokes.
What is Gouache?
Gouache is a type of paint that is made by mixing pigment with a binder, usually gum arabic. It is a water-based paint, which means that it can be thinned with water and cleaned up with soap and water. Gouache is similar to watercolor, but it has a thicker consistency and a more opaque finish. This makes it a popular choice for artists who want to create bold, vibrant paintings.
Why Use Gouache?
Gouache is a versatile medium that can be used to create a wide range of effects. It is ideal for painting landscapes because it can be used to create both delicate washes and bold, opaque strokes. Gouache also dries quickly, which makes it easier to layer colors and build up a painting. Additionally, gouache can be used on a variety of surfaces, including paper, board, and canvas.
If you want to learn how to paint a realistic landscape with gouache, this article will provide you with the tips and techniques you need to get started. From choosing the right materials to creating a composition and applying paint, we will guide you through the process of creating a beautiful landscape painting with gouache.
Choosing the Right Materials
When it comes to painting a realistic landscape with gouache, choosing the right materials is key to achieving the desired result. Here are some factors to consider when selecting your materials:
Types of Gouache Paints
There are two types of gouache paints: traditional gouache and acrylic gouache. Traditional gouache is made with a binder of gum arabic and is water-soluble. It can be reactivated with water even after it has dried. Acrylic gouache, on the other hand, is made with an acrylic binder and is waterproof when dry. It cannot be reactivated with water.
Both types of gouache paints have their advantages and disadvantages. Traditional gouache has a more matte finish and can be blended more easily. It is also more forgiving if mistakes are made as it can be reworked. Acrylic gouache, on the other hand, has a more vibrant color and is more durable. It is also easier to layer and create more texture.
Brushes
The type of brush you use will depend on the size and detail of the landscape you are painting. For larger areas, a flat brush is recommended while a round brush is better for smaller details. Synthetic brushes are a good choice for gouache as they hold their shape and are easier to clean than natural hair brushes.
Papers
The type of paper you choose is also important. Gouache can be used on a variety of papers but it is recommended to use a heavier weight paper to prevent buckling or warping. Watercolor paper is a good choice as it is designed to handle water-based media. Cold-pressed paper has a slightly textured surface which can add more interest to the painting.
| Type of Paint | Advantages | Disadvantages |
|---|---|---|
| Traditional Gouache | Matte finish, easy to blend, forgiving | Can be less vibrant, less durable |
| Acrylic Gouache | More vibrant color, more durable, easier to layer | Less forgiving, harder to blend |

Preparing the Workspace
Before starting to paint a realistic landscape with gouache, it is important to prepare your workspace properly. This will help you to work more efficiently and avoid any potential messes or accidents.
Setting up the Easel and Palette
The first step in preparing your workspace is to set up your easel and palette. Choose a comfortable location with good lighting and ventilation. Make sure your easel is stable and at a comfortable height for you to work at. The palette should be clean and free of any old paint or residue. You can use a disposable palette or a glass palette that can be easily cleaned.
Organizing the Paints and Brushes
Next, organize your paints and brushes. Keep your paints organized by color and label them if necessary. This will make it easier to find the colors you need as you work. Keep your brushes clean and organized. Use a brush holder or roll to keep them in one place and prevent them from getting damaged.
You may also want to have a container of water and a rag or paper towel nearby to clean your brushes as you work. This will help to keep your colors pure and prevent them from getting muddy.
| Item | Recommendation |
|---|---|
| Easel | Stable and at a comfortable height |
| Palette | Clean and organized by color |
| Brushes | Clean and organized in a holder or roll |
| Water container | Available for cleaning brushes |
| Rag or paper towel | Available for cleaning brushes |
By taking the time to properly prepare your workspace, you can ensure that your painting process goes smoothly and you can focus on creating a beautiful and realistic landscape with gouache.
Sketching the Landscape
Before you start painting, it’s essential to sketch the landscape to get a sense of the composition, basic shapes, and forms. This step is crucial to create a realistic painting, as it will help you understand the landscape’s structure and layout.
Choosing the subject and composition
The first step in sketching the landscape is to choose the subject and composition. Consider the elements you want to include in your painting, such as mountains, trees, water bodies, and buildings. It’s essential to think about the composition and how the elements will interact with each other.
You can create a rough sketch of the landscape to determine the placement of the elements and the overall composition. This will help you visualize the painting and make any necessary changes before starting the actual painting.
Sketching the basic shapes and forms
Once you have the composition in mind, you can start sketching the landscape’s basic shapes and forms. It’s essential to start with simple shapes and gradually add details to create a more complex image.
Use light lines to sketch the basic shapes, such as squares, circles, and triangles, to represent the different elements in the landscape. You can also use shading to show the different tones and values in the landscape.
It’s essential to keep the sketch loose and not worry too much about the details. The sketch is only a guide, and you can make changes as you start painting.
Overall, sketching the landscape is a crucial step in creating a realistic painting. It helps you understand the composition, basic shapes, and forms, and gives you a blueprint for the painting. Take your time with this step, and don’t rush to start painting until you’re satisfied with the sketch.

Mixing and Applying the Paint
Before starting to paint, it is important to mix the colors to create a realistic palette. Gouache paints are opaque, which makes them perfect for layering colors until the desired hue is achieved. Here are some tips for mixing colors:
- Start with the primary colors: red, blue, and yellow
- Use a mixing tray or palette to blend the colors
- Add white to create tints and black to create shades
- Experiment with mixing small amounts of paint to achieve the desired color
- Keep a record of the colors used to create a specific hue for future reference
Once the colors are mixed, it is time to apply the paint. Here are some techniques to create a realistic landscape:
Dry Brushing
Dry brushing is a technique where a small amount of paint is applied to a dry brush. The brush is then lightly dragged across the surface, leaving behind a textured and uneven stroke. This technique is perfect for creating the texture of grass, leaves, and trees.
Wet-on-Wet
Wet-on-wet is a technique where wet paint is applied to a wet surface. This technique creates soft and blended edges, perfect for creating the illusion of clouds and water.
Layering
Layering is a technique where multiple layers of paint are applied to create depth and dimension. This technique is perfect for creating the illusion of hills, mountains, and rocks.
By using these techniques and mixing the right colors, you can create a realistic landscape with gouache paints.
Adding Details and Depth
Once you have established the basic shapes and colors of your landscape painting with gouache, it’s time to add some texture and highlights to bring it to life. Texture is an important element in creating a realistic landscape, and it can be achieved by using a variety of brush strokes and techniques.
Adding Texture
To add texture to your painting, try using a dry-brush technique. Load your brush with a small amount of paint and then wipe most of it off on a paper towel. Then, use short, quick strokes to apply the paint to the surface of your painting. This will create a rough, textured effect that can mimic the look of grass, rocks, or other natural elements.
You can also use a stippling technique to create texture. Dip the tip of your brush in paint and then dot it onto the surface of your painting. This will create a speckled effect that can be used to create the look of leaves, foliage, or other natural textures.
Creating Depth with Shadows and Layers
Another important element in creating a realistic landscape painting is depth. To create depth, you can use shadows and layers. Shadows can be created by mixing a darker color with your base color and then applying it to the areas of your painting that would naturally be in shadow.
Layers can be created by applying multiple layers of paint to your painting. Start with the lighter colors and then gradually build up to the darker colors. This will create a sense of depth and dimensionality in your painting.
By adding texture, shadows, and layers to your landscape painting with gouache, you can create a realistic and visually stunning work of art.
Final Touches and Cleanup
After completing the main elements of your landscape painting with gouache, it’s time to add the final touches and make any necessary corrections to ensure that your painting looks realistic and polished.
Finalizing the Painting with Small Details
Start by examining your painting and identifying any areas that require additional details. This could include adding highlights to certain areas to make them pop, or adding shadows to create depth. Use a small brush and a light touch to make these final touches, being careful not to overdo it and disrupt the overall balance of your painting.
Correcting Mistakes
If you notice any mistakes or areas that need to be corrected, now is the time to do it. Use a damp brush or a clean cloth to gently remove any unwanted paint, and then make the necessary corrections. Remember to work slowly and carefully to avoid creating new mistakes.
Cleaning up the Workspace and Materials
Once you’re happy with your painting, it’s important to clean up your workspace and materials. Use a damp cloth to wipe down your palette, brushes, and any other tools you used. Store your paints and brushes properly to ensure they stay in good condition for future use.
- Dispose of any waste materials responsibly
- Wash your hands thoroughly to remove any paint residue
- Clean your workspace and put away all materials
Conclusion
By following these final touches and cleanup steps, you can ensure that your landscape painting with gouache looks polished and professional. Don’t rush this final stage, as it can make all the difference in the final outcome of your painting.