
How to Do a Basic Makeup Look: Step-by-Step Guide to Everyday Makeup Application
As a professional makeup artist with over 10 years of experience, I have seen the transformative power of makeup firsthand. It can boost your confidence, enhance your natural beauty, and make you feel like the best version of yourself. Over the years, I have worked with countless clients who have struggled with applying makeup and creating a basic everyday look that they feel comfortable wearing.
In this step-by-step guide, I will share my personal experience with makeup and provide you with easy-to-follow instructions on how to create a basic makeup look that you can wear every day. Whether you are a beginner or an experienced makeup enthusiast, this guide will help you achieve a flawless and natural-looking makeup application.
My Personal Experience with Makeup
I have always been fascinated with makeup and its ability to transform one’s appearance. As a teenager, I would spend hours experimenting with different makeup looks and watching beauty tutorials online. When I started working as a makeup artist, I quickly realized that not everyone had the same passion for makeup as I did.
Many of my clients were intimidated by makeup and didn’t know where to start. They would often come to me with pictures of their favorite celebrities or influencers and ask me to recreate the look. However, they were disappointed when they didn’t look exactly like the picture.
That’s when I realized that there was a need for a basic makeup guide that could help people create a natural-looking makeup application that they felt comfortable wearing. And that’s why I created this step-by-step guide to help you achieve just that.
Step 1: Prep Your Skin
Before applying any makeup, it is important to prep your skin to ensure a smooth and flawless finish. This step involves cleansing your face and applying moisturizer.
Cleanse Your Face
The first step to prepping your skin for makeup application is to cleanse your face. This involves removing any dirt, oil, or makeup residue that may be present on your skin. Use a gentle cleanser that is suitable for your skin type and massage it into your skin in circular motions. Rinse your face with lukewarm water and pat dry with a clean towel.
- Choose a gentle cleanser that is suitable for your skin type
- Massage the cleanser into your skin in circular motions
- Rinse your face with lukewarm water and pat dry with a clean towel
Apply Moisturizer
After cleansing your face, the next step is to apply moisturizer. This step is important to hydrate your skin and create a smooth base for your makeup. Choose a moisturizer that is suitable for your skin type and apply it evenly all over your face and neck. Let it absorb into your skin for a few minutes before moving on to the next step.
- Choose a moisturizer that is suitable for your skin type
- Apply moisturizer evenly all over your face and neck
- Let it absorb into your skin for a few minutes
Step 2: Apply Foundation
After the skincare routine, the next step is to apply foundation. Foundation is the base of your makeup look, and it is crucial to choose the right shade and apply it evenly.
Choose the Right Shade
Choosing the right shade of foundation is essential to achieve a flawless look. To find your perfect match, test the foundation on your jawline, and look for a shade that matches your skin tone. Also, consider the undertone of your skin, whether it is warm, cool, or neutral. If you are unsure, ask for assistance from a makeup artist or a beauty consultant.
Apply Foundation Evenly
When applying foundation, start by applying it in the center of your face and blend it outward using a foundation brush, sponge, or your fingers. Make sure to blend it well around your hairline and jawline to avoid any harsh lines. To avoid a cakey look, apply foundation in thin layers and build it up gradually until you achieve the desired coverage.
Another tip to apply foundation evenly is to use a primer before applying it. Primer helps to smooth out your skin texture and makes the foundation last longer. It also helps to reduce the appearance of pores and fine lines.
When applying foundation, it is essential to consider your skin type. If you have oily skin, use a mattifying foundation to control shine. If you have dry skin, use a hydrating foundation to add moisture to your skin. If you have combination skin, use a foundation that is suitable for both oily and dry areas of your face.
Pro tip:
If you have any blemishes or dark circles, use a concealer to cover them before applying foundation. This will help to achieve a more even skin tone.
By following these tips, you can achieve a flawless and natural-looking base for your everyday makeup look.
Step 3: Conceal and Correct
Once you have applied your foundation, it is time to move on to concealing and correcting any imperfections on your skin. This step will help you achieve a flawless and even complexion.
Conceal Dark Circles
Dark circles under your eyes can make you look tired and aged. To conceal them, you will need a concealer that is one or two shades lighter than your skin tone. Apply the concealer in a triangle shape under your eyes, starting from the inner corner and extending to the outer corner. Use a damp beauty blender or a brush to blend the concealer into your skin. Make sure to blend it well, so there are no visible lines or creases.
TIP:
- Use a color corrector before applying the concealer if you have severe dark circles. Peach or orange color correctors work best for dark circles.
Correct Blemishes
If you have any blemishes, such as acne or scars, you can use a concealer that matches your skin tone to cover them up. Apply the concealer directly on the blemish and blend it well with a brush or beauty blender. You can also use a green color corrector to neutralize any redness before applying the concealer.
TIP:
- For stubborn blemishes, use a small brush to apply the concealer precisely.
- Set your concealer with a translucent powder to make it last longer and prevent creasing.
| Products You Can Use: | Price: |
|---|---|
| Maybelline Instant Age Rewind Eraser Dark Circles Treatment Concealer | $9.99 |
| Nars Radiant Creamy Concealer | $30 |
| MAC Studio Fix 24-Hour Smooth Wear Concealer | $24 |
Concealing and correcting may seem like a lot of work, but it is an essential step in achieving a flawless makeup look. With the right tools and products, you can easily cover up any imperfections and achieve an even complexion.
Step 4: Set Your Face
After applying your foundation, concealer, and powder, it’s time to set your face to ensure your makeup lasts all day.
Apply Setting Powder
Setting powder helps to lock in your foundation and concealer, preventing them from creasing or sliding off throughout the day. Using a fluffy powder brush, gently dust a translucent setting powder all over your face, concentrating on the areas where you tend to get oily.
- Use a light hand when applying setting powder to avoid a cakey finish.
- If you have dry skin, use a hydrating setting powder to avoid accentuating any dry patches.
Use Setting Spray
Setting spray is the final step in ensuring your makeup lasts all day. Hold the bottle about 6-8 inches away from your face and spritz a few times in an X and T motion to ensure even coverage.
- Opt for a setting spray that suits your skin type (e.g. matte for oily skin, dewy for dry skin).
- Carry a travel-sized setting spray in your bag for touch-ups throughout the day.
| Setting Powder | Setting Spray |
|---|---|
| Helps to lock in foundation and concealer | Helps to set makeup and prevent it from fading |
| Great for oily skin | Suitable for all skin types |
| Can give a cakey finish if applied too heavily | Can make your skin look dewy |
Step 5: Define Your Features
Defining your features is all about enhancing your natural beauty. This step consists of shaping your brows, contouring your face, and highlighting your features.
Shape Your Brows
Shaping your brows is an essential step in framing your face and completing your makeup look. Start by brushing your brows using a spoolie brush. Then, use a brow pencil or powder to fill in any sparse areas and create a defined shape. Use a concealer or highlighter to clean up the edges of your brows for a polished finish.
Contour Your Face
Contouring your face helps to create definition and add dimension to your features. Start by choosing a contour shade that is two shades darker than your skin tone. Apply the contour shade to the hollows of your cheeks, temples, and jawline using a contour brush. Blend the contour shade well to avoid any harsh lines.
Highlight Your Features
Highlighting your features is all about adding a natural glow to your face. Choose a highlighter shade that complements your skin tone and apply it to the high points of your face, such as the top of your cheekbones, the bridge of your nose, and the cupid’s bow. Use a fan brush or a small fluffy brush to blend the highlighter for a seamless finish.
| Product | Description |
|---|---|
| Anastasia Beverly Hills Brow Wiz | A retractable brow pencil that creates precise, hair-like strokes |
| Fenty Beauty Match Stix Matte Skinstick | A creamy contour stick that blends seamlessly into the skin |
| Becca Shimmering Skin Perfector Pressed Highlighter | A buttery highlighter that adds a natural glow to the skin |
Defining your features is the final step in achieving a basic makeup look. By shaping your brows, contouring your face, and highlighting your features, you can enhance your natural beauty and feel confident in your everyday makeup application.
Step 6: Apply Eye Makeup
Eye makeup is the most important part of any makeup look. It can make your eyes look bigger, brighter, and more defined. In this step, we will take you through all the necessary steps to achieve a basic eye makeup look.
Prime Your Lids
Priming your lids is an essential step in eye makeup application. It helps to create a smooth base for your eyeshadow and makes it last longer. Apply a small amount of eye primer to your lids and blend it in using your finger or a brush.
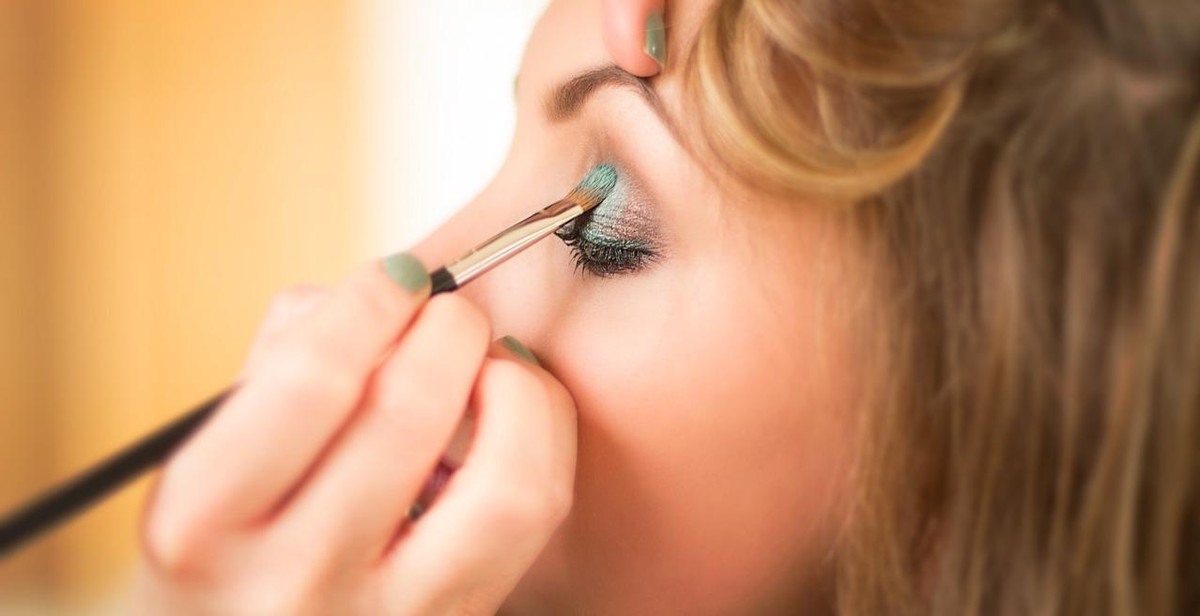
Apply Eyeshadow
Using an eyeshadow brush, apply a neutral shade all over your lid. Then, use a darker shade to create depth in the crease of your eye. Blend the colors together using a blending brush for a seamless transition. If you want to add more dimension, you can also apply a shimmery shade to the center of your lid.
Line Your Eyes
Using a black or brown eyeliner, line your upper lash line. You can create a thin or thick line depending on your preference. Then, line your lower lash line with a lighter shade to open up your eyes. You can also smudge the lower lash line with a brush or your finger for a softer look.
Mascara and False Lashes
Apply mascara to your upper and lower lashes to make them appear longer and fuller. If you want to take your eye makeup to the next level, you can also apply false lashes. Cut the lashes to fit your eye shape, apply glue to the band, and place them as close to your lash line as possible. Hold them in place for a few seconds until the glue dries.
And there you have it, a basic eye makeup look that you can wear every day!
Step 7: Finish with Lips
When it comes to completing your basic makeup look, don’t forget about your lips. Follow these simple steps to achieve a flawless pout:
Exfoliate Your Lips
Before applying any lipstick or gloss, it’s important to exfoliate your lips to remove any dry, flaky skin. You can use a lip scrub or make your own by mixing sugar and coconut oil together. Gently rub the mixture onto your lips in circular motions and then rinse off with warm water. This will leave your lips feeling soft and smooth, ready for the next step.
Apply Lipstick or Gloss
Now it’s time to add some color to your lips. Choose a shade that complements your skin tone and outfit. If you prefer a matte finish, go for a lipstick. If you want a more glossy finish, choose a lip gloss. Apply the product evenly to your lips, starting from the center and working outwards. You can use a lip brush or apply directly from the tube. Blot your lips with a tissue to remove any excess product.
For a long-lasting finish, you can apply a lip liner before your lipstick or gloss. This will help to define your lips and prevent the color from bleeding.
Remember to reapply your lipstick or gloss throughout the day, especially after eating or drinking.
| Lipstick vs. Lip Gloss | |
|---|---|
| Lipstick | Lip Gloss |
| Matte finish | Glossy finish |
| Long-wearing | Short-wearing |
| More pigmented | Sheer or translucent |
Now that you’ve completed all the steps, you’re ready to show off your natural and beautiful everyday makeup look!
Conclusion:
Learning how to do a basic makeup look is not only fun but also a valuable skill that can enhance your overall appearance. With the right tools and techniques, anyone can achieve a flawless everyday makeup look.
Remember, practice makes perfect. Don’t be discouraged if your first attempt doesn’t turn out exactly as you hoped. Keep experimenting and trying new things until you find what works best for you.
When it comes to makeup, it’s important to take care of your skin. Always make sure to remove your makeup before going to bed and follow a proper skincare routine to keep your skin healthy and glowing.
Tips to Remember:
- Always start with a clean and moisturized face.
- Choose makeup products that match your skin tone.
- Blend, blend, blend! Avoid harsh lines and edges.
- Invest in good quality makeup brushes.
- Don’t forget to highlight your best features.
Final Thoughts:
| If you’re new to makeup, don’t be intimidated. Start with the basics and work your way up to more advanced techniques. | Remember to have fun and enjoy the process. Makeup is a form of self-expression and should be used to enhance your natural beauty. |
By following this step-by-step guide, you can achieve a beautiful and natural everyday makeup look that will leave you feeling confident and ready to take on the day.