
How to Carve Wood: Essential Tools and Techniques for Woodworking
Woodworking is a craft that has been around for centuries. It is an art form that requires patience, skill, and creativity. My journey as a woodworker started when I was a teenager. My father was a carpenter, and he taught me the basics of woodworking. I was fascinated by the ability to take a piece of wood and turn it into something beautiful and functional. Over the years, I have honed my skills and learned new techniques.
The Joy of Woodworking
There is something special about working with wood. It is a natural material that has a warmth and beauty that cannot be replicated by synthetic materials. As a woodworker, I take pride in creating objects that are both beautiful and useful. Whether it is a piece of furniture or a decorative object, every project is a unique challenge that requires creativity and skill.
The Essential Tools for Woodworking
Woodworking requires a variety of tools, from hand tools to power tools. Some of the essential tools include:
- Chisels
- Saws
- Clamps
- Hammers
- Planes
Each tool has a specific purpose and requires a different technique to use effectively. Learning how to use these tools properly is essential for any woodworker.
The Techniques of Woodworking
Woodworking techniques vary depending on the project. Some of the most common techniques include:
- Carving
- Joinery
- Sanding
- Finishing
Each technique requires a different level of skill and can take years to master. However, with practice and patience, anyone can learn how to carve wood and create beautiful objects.
| Tool | Technique |
|---|---|
| Chisel | Carving, Joinery |
| Saw | Joinery, Cutting |
| Clamp | Joinery, Holding |
| Hammer | Joinery, Nailing |
| Plane | Sanding, Shaping |
Whether you are a beginner or an experienced woodworker, there is always something new to learn. With the right tools and techniques, anyone can create beautiful objects out of wood.

Essential Woodworking Tools
Woodworking is a creative and fulfilling hobby, but it requires the right tools to achieve the desired results. Whether you’re a beginner or an experienced woodworker, having the right tools can make all the difference in your projects. Here are the essential woodworking tools you need:
Hand Tools
Hand tools are essential for any woodworking project. They allow you to work with precision and create intricate designs. Here are some of the must-have hand tools:
- Chisels – used for carving and shaping wood
- Hand saws – used for cutting wood
- Hand planes – used for smoothing and shaping wood
- Hammers – used for driving nails and other fasteners
- Screwdrivers – used for tightening and loosening screws
Power Tools
Power tools are essential for larger woodworking projects. They are faster and more efficient than hand tools, but they require more skill and safety precautions. Here are some of the must-have power tools:
- Table saw – used for cutting large pieces of wood
- Compound miter saw – used for cutting angles and bevels
- Router – used for shaping and cutting edges
- Drill press – used for drilling precise holes
- Power sander – used for smoothing and finishing surfaces
Safety Equipment
Woodworking can be dangerous, so it’s essential to have the right safety equipment. Here are some of the must-have safety equipment:
- Safety glasses – protect your eyes from flying debris
- Dust mask – protect your lungs from sawdust and other particles
- Earplugs – protect your ears from loud noises
- Gloves – protect your hands from sharp tools and splinters
- First aid kit – in case of accidents
| Type of Tool | Examples |
|---|---|
| Hand Tools | Chisels, hand saws, hand planes, hammers, screwdrivers |
| Power Tools | Table saw, compound miter saw, router, drill press, power sander |
| Safety Equipment | Safety glasses, dust mask, earplugs, gloves, first aid kit |
Preparing the Wood
Before you start carving wood, it’s important to prepare it properly to ensure the best results. This involves selecting the right type of wood, measuring and marking it, and cutting and shaping it to the desired size and shape. Here are some essential tips for preparing the wood:
Selecting the Right Wood
The type of wood you choose for your carving project will impact the final outcome. Some woods are easier to carve than others, while some are better suited for specific types of carving. Here are some popular woods for carving:
- Basswood: A soft and lightweight wood that’s easy to carve and perfect for beginners.
- Butternut: A medium-hardness wood that’s great for relief carving and has a beautiful grain pattern.
- Maple: A hard and dense wood that’s perfect for intricate carving and has a smooth finish.
- Walnut: A hard and durable wood that’s great for carving furniture and has a rich, dark color.
Measuring and Marking
Once you’ve selected the right wood for your project, it’s time to measure and mark it to ensure accuracy and precision. Here are some tips:
- Use a measuring tape or ruler to measure the wood and mark it with a pencil or marker.
- Make sure your marks are clear and visible, and use a straight edge or square to ensure straight lines.
- Double-check your measurements before cutting to avoid mistakes.
Cutting and Shaping
After measuring and marking the wood, it’s time to cut and shape it to the desired size and shape. Here are some tips:
- Use a saw to cut the wood to the desired length and width.
- Use a carving knife or chisel to shape the wood, making small cuts and removing small amounts of wood at a time.
- Be patient and take your time, and use sandpaper to smooth out any rough edges or surfaces.
- Always wear protective gear, such as gloves and eye protection, when cutting and shaping wood.
| Tip: | Practice on scrap wood before starting your actual project to get a feel for the tools and techniques. |
|---|
Carving Techniques
Wood carving techniques can be broadly divided into four categories: whittling, chip carving, relief carving, and in-the-round carving. Each technique requires a different set of tools and skills, but all of them involve removing wood to create a desired shape or pattern.
Whittling
Whittling is the simplest and most basic form of wood carving. It involves using a single knife to remove small chips of wood from a larger piece. Whittling is often used to create simple shapes or figures, such as animals or birds. It can also be used to carve spoons, bowls, and other functional objects. Whittling knives are usually small and have a curved or straight blade.
Chip Carving
Chip carving is a decorative technique that involves removing small chips of wood from a flat surface to create a pattern or design. It is often used to decorate boxes, furniture, and other objects. Chip carving knives have a short, triangular blade that is used to make precise cuts. The technique requires a lot of practice and patience, but the results can be stunning.
Relief Carving
Relief carving is a technique in which a design is carved into a flat piece of wood to create a three-dimensional effect. The design is raised from the background, giving it depth and texture. Relief carving can be used to create intricate designs and scenes, such as landscapes or portraits. It requires a variety of tools, including chisels, gouges, and knives.
In-the-Round Carving
In-the-round carving is the most complex and advanced form of wood carving. It involves carving a three-dimensional object from a single piece of wood. In-the-round carving is often used to create sculptures, figurines, and other decorative objects. It requires a wide range of tools, including chisels, gouges, saws, and knives. In-the-round carving is a challenging technique that requires a lot of skill and practice, but the results can be truly impressive.
| Technique | Tools Needed | Difficulty | Examples |
|---|---|---|---|
| Whittling | Knife | Easy | Animals, spoons, bowls |
| Chip Carving | Chip carving knife | Intermediate | Boxes, furniture |
| Relief Carving | Chisels, gouges, knives | Advanced | Landscapes, portraits |
| In-the-Round Carving | Chisels, gouges, saws, knives | Expert | Sculptures, figurines |
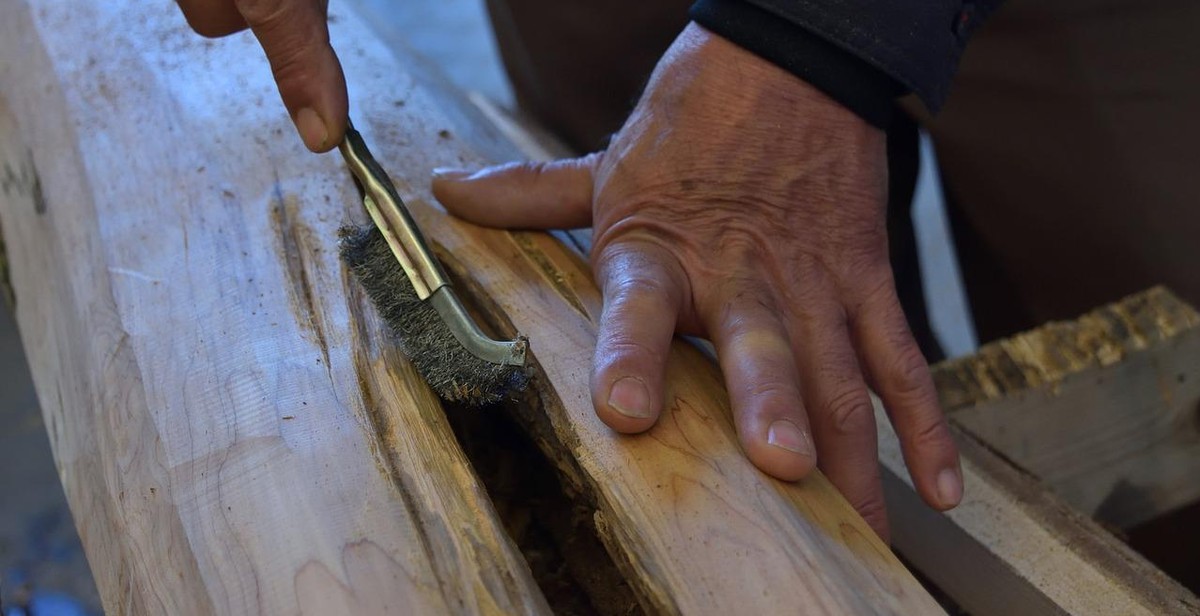
Finishing and Sanding
Once you have completed carving your wood project, the next step is to finish and sand it. Finishing and sanding are crucial steps in woodworking as they give your project a polished and professional look.
Sanding Techniques
There are different sanding techniques you can use to achieve a smooth surface on your wood project. Here are some of them:
- Hand Sanding: This technique involves using sandpaper wrapped around a sanding block or your hand to sand the wood. Hand sanding is ideal for small projects and for reaching tight spaces.
- Power Sanding: Power sanding involves using a power sander to sand the wood. This technique is ideal for larger projects and for achieving a smooth surface quickly.
- Wet Sanding: Wet sanding involves using water or a lubricant to reduce friction while sanding. This technique is ideal for finishing and for removing scratches and imperfections on the wood.
Staining and Painting
Staining and painting are optional techniques you can use to add color and character to your wood project. Staining involves applying a stain to the wood to enhance its natural color and grain. Painting involves applying paint to the wood to change its color and add texture.
Before staining or painting your wood project, ensure that it is clean and free of dust and debris. Apply the stain or paint evenly using a brush or a sprayer. Allow the stain or paint to dry completely before applying a second coat.
Sealing and Protecting
Sealing and protecting your wood project is important to prevent damage from moisture, heat, and other elements. There are different types of sealers and protectors you can use, including:
| Type | Description |
|---|---|
| Shellac | A natural sealer that dries quickly and is easy to apply. |
| Polyurethane | A synthetic sealer that provides a durable and long-lasting finish. |
| Lacquer | A fast-drying sealer that provides a glossy finish. |
Apply the sealer or protector evenly using a brush or a sprayer. Allow the sealer or protector to dry completely before applying a second coat.
Conclusion
Wood carving is a highly rewarding and fulfilling hobby or profession that requires patience, skill, and the right tools. Whether you are a beginner or an experienced woodworker, mastering the essential tools and techniques for carving wood is crucial to achieving the desired results.
In this article, we have discussed the essential tools and techniques for carving wood, including the different types of knives, gouges, and chisels, as well as the importance of safety gear, sharpening tools, and wood selection. We have also provided step-by-step instructions on how to carve a simple wooden spoon, which you can use as a starting point for your wood carving journey.
Remember, wood carving is a craft that requires practice, patience, and dedication. Don’t be discouraged if your first carving attempts do not turn out as expected. Keep practicing, and you will eventually master the art of wood carving.
Tips for Successful Wood Carving
- Start with simple projects and work your way up to more complex ones.
- Always use sharp tools to avoid accidents and achieve clean cuts.
- Select the right wood for your project, depending on its hardness, texture, and grain.
- Take breaks and stretch your hands and arms to avoid cramping and fatigue.
- Experiment with different techniques and styles to find your own unique carving style.