
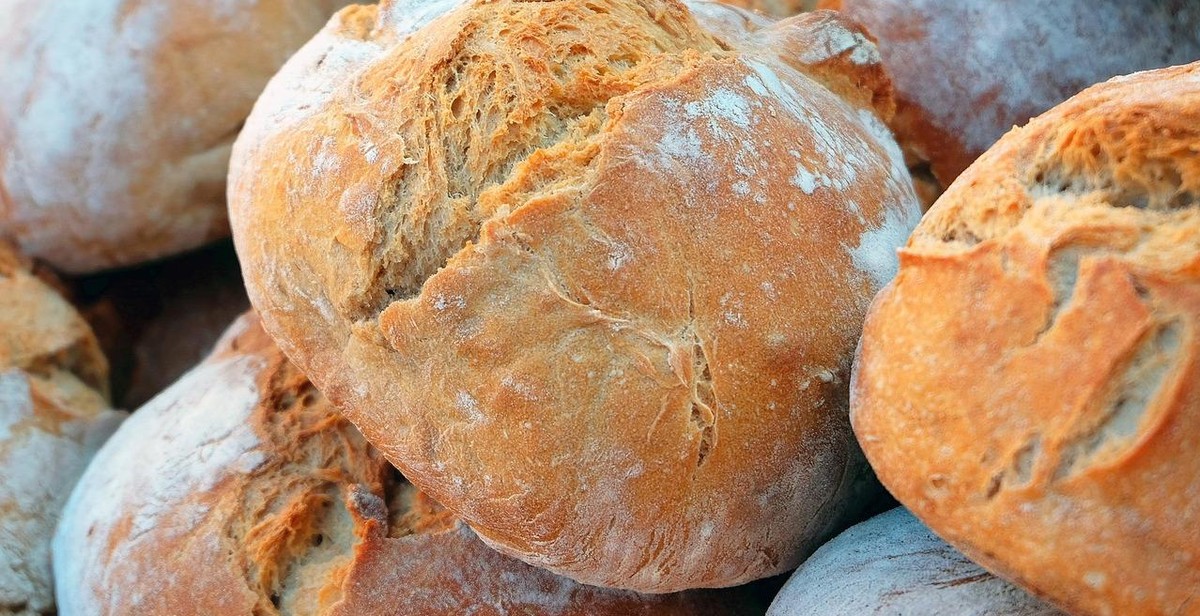
How to Bake Artisan Bread at Home: Techniques for Delicious Homemade Loaves
There’s nothing quite like the smell of freshly baked bread wafting through your home. Artisan bread, in particular, is a favorite among bread enthusiasts for its crispy crust and soft, chewy interior. But you don’t have to visit a bakery to enjoy this type of bread. With a few simple techniques, you can easily bake artisan bread at home.
The Benefits of Baking Your Own Artisan Bread
Baking your own bread has many benefits. For one, it’s a fun and rewarding hobby that can help you develop new skills in the kitchen. Additionally, homemade bread is often healthier and more flavorful than store-bought bread, as you can control the ingredients and ensure that there are no preservatives or additives.
What Makes Artisan Bread Different?
Artisan bread is made using traditional bread-making techniques and often includes simple, high-quality ingredients like flour, water, salt, and yeast. The dough is left to rise for an extended period, which allows the flavors to develop and creates the signature chewy texture. Additionally, artisan bread is often baked in a steamy oven, which creates a crispy crust.
In this article, we’ll explore the techniques for baking your own artisan bread at home, from selecting the right ingredients to shaping and baking your loaves. Whether you’re a seasoned baker or a beginner, you’ll be able to create delicious homemade loaves that rival those from your favorite bakery.
Ingredients for Artisan Bread
Baking artisan bread at home requires only a few simple ingredients. The quality of these ingredients is crucial to the success of your bread. Here are the four essential ingredients you will need:
| Ingredient | Role in Bread Making |
|---|---|
Flour |
Flour is the backbone of any bread recipe. It provides the structure and texture of the bread. For artisan bread, it is best to use high-quality bread flour, which has a higher protein content than all-purpose flour. This protein helps create gluten, which is essential for the bread’s texture and rise. |
Water |
Water is the main liquid ingredient in bread making. It activates the yeast and helps the dough rise. The amount of water used will depend on the type of flour and the humidity in your kitchen. Use lukewarm water to activate the yeast and help the dough rise more quickly. |
Yeast |
Yeast is a living organism that feeds on sugar and produces carbon dioxide gas. This gas is what causes the bread to rise. There are two types of yeast: active dry yeast and instant yeast. Active dry yeast needs to be dissolved in water before using, while instant yeast can be added directly to the flour. Use the type of yeast specified in your recipe. |
Salt |
Salt is an essential ingredient in bread making. It enhances the flavor of the bread and helps control the fermentation process. Salt also strengthens the gluten and helps the dough hold its shape. Use a coarse salt, such as kosher salt, for best results. |
Now that you know the essential ingredients for baking artisan bread, it’s time to gather your supplies and start baking!

Equipment for Baking Artisan Bread at Home
When it comes to baking artisan bread at home, having the right equipment is essential. Here are three key items that every home baker should have:
Mixing Bowl
A good mixing bowl is an essential piece of equipment for any home baker. Look for a bowl that is large enough to hold all of the ingredients for your recipe, but not so large that it becomes difficult to handle. Stainless steel and glass are both good options, as they are durable and easy to clean. Avoid plastic bowls, as they can absorb odors and flavors over time.
Dutch Oven
A Dutch oven is a heavy, lidded pot that is perfect for baking artisan bread. The heavy lid traps steam inside the pot, creating a moist environment that helps the bread develop a crispy crust. Look for a Dutch oven that is made of cast iron or ceramic, as these materials distribute heat evenly and retain it well. A 5- or 6-quart Dutch oven is a good size for most bread recipes.
Bread Knife
A good bread knife is essential for slicing artisan bread. Look for a knife with a serrated edge, as this will make it easier to cut through the crusty exterior of the bread without crushing the soft interior. A blade that is at least 8 inches long will give you enough length to slice through even large loaves of bread.
| Equipment | Features | Pros | Cons |
|---|---|---|---|
| Mixing Bowl | Stainless steel or glass, large enough to hold ingredients, easy to handle | Durable, easy to clean | Avoid plastic, can absorb odors and flavors |
| Dutch Oven | Cast iron or ceramic, heavy lid, 5-6 quart size | Distributes heat evenly, retains heat well, creates moist environment for crispy crust | Can be heavy and difficult to handle |
| Bread Knife | Serrated edge, at least 8 inches long | Easier to cut through crusty exterior without crushing soft interior | Can be difficult to sharpen |
Techniques for Delicious Homemade Loaves
Mixing the Dough
The first step in making artisan bread is mixing the dough. You can mix the dough by hand or use a stand mixer with a dough hook attachment. Combine all the dry ingredients in a large mixing bowl and then add the wet ingredients. Mix everything together until you have a sticky dough. It’s important not to overmix the dough, as this can result in a tough texture.
Kneading the Dough
After mixing the dough, it’s time to knead it. Kneading helps to develop the gluten in the dough, which gives it its structure and texture. You can knead the dough by hand on a floured surface or use a stand mixer with a dough hook attachment. Knead the dough for about 10 minutes until it’s smooth and elastic.
Proofing the Dough
Once the dough is kneaded, it’s time to let it rest and rise. This process is called proofing. Place the dough in a greased bowl, cover it with a damp cloth, and let it rest in a warm, draft-free place for about an hour or until it has doubled in size. The longer you let the dough proof, the more flavorful your bread will be.
Shaping the Dough
After proofing, it’s time to shape the dough. You can shape the dough into a round or oblong shape, or you can use a bread pan for a more traditional loaf shape. Make sure to handle the dough gently and avoid deflating it. Let the shaped dough rest for another 30 minutes to an hour before baking.
Scoring the Dough
Scoring the dough is an important step in baking artisan bread. Use a sharp knife or a bread lame to make shallow cuts in the dough. This helps the bread expand and gives it a beautiful crust. You can make one long cut down the center of the loaf or make several smaller cuts in a decorative pattern.
Using these techniques, you can create delicious artisan bread at home that rivals anything you can buy at a bakery.
Baking Artisan Bread at Home
Preheating the Dutch Oven
Preheating the Dutch oven is crucial to achieving a crispy crust and a soft, airy crumb. Before you start baking, preheat your oven to 450°F (232°C) for at least 30 minutes. This will ensure that your Dutch oven is thoroughly heated and ready to go.
While your oven is preheating, place your Dutch oven, with the lid on, inside the oven. Allow it to heat up for at least 20 minutes. This will ensure that the Dutch oven is evenly heated and ready to create the perfect crust on your bread.
Baking the Bread
Once your oven and Dutch oven are preheated, it’s time to bake your bread. Carefully remove the Dutch oven from the oven and take off the lid.
Using oven mitts or a thick towel, carefully place your dough into the Dutch oven. Be sure to handle it gently to avoid deflating the dough.
Place the lid back on the Dutch oven and return it to the oven. Bake for 20 minutes with the lid on.
After 20 minutes, remove the lid from the Dutch oven and continue baking for an additional 20-25 minutes. This will allow the bread to develop a beautiful golden brown color and a crispy crust.
Once your bread is done baking, carefully remove the Dutch oven from the oven and transfer the bread to a wire rack to cool. Allow it to cool for at least 30 minutes before slicing and serving.
Tips:
- Be careful when handling the Dutch oven, as it will be very hot.
- For a softer crust, brush the top of the bread with melted butter before baking.
- Experiment with different types of flour and add-ins to create unique and delicious artisan breads.
| Dutch Oven Size | Bread Size | Baking Time |
|---|---|---|
| 3-4 quart | 1-2 pounds | 40-45 minutes |
| 5-6 quart | 2-3 pounds | 45-50 minutes |
| 7-8 quart | 3-4 pounds | 50-55 minutes |
Conclusion
Finally, baking artisan bread at home is not as complicated as it might seem. With the right ingredients, equipment, and techniques, anyone can bake delicious homemade loaves that rival those found in fancy bakeries.
Remember to pay attention to the quality of your ingredients, especially the flour. Use a high-quality flour with a high protein content to achieve the best results. Also, make sure you have the right equipment, including a Dutch oven, baking stone, and a kitchen scale.
When it comes to techniques, take your time and be patient. Allow the dough to rest and rise properly, and don’t rush the baking process. Follow the recipe instructions closely, but also don’t be afraid to experiment and make adjustments to suit your taste.
Finally, enjoy the process of baking artisan bread at home. It’s a satisfying and rewarding experience that will impress your friends and family. With practice, you’ll be able to create your own signature bread that is both delicious and unique.
- Use high-quality ingredients
- Invest in the right equipment
- Be patient and take your time
- Experiment and adjust to suit your taste
- Enjoy the process and have fun!
Now that you have all the information you need, it’s time to get started on your artisan bread baking journey. Happy baking!