
How to Start a Home Recording Studio for Music Production
With the rise of digital technology, it has become easier than ever to create professional-quality music recordings from the comfort of your own home. Starting a home recording studio can be a great way to pursue your passion for music production without breaking the bank. However, setting up a home recording studio can be overwhelming, especially if you’re new to the world of music production. In this article, we’ll provide you with a step-by-step guide on how to start a home recording studio for music production.
Step 1: Determine Your Budget
Before you start buying equipment, it’s important to determine your budget. The cost of setting up a home recording studio can vary greatly depending on the quality of equipment you choose. You’ll need to decide how much you’re willing to spend and what you can afford.
Step 2: Choose Your Recording Space
The space you choose for your home recording studio is crucial. Ideally, you’ll want to choose a room that is quiet and free from outside noise. You’ll also want to consider the acoustics of the room. Some rooms may have a lot of echo or reverb, which can affect the quality of your recordings.
Step 3: Invest in Essential Equipment
To get started, you’ll need a few essential pieces of equipment, including a computer, audio interface, microphone, headphones, and studio monitors. You may also want to invest in additional equipment, such as a MIDI controller, synthesizer, or guitar amp.
Step 4: Choose Your Recording Software
The software you choose for your home recording studio is just as important as the hardware. There are many different digital audio workstations (DAWs) to choose from, each with its own strengths and weaknesses. Some popular options include Pro Tools, Logic Pro X, Ableton Live, and FL Studio.
Step 5: Learn the Basics of Music Production
Even with the best equipment and software, you won’t be able to create professional-quality recordings without some basic knowledge of music production. Take the time to learn about topics such as mixing, mastering, and sound design.
By following these steps, you’ll be well on your way to starting your own home recording studio for music production.

Step 1: Define Your Goals
Before starting a home recording studio, it is important to define your goals for music production. This will help you determine the type of equipment and software you need to invest in, as well as your budget.
What kind of music do you want to produce?
The type of music you want to produce will determine the equipment and software you need. For example, if you want to produce electronic music, you will need a MIDI controller, synthesizers, and drum machines. If you want to produce live instruments, you will need microphones, audio interfaces, and preamps. Determine the genre and style of music you want to produce before investing in equipment and software.
What is your budget?
Setting a budget is crucial when starting a home recording studio. Determine how much you are willing to spend on equipment and software. Keep in mind that quality equipment and software can be expensive, but investing in them will ensure high-quality recordings. Consider purchasing used equipment or renting equipment to save money.
- Define your music production goals
- Determine the equipment and software needed based on the type of music you want to produce
- Set a budget for equipment and software
Step 2: Choose Your Space
Choosing the right space for your home recording studio is crucial for the quality of your music production. Here are some factors to consider:
Determine the size of your space
The size of your space will depend on your needs and the equipment you plan to use. If you plan to record a full band, you will need a larger space compared to recording a single instrument or vocals. Consider the size of your equipment and furniture, and make sure you have enough space for comfortable movement.
Consider acoustic treatment
Acoustic treatment is important to achieve a good sound quality in your recordings. You can use acoustic panels, diffusers, bass traps, and other materials to control the sound reflections and absorption in your space. Make sure to research and plan your acoustic treatment before setting up your studio.
Choose the right location
The location of your studio can affect the sound quality of your recordings. Avoid setting up your studio in noisy areas, such as near a busy street or a noisy neighbor. Choose a room with minimal outside noise and good ventilation. Also, consider the accessibility of your space for your equipment and clients.
By considering these factors, you can choose the right space for your home recording studio and create an optimal environment for your music production.
Step 3: Select Your Equipment
Now that you have a dedicated space for your home recording studio, it’s time to select the equipment you will need to produce high-quality music. Here are the essential pieces of equipment you will need:
Computer and DAW
Your computer is the heart of your home recording studio. It’s important to choose a computer with enough processing power and memory to handle the demands of music production. A digital audio workstation (DAW) is software that allows you to record, edit, and mix your music. There are many DAW options available, including Pro Tools, Logic Pro, and Ableton Live.
Audio Interface
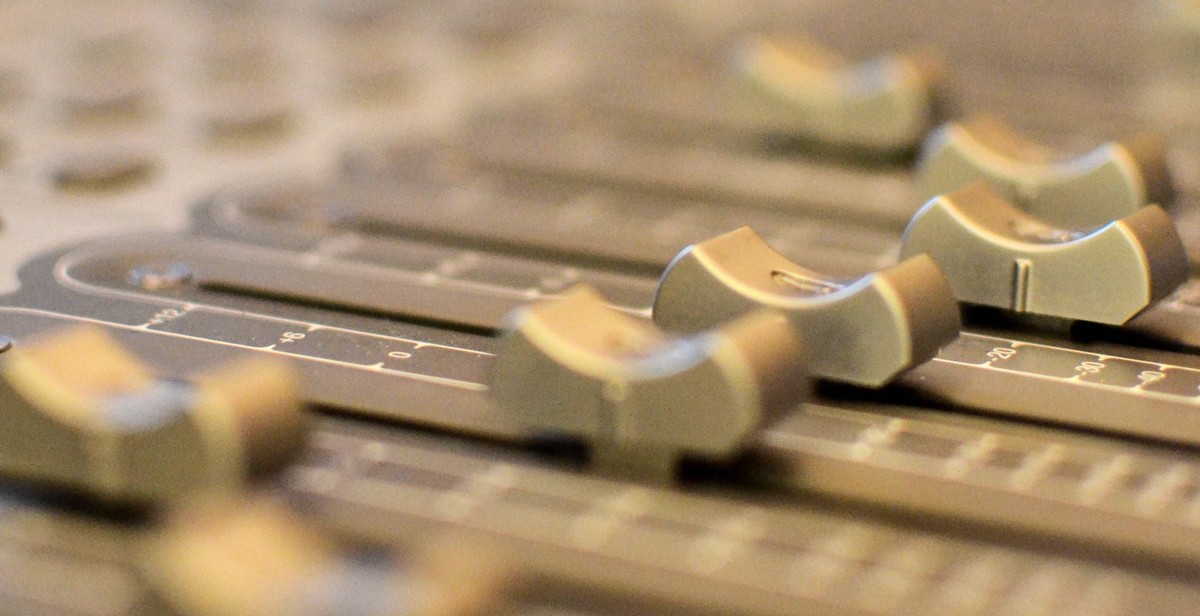
An audio interface is a device that connects your computer to your microphones and monitors. It converts the analog signals from your microphones into digital signals that can be processed by your computer. A good audio interface will have high-quality preamps and converters to ensure that your recordings sound professional.
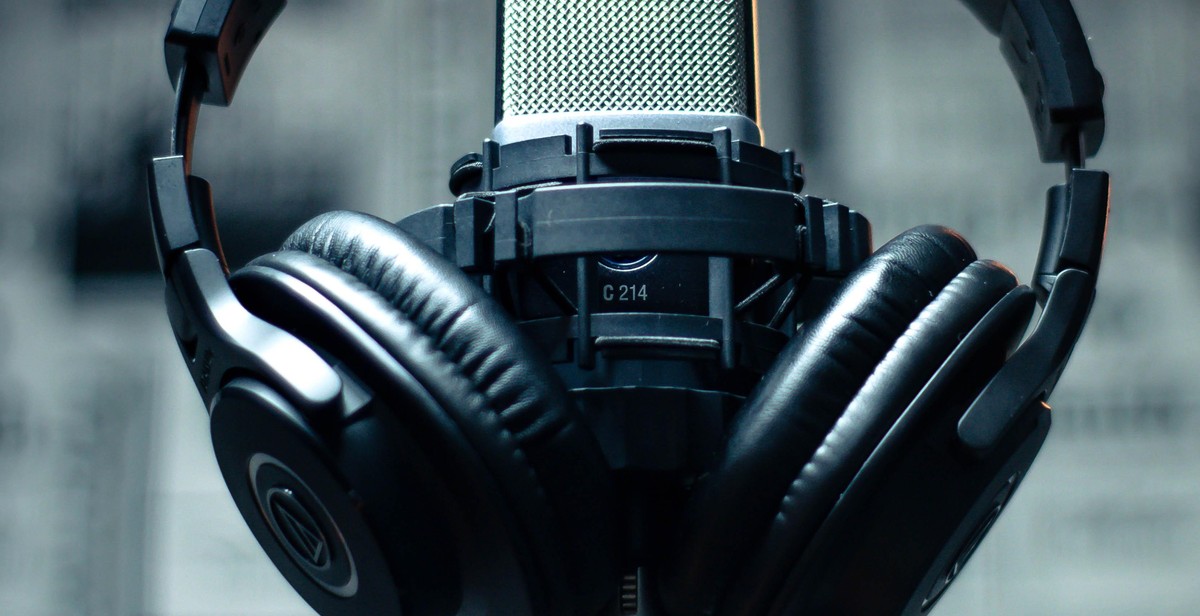
Microphones
Microphones are essential for capturing the sound of your instruments and vocals. There are many types of microphones available, including dynamic, condenser, and ribbon microphones. It’s important to choose the right microphone for the job, as different microphones have different characteristics and are suited for different applications.
Monitors and Headphones
Monitors and headphones are essential for monitoring your recordings. Monitors are speakers that are designed for accurate playback of your music, while headphones allow you to monitor your recordings without disturbing others. It’s important to choose high-quality monitors and headphones that accurately reproduce the sound of your recordings.
| Equipment | Essential? |
|---|---|
| Computer and DAW | Yes |
| Audio Interface | Yes |
| Microphones | Yes |
| Monitors and Headphones | Yes |
By selecting the right equipment for your home recording studio, you’ll be able to produce high-quality music that sounds professional. In the next section, we’ll discuss how to set up your equipment and start recording.
Step 4: Set Up Your Studio
Once you have acquired all the necessary equipment, it is time to set up your home recording studio. This step involves arranging your equipment, installing acoustic treatment, and connecting everything.
Arrange your equipment
The first thing you need to do is arrange your equipment in a way that is ergonomic and conducive to your workflow. You want to make sure that your studio desk is set up in a way that allows you to easily reach all your equipment without having to strain your body. You also want to make sure that your equipment is organized and labeled so that you can quickly find what you need when you need it.
Install acoustic treatment
Acoustic treatment is crucial for getting the best sound quality in your recordings. You want to make sure that your studio is properly treated to reduce unwanted reflections and echoes. This can be achieved through the use of acoustic panels, bass traps, and diffusers. You can either purchase pre-made acoustic treatment solutions or make your own.
Connect everything
Finally, you need to connect all your equipment. This involves running cables from your microphones, instruments, and other equipment to your audio interface. You also need to connect your audio interface to your computer and make sure that all the necessary drivers are installed. Once everything is connected, you should test your setup to make sure that everything is working properly.
| Equipment Checklist |
|---|
| Studio desk |
| Computer |
| Audio interface |
| Microphones |
| Headphones |
| Studio monitors |
| Instruments |
Step 5: Start Recording
Now that you’ve set up your home recording studio and learned the basics of music production, it’s time to start recording your first track. Here are some essential steps to follow:
1. Learn Your DAW
Your digital audio workstation (DAW) is the software you’ll use to record, edit, and mix your music. Take the time to learn the ins and outs of your DAW, including how to:
- Create new tracks
- Record and playback audio
- Import and export files
- Use plugins and effects
There are many tutorials and online courses available to help you master your DAW, so take advantage of them.
2. Record Your First Track
When you’re ready to start recording, follow these steps:
- Choose your tempo and time signature
- Select your instrument and microphone
- Arm your track for recording
- Hit record and start playing
- Listen back to your recording and make any necessary edits
Remember, your first track doesn’t have to be perfect. It’s all about getting started and learning as you go.
Conclusion
By following these steps, you’ll be well on your way to creating professional-quality music from the comfort of your own home. Keep learning, practicing, and experimenting, and you’ll soon be producing music that you’re proud of.
Step 6: Mix and Master Your Tracks
Once you have recorded your tracks, the next step is to mix and master them. Mixing involves adjusting the levels, panning, and EQ of each track to create a balanced and cohesive sound. Mastering involves processing the final mix to create a polished and professional-sounding track.
Mixing basics
When mixing your tracks, start by setting the levels of each track so that they are balanced and sit well together in the mix. Use EQ to shape the sound of each track, cutting any frequencies that clash and boosting those that add clarity and definition. Panning can be used to create a sense of space and width in the mix, with instruments placed in different positions across the stereo field.
- Start with the drums and bass
- Find the right balance between instruments
- Use EQ to shape the sound
- Use panning to create space
- Use compression to control dynamics
Mastering basics
Mastering involves processing the final mix to create a polished and professional-sounding track. This can involve EQ, compression, limiting, and stereo enhancement. The goal is to ensure that the track sounds great on a variety of playback systems and to create a consistent sound across all tracks on an album.
- Start with EQ to balance the frequency spectrum
- Use compression to control dynamics
- Use limiting to raise the overall volume
- Use stereo enhancement to create width and depth
- Compare your track to commercial releases
| Mixing | Mastering |
|---|---|
| Adjust levels | Balance frequency spectrum |
| Use EQ to shape sound | Use compression to control dynamics |
| Use panning to create space | Use limiting to raise overall volume |
| Use compression to control dynamics | Use stereo enhancement to create width and depth |
| Compare to commercial releases |
Conclusion
Starting a home recording studio for music production is a great way to pursue your passion for music and create high-quality recordings without breaking the bank. With the right equipment and software, you can produce professional-sounding tracks from the comfort of your own home.
When setting up your home recording studio, it’s important to consider your budget, the space you have available, and the type of music you want to produce. By investing in a good quality microphone, audio interface, and studio monitors, you can ensure that your recordings sound clear and balanced.
Additionally, choosing the right software and plugins can help you achieve the sound you’re looking for. Whether you prefer a digital audio workstation like Ableton Live or Logic Pro X, or a simpler recording software like Audacity, there are plenty of options available to suit your needs.
Finally, don’t forget to experiment and have fun with your home recording studio. With a little practice and patience, you can create music that you’re truly proud of.
Key Takeaways
- Starting a home recording studio is a great way to pursue your passion for music.
- Investing in good quality equipment and software can help you produce professional-sounding tracks.
- Consider your budget, space, and type of music you want to produce when setting up your studio.
- Experiment and have fun with your home recording studio to create music you’re proud of.
| Recommended Equipment | Recommended Software |
|
|
With these tips and recommendations, you’re well on your way to starting a successful home recording studio for music production.