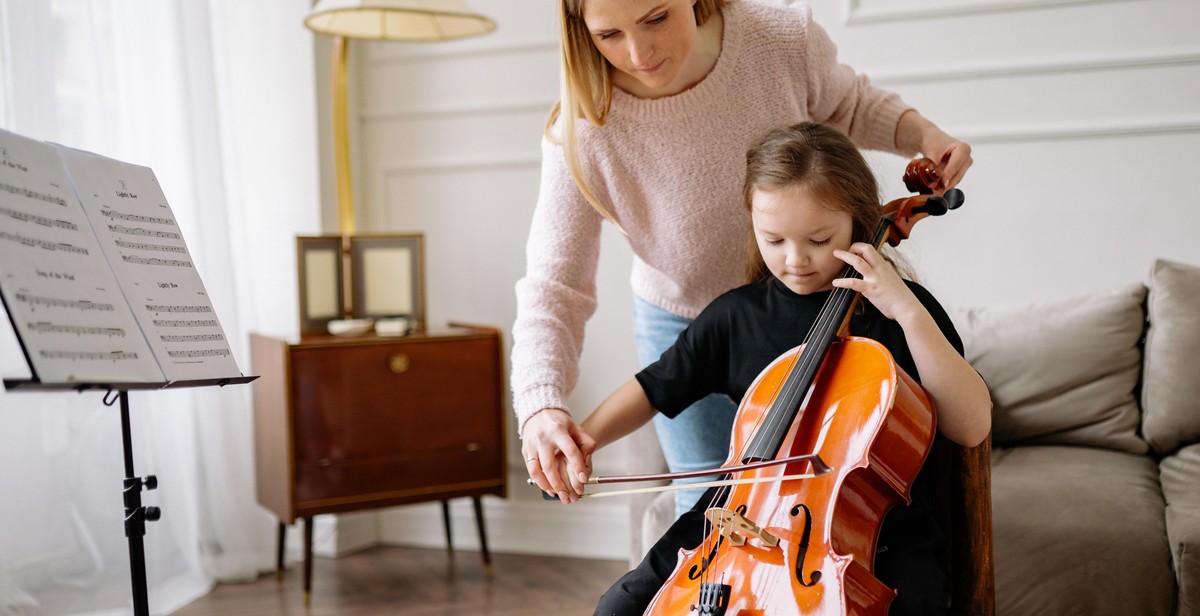
How to Play the Cello: Beginner’s Guide to Bowing Techniques and Fingerings
If you are interested in learning how to play a musical instrument, the cello is an excellent choice. The cello is a stringed instrument that is played with a bow and can produce a wide range of sounds, from deep and melancholic to bright and joyful. It is a versatile instrument that can be played in various genres, including classical, jazz, and folk music.
What is a Cello?
The cello is a member of the violin family, along with the violin, viola, and double bass. It is a large instrument that is typically played in a seated position, with the player resting the instrument between their knees. The cello has four strings, which are tuned in fifths: C-G-D-A. The sound is produced by drawing the bow across the strings or by plucking them with the fingers.
Why Play the Cello?
Playing the cello can be a rewarding experience for several reasons. First and foremost, it is a beautiful instrument with a rich and expressive sound. Learning to play the cello can also improve your coordination, posture, and concentration. Additionally, playing music has been shown to have numerous mental and emotional benefits, including reducing stress and improving cognitive function.
Whether you are a complete beginner or have some experience with the instrument, this beginner’s guide will provide you with an overview of the essential bowing techniques and fingerings you need to get started playing the cello.

The Basics of Bowing
Before diving into specific bowing techniques, it’s important to understand the fundamentals. The bow is held with the right hand, while the left hand is responsible for pressing down on the strings to create notes. The bow should be held at a slight angle and should be drawn across the strings with a smooth, fluid motion. The amount of pressure applied to the strings will affect the volume and tone of the notes produced.
Proper bow grip is also crucial for effective bowing. The thumb should be placed on the underside of the frog, while the other fingers should be curved around the top of the bow. The pinky should be resting on top of the stick, while the index and middle fingers should be positioned around the bow’s frog.
Bowing Exercises for Beginners
For beginners, it’s important to start with simple bowing exercises to develop proper technique and build strength. One of the most basic exercises is the “down-up” stroke, where the bow is drawn down across the strings and then lifted back up. This exercise can be repeated multiple times, gradually increasing the speed and pressure applied to the strings.
Another exercise is the “long bow,” where the bow is drawn across the entire length of the strings, producing a sustained note. This exercise can be used to practice maintaining consistent pressure and speed throughout the entire length of the bow stroke.
Advanced Bowing Techniques
Once basic bowing techniques have been mastered, it’s time to move on to more advanced techniques. One technique is the “spiccato,” where the bow is bounced off the strings to produce a short, staccato note. This technique requires precise control and timing, and can add a dynamic element to cello playing.
The “col legno” technique involves using the wooden part of the bow to strike the strings, producing a percussive sound. This technique is used sparingly in cello playing, but can add a unique texture to certain pieces.
| Basic Bowing Techniques | Advanced Bowing Techniques |
|---|---|
| Down-up stroke | Spiccato |
| Long bow | Col legno |
- Other advanced bowing techniques include:
- Tremolo
- Pizzicato
- Harmonics
- Double stops
By mastering these advanced bowing techniques, cello players can add depth and complexity to their playing.

Fingerings
Playing the cello requires proper finger placement and hand positioning. This is critical for achieving the right tone and intonation. Here are some tips to help you perfect your fingerings:
Finger Placement and Hand Positioning
Place your fingers on the strings just behind the frets. This will help you press the strings down firmly and produce clear notes. Make sure your fingers are curved and that you use the tips of your fingers to press down the strings. Keep your thumb behind the fingerboard for support.
Hand positioning is also important. Your hand should be relaxed and curved, with your fingers at a slight angle to the strings. Avoid gripping the neck too tightly as this can cause tension and affect your playing.
Exercises for Finger Strength and Dexterity
Practicing exercises that improve finger strength and dexterity can help you play more complex pieces with ease. Here are some exercises you can try:
- Finger lifts: Place your fingers on the strings and lift them off one at a time, starting with your pinky finger. Repeat this exercise, working your way up to your index finger.
- Scale runs: Practice playing scales up and down the fingerboard. This will help you build finger strength and improve your intonation.
- Octave jumps: Practice playing octave jumps up and down the fingerboard. This will help you build finger dexterity and improve your hand positioning.
Advanced Fingerings and Techniques
As you progress, you will encounter more advanced fingerings and techniques. Here are some to look out for:
| Technique | Description |
|---|---|
| Vibrato | A technique used to add expression to your playing. It involves oscillating your finger back and forth on the string while maintaining pressure. |
| Shifts | A technique used to play notes outside of first position. It involves moving your hand up or down the fingerboard to reach higher or lower notes. |
| Double stops | A technique used to play two notes at the same time. It involves pressing down two strings at once with two different fingers. |
Practice these techniques slowly and gradually increase your speed as you become more comfortable with them.

Choosing a Cello
Choosing the right cello is an important decision that can greatly impact your playing experience. There are several factors to consider when selecting a cello, including whether to rent or buy, what to look for in a cello, and how to care for your instrument.
Renting vs. Buying
For beginners, renting a cello can be a great option. Renting allows you to try out different cellos without committing to a purchase. Additionally, rental cellos are typically maintained by the rental company, so you don’t have to worry about upkeep and repairs. However, renting can be more expensive in the long run, and you may not have the same level of customization options as you would with a purchased cello.
If you’re ready to commit to a cello, buying can be a good option. Purchasing a cello gives you more control over the instrument and allows for customization options. Keep in mind that buying a cello can be a significant investment, so it’s important to do your research and choose a high-quality instrument that will last for years.
What to Look for in a Cello
When selecting a cello, there are several factors to consider:
- Size: Cellos come in various sizes, so it’s important to choose one that fits your body type. A cello that is too large or small can be uncomfortable to play.
- Tone: Every cello has its unique sound, so it’s important to choose one that produces a tone that you like. Some cellos have a brighter sound, while others have a warmer, more mellow sound.
- Construction: The construction of a cello can greatly impact its sound and durability. Look for a cello with a solid top, back, and sides, as well as a sturdy neck and fingerboard.
- Bow: The bow is an important part of playing the cello, so it’s important to choose one that is well-balanced and comfortable to hold.
Caring for Your Cello
Proper care and maintenance can help your cello last for years. Here are some tips:
- Store your cello properly: When not in use, store your cello in a case to protect it from dust, moisture, and temperature changes.
- Clean your cello regularly: Use a soft cloth to wipe down your cello after each use to remove rosin buildup and fingerprints.
- Keep your cello in tune: Tune your cello regularly to prevent unnecessary strain on the instrument.
- Take your cello for regular maintenance: Take your cello to a professional luthier for regular maintenance and repairs.
| Renting | Buying |
|---|---|
| Good for beginners who want to try out different cellos before committing to a purchase | Gives you more control over the instrument and allows for customization options |
| Can be more expensive in the long run | Can be a significant investment |
| Rental cellos are typically maintained by the rental company | Research and choose a high-quality instrument that will last for years |

Conclusion
If you are reading this article, congratulations on taking the first step towards learning how to play the cello! It is a beautiful and rewarding instrument that requires dedication and practice to master.
Throughout this beginner’s guide, we have covered the basics of bowing techniques and fingerings. Remember, proper form and technique are essential to producing a beautiful and consistent sound.
It is important to start with the basics and gradually build up your skills. Don’t be discouraged if progress seems slow at first. With time and practice, you will see improvement.
It is also important to have a good instrument and proper equipment. Make sure your cello is in good condition and that you have a well-fitted bow and rosin. A comfortable and ergonomic chair is also essential for long practice sessions.
Lastly, don’t forget to have fun! Playing the cello should be enjoyable and fulfilling. Experiment with different styles of music and find what inspires you.
Resources
Here are some additional resources to help you on your cello-playing journey:
- Cellobello – a website with articles, lessons, and resources for cellists of all levels
- IMSLP – a database of free sheet music for cello
- Online Cello Academy – a YouTube channel with instructional videos for cellists
Final Thoughts
Learning how to play the cello is a journey that requires patience, dedication, and hard work. But with the right mindset and resources, it can be a fulfilling and enjoyable experience. Keep practicing and never give up on your musical aspirations!
