
How to Construct a Raised Bed Garden for Easy Planting and Maintenance
Are you tired of bending over to plant and weed your garden? Do you want to improve the overall health and productivity of your plants? If so, constructing a raised bed garden may be the perfect solution for you.
Why Construct a Raised Bed Garden?
Raised bed gardens offer numerous benefits over traditional gardens. First and foremost, they provide better drainage and aeration for your plants’ roots, which can lead to healthier and more productive crops. Additionally, raised beds are easier to maintain and allow for more efficient use of space. They also help to keep out weeds and pests, and can be customized to fit your specific needs and preferences.
Whether you’re an experienced gardener or just starting out, constructing a raised bed garden is a simple and rewarding process. In this article, we’ll guide you through the steps of building a raised bed garden, from selecting the right location and materials to filling it with soil and planting your favorite vegetables and flowers.
So, let’s get started on creating your own beautiful and bountiful raised bed garden!
Step 1: Choosing a Location
Before constructing a raised bed garden, it’s important to choose the right location. Here are some considerations for selecting the perfect spot:
Considerations for Location
- Sunlight: Most vegetables require at least 6 hours of sunlight per day. Choose a location that receives ample sunlight throughout the day.
- Drainage: Ensure that the location has good drainage to prevent waterlogging. Raised beds are ideal for areas with poor drainage.
- Proximity to water source: It’s important to choose a location that’s close to a water source for easy watering.
- Soil quality: The soil should be fertile and well-draining. Avoid areas with compacted soil, heavy clay, or rocky soil.
- Accessibility: Choose a location that’s easily accessible for planting, weeding, and harvesting. Avoid areas that are too far away or difficult to reach.
Preparing the Site
Once you’ve chosen the location for your raised bed garden, it’s time to prepare the site:
- Clear the area: Remove any grass, weeds, or debris from the site.
- Level the ground: Use a rake or shovel to level the ground. The site should be flat and even.
- Install a weed barrier: To prevent weeds from growing, install a weed barrier such as landscape fabric or cardboard.
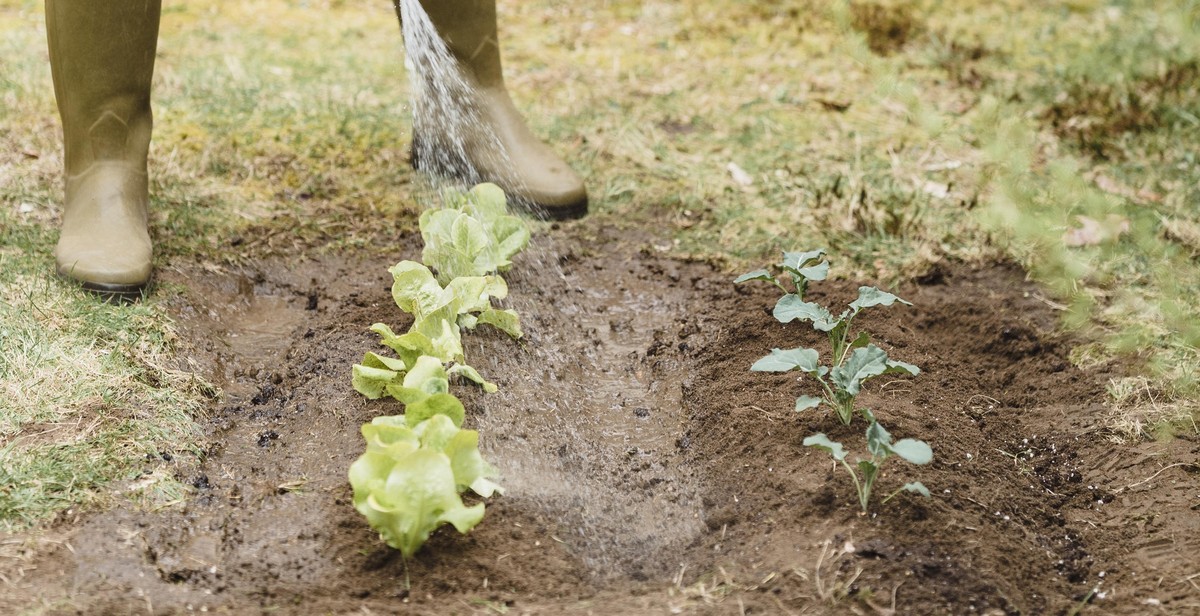
- Add soil: Fill the raised bed with a mixture of topsoil, compost, and other organic matter. The soil should be loose and well-draining.
|
Image source: Pixabay.com |

Step 2: Building the Raised Bed
Now that you have chosen the perfect location for your raised bed garden, it’s time to start building. Here are the steps to follow:
Materials Needed:
- Wooden boards or blocks (cedar, redwood, or pressure-treated lumber)
- Galvanized screws or nails
- Measuring tape
- Gardening soil or compost
- Landscaping fabric or cardboard
- Shovel or garden fork
Choosing the Right Size:
Consider the size of your garden and the plants you want to grow when choosing the size of your raised bed. A standard size is 4 feet wide by 8 feet long, but you can adjust the dimensions to fit your space and needs. Keep in mind that the bed should be no wider than 4 feet to allow for easy access to all plants.
Constructing the Bed:
- Measure and mark the dimensions of the raised bed on the ground where you want it to be located.
- Use a shovel or garden fork to remove the grass and loosen the soil within the marked area.
- Place the wooden boards or blocks on the prepared area, making sure they are level and flush with each other. If using wooden boards, attach them together at the corners with galvanized screws or nails.
- If desired, line the bottom of the bed with landscaping fabric or cardboard to prevent weeds from growing up through the soil.
- Fill the bed with gardening soil or compost, leaving a few inches of space at the top for watering and planting.
- Water the soil thoroughly.
| Material | Pros | Cons |
|---|---|---|
| Cedar or Redwood | Durable, naturally resistant to rot and insects, attractive | Expensive |
| Pressure-Treated Lumber | Inexpensive, readily available | May contain chemicals that can leach into soil, not as durable as cedar or redwood |
| Concrete Blocks | Durable, easy to stack | May not be as attractive as wooden beds, can be more difficult to work with |
Step 3: Preparing the Soil
Choosing the Right Soil Mix
Choosing the right soil mix is crucial for the success of your raised bed garden. The soil mix you choose should be nutrient-rich, well-draining, and loose enough to allow roots to grow easily. A good soil mix for a raised bed garden should contain a blend of organic matter, such as compost and peat moss, and inorganic matter, such as vermiculite or perlite.
It is important to note that different plants require different types of soil. For example, vegetables prefer a soil mix that is high in nitrogen, while herbs prefer a well-draining soil. Therefore, it is important to research the specific needs of the plants you plan to grow and choose a soil mix that will meet those needs.
Filling the Bed
Once you have chosen the right soil mix, it is time to fill your raised bed. Start by adding a layer of gravel or stones to the bottom of the bed. This will improve drainage and prevent water from pooling in the bottom of the bed.
Next, add a layer of your chosen soil mix. It is important to fill the bed to the top, as the soil will settle over time. Water the soil thoroughly before planting to ensure that it is evenly moist.
Finally, it is a good idea to add a layer of mulch to the top of the soil. This will help retain moisture in the soil and prevent weeds from growing.
- Choose a nutrient-rich, well-draining soil mix for your raised bed garden.
- Research the specific needs of the plants you plan to grow and choose a soil mix that will meet those needs.
- Add a layer of gravel or stones to the bottom of the bed to improve drainage.
- Fill the bed to the top with soil mix and water thoroughly before planting.
- Add a layer of mulch to the top of the soil to retain moisture and prevent weeds.

Step 4: Planting
After preparing your raised bed garden, it’s time to start planting! Here are some tips to help you choose the right plants and successfully plant them:
Choosing the Right Plants
When selecting plants for your raised bed garden, consider the following:
- Climate: Choose plants that are well-suited for your local climate to ensure they thrive.
- Soil: Different plants require different soil types. Make sure you choose plants that will grow well in the soil you have prepared.
- Season: Some plants are better suited for specific seasons. Choose plants that will grow well during the current season.
- Spacing: Be sure to choose plants that will fit comfortably in your raised bed without overcrowding.
Planting Tips
Here are some tips to help you successfully plant your chosen plants:
- Plant at the right time: Plant your seeds or seedlings at the appropriate time according to the plant’s recommended growing season.
- Proper spacing: Be sure to space your plants according to their specific requirements to ensure they have enough room to grow.
- Watering: Water your plants regularly and according to their specific needs.
- Mulching: Mulching can help retain moisture in the soil and prevent weeds from growing.
- Fertilizing: Depending on the plants you choose, you may need to fertilize them periodically to promote healthy growth.
| Plant | Spacing | Watering Needs | Fertilizer Needs |
|---|---|---|---|
| Tomatoes | 24-36 inches apart | Regular watering | High nitrogen |
| Lettuce | 6-10 inches apart | Regular watering | Low nitrogen |
| Cucumbers | 36-60 inches apart | Regular watering | High nitrogen |
By following these tips, you can ensure that your plants grow healthy and strong in your raised bed garden.

Step 5: Maintenance
Now that your raised bed garden is constructed and planted, it’s important to maintain it properly to ensure healthy growth and bountiful harvests. The following are some key maintenance tasks to keep in mind:
Watering
Regular watering is essential for the health of your plants. The frequency and amount of water required will depend on the specific plants you’re growing, the weather conditions, and the type of soil in your raised bed. As a general rule, it’s better to water deeply and less frequently than to water shallowly and often. This encourages deeper root growth and helps prevent water runoff. Consider using a drip irrigation system or soaker hose to make watering easier and more efficient.
Fertilizing
Plants in raised beds typically require more frequent fertilizing than those in traditional gardens, as the soil in raised beds can become depleted more quickly. Consider using organic fertilizers such as compost, manure, or fish emulsion to provide your plants with the nutrients they need. You can also use slow-release fertilizers or add a balanced fertilizer to your soil mix before planting.
Weeding
Weeds can quickly take over a raised bed garden if left unchecked, so it’s important to keep them under control. Regular weeding can be done by hand or with a hoe, but consider using a weed barrier or mulch to prevent weeds from growing in the first place. Be sure to remove any weeds before they go to seed to prevent them from spreading.
Pest Control
Pests such as aphids, slugs, and snails can wreak havoc on your raised bed garden. Consider using natural pest control methods such as companion planting, insecticidal soap, or neem oil to keep pests at bay. You can also use physical barriers such as row covers or netting to protect your plants from insects and birds.
| Task | Frequency |
|---|---|
| Watering | As needed, typically 1-2 times per week |
| Fertilizing | Every 4-6 weeks |
| Weeding | As needed, typically weekly |
| Pest Control | As needed, typically weekly |

Conclusion
Constructing a raised bed garden is a great way to enjoy a bountiful harvest while minimizing the effort and time required for planting and maintenance. By following the simple steps outlined in this article, you can create a raised bed garden that is not only functional but also aesthetically pleasing.
Key Takeaways
- Choose a suitable location that receives adequate sunlight and has good drainage.
- Select the appropriate materials for your raised bed garden.
- Plan the layout of your raised bed garden and prepare the soil.
- Plant your desired crops and maintain the garden regularly.
Benefits of a Raised Bed Garden
A raised bed garden offers numerous benefits, including:
- Reduced soil compaction and improved drainage, leading to healthier plants.
- Less strain on your back and knees, as raised beds can be built to a comfortable height.
- Easier access to plants, making planting, harvesting, and maintenance tasks more convenient.
- Improved aesthetics, as raised bed gardens can be designed to complement your outdoor space.
Enjoying Your Raised Bed Garden
Now that you have built your raised bed garden, it’s time to sit back and enjoy the fruits of your labor. With proper care and maintenance, your raised bed garden can provide you with fresh produce for many years to come.
Remember to water your plants regularly, fertilize as needed, and keep an eye out for pests and diseases. With a little bit of effort, you can create a thriving garden that will bring joy and satisfaction to your life.