How to Perform a Brake Pad Replacement on Your Car
If you own a car, you know how important it is to maintain it properly. One of the most critical components of any vehicle is the braking system. Brake pads are an essential part of the braking system, and they need to be replaced periodically to keep your car safe and in good working condition. In this article, we will guide you through the process of replacing your brake pads.
Why Replace Your Brake Pads?
Brake pads are designed to wear out over time, and they need to be replaced periodically. If you don’t replace your brake pads when they are worn, your car’s braking system will not work correctly, and you could be putting yourself and others at risk. Additionally, worn brake pads can cause damage to other parts of your car, such as the rotors, which can be expensive to repair.
When to Replace Your Brake Pads?
The lifespan of brake pads depends on various factors, such as driving habits, the type of vehicle, and the quality of the brake pads. However, a general rule of thumb is to replace your brake pads every 20,000 to 60,000 miles. You should also replace your brake pads if you notice any signs of wear, such as squeaking or grinding noises when you brake.
Tools and Materials You Will Need
Before you start replacing your brake pads, you will need to gather some tools and materials. Here is a list of items that you will need:
- New brake pads
- Brake cleaner
- Jack and jack stands
- Lug wrench
- Socket wrench set
- C-clamp
By following the steps outlined in this article, you can replace your brake pads safely and effectively, ensuring that your car’s braking system is in good working condition. Let’s get started!

When to Replace Your Brake Pads
Brake pads are a crucial component of your car’s braking system. They are responsible for stopping your car when you apply the brakes. Over time, brake pads wear down and need to be replaced. Here are some signs that it’s time to replace your brake pads:
Symptoms of Worn Brake Pads
- Screeching or squeaking noise when you apply the brakes
- Grinding noise when you apply the brakes
- Reduced braking performance
- Longer stopping distances
- Brake pedal feels soft or spongy
- Vibration or pulsation in the brake pedal
If you notice any of these symptoms, it’s important to have your brake pads inspected by a professional mechanic. Driving with worn brake pads can be dangerous and can lead to more expensive repairs down the line.
How Often Should You Replace Your Brake Pads?
The lifespan of brake pads varies depending on a variety of factors, such as driving style, road conditions, and the type of brake pads you have installed. Generally, brake pads should be replaced every 50,000 miles or so. However, it’s important to have them inspected regularly to ensure they are in good condition.
If you frequently drive in stop-and-go traffic or in hilly areas, your brake pads may wear down more quickly. Similarly, if you frequently tow heavy loads, your brake pads may wear down more quickly as well.
Ultimately, it’s important to follow the manufacturer’s recommended maintenance schedule for your car’s braking system. This will help ensure that your brakes are in good condition and that you can stop safely when you need to.

Preparing Your Car for Brake Pad Replacement
Before you start replacing your brake pads, you need to gather all the necessary tools and equipment. You don’t want to be halfway through the job only to realize that you’re missing a crucial tool. Here’s what you’ll need:
- Jack and jack stands
- Lug wrench or impact wrench
- Socket wrench set
- C-clamp
- Brake cleaner
- New brake pads
- New brake rotors (if necessary)
Once you have all the tools and equipment you need, you can get started with the actual brake pad replacement process. The first step is to jack up your car and remove the wheels. Here’s how:
Jack Up Your Car
Before you jack up your car, make sure it’s parked on a level surface and the emergency brake is engaged. Use the lug wrench or impact wrench to loosen the lug nuts on the wheels you’re going to remove. Then, place the jack under the designated jacking point for your car (refer to your owner’s manual for this information).
Pump the jack handle up and down until the car is lifted off the ground. Then, place the jack stands under the designated support points (again, refer to your owner’s manual). Slowly lower the car onto the jack stands and make sure it’s stable before you start working.
Remove the Wheels
With the car securely on the jack stands, use the lug wrench or impact wrench to remove the lug nuts and take off the wheels. Place the wheels aside in a safe location where they won’t roll away or get damaged.
Now that your car is properly prepared, you can move on to the next step in the brake pad replacement process.

Removing the Old Brake Pads
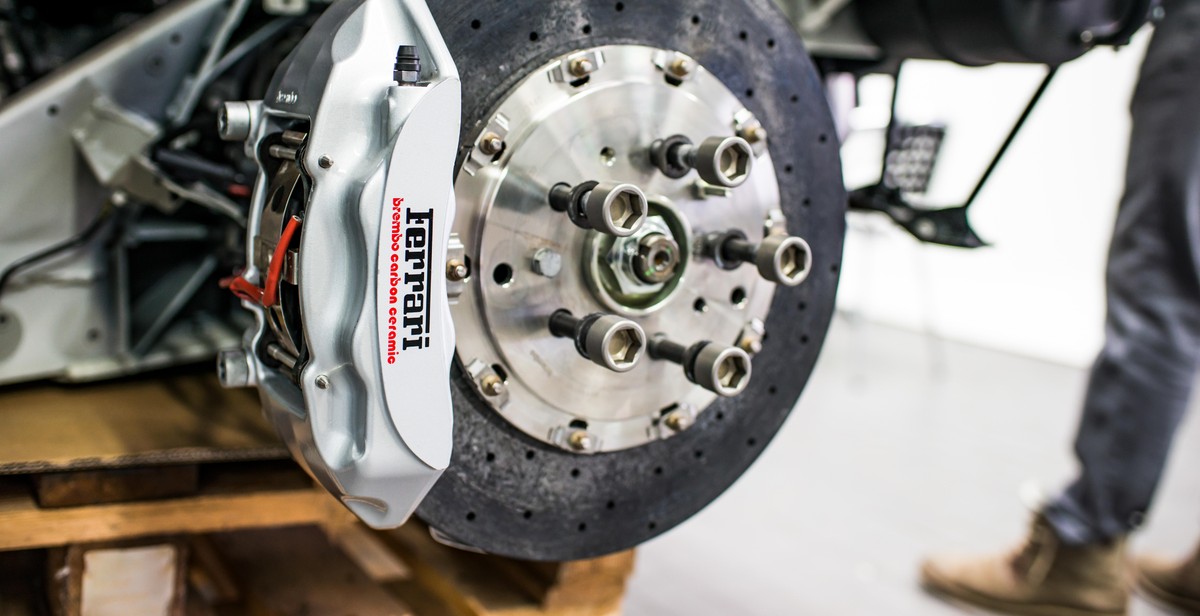
Now that you have removed the caliper, it’s time to remove the old brake pads. The process is fairly simple, but it requires a bit of caution. Here’s how to do it:
- Inspect the brake pads for wear and tear. If they are excessively worn, cracked, or damaged in any way, they need to be replaced.
- Locate the retaining clips or pins that hold the brake pads in place. These are usually located on the top and bottom of the caliper.
- Using a flathead screwdriver, gently pry the retaining clips or pins out of the caliper. Be careful not to damage them.
- Once the retaining clips or pins are removed, you should be able to slide the old brake pads out of the caliper. If they are stuck, you can use a pair of pliers to gently wiggle them out.
- Take note of the orientation of the old brake pads. They are usually marked with “L” or “R” to indicate which side they go on.
- Inspect the brake caliper and rotor for any signs of damage or wear and tear. If you notice any issues, it’s best to address them before installing the new brake pads.
Once you have removed the old brake pads, you can move on to installing the new ones. But before you do that, it’s a good idea to clean the caliper and rotor with brake cleaner to remove any dirt, debris, or grease that may have accumulated.
| Tools Required: | Flathead screwdriver, pliers, brake cleaner. |
|---|
Conclusion
Removing the old brake pads is an essential part of performing a brake pad replacement. By following the steps outlined above, you can safely and easily remove the old brake pads and prepare your vehicle for the installation of new ones.

Installing the New Brake Pads
Once you have removed the old brake pads, it is time to install the new ones. Here are the steps to follow:
Preparing the New Brake Pads
Before installing the new brake pads, it is important to prepare them properly. Here’s how:
- Check the new brake pads to ensure they are the correct fit for your vehicle.
- Apply a thin layer of brake pad lubricant to the back of each pad. This will prevent noise and vibration.
- Check the brake rotors for any damage or wear. If the rotors are damaged or worn, they will need to be replaced.
Install the New Brake Pads
Now that you have prepared the new brake pads, it’s time to install them. Follow these steps:
- Insert the new brake pads into the caliper bracket. Make sure the pads are seated properly and the clips are in place.
- Slide the caliper over the new brake pads and align it with the caliper bracket.
- Reinstall the caliper bolts and torque them to the manufacturer’s specifications.
Reinstall the Caliper
With the new brake pads installed, it’s time to reinstall the caliper. Here’s how:
- Slide the caliper over the new brake pads and align it with the caliper bracket.
- Reinstall the caliper bolts and torque them to the manufacturer’s specifications.
- Reconnect the brake hose to the caliper and tighten the banjo bolt.
- Reinstall the wheel and torque the lug nuts to the manufacturer’s specifications.
And that’s it! You have successfully installed new brake pads on your car. Remember to test your brakes before driving to ensure they are working properly.

Testing Your Brakes
After replacing your brake pads, it’s important to test them out to ensure they are working correctly. Here are the steps to follow:
Pump the Brakes
Pump the brakes a few times before you start driving to make sure they are working properly. This will also help to seat the new brake pads against the rotor.
Take a Test Drive
Take a test drive around your neighborhood to test your brakes at different speeds. Start slowly and gradually increase your speed. Pay attention to any unusual noises or vibrations coming from your brakes.
- Make sure your car stops smoothly and evenly.
- Test your brakes at different speeds and on different surfaces, such as pavement and gravel.
- If you feel any vibrations or hear any unusual noises, pull over and inspect your brakes again.
Final Thoughts
Testing your brakes after replacing your brake pads is important to ensure your safety and the safety of others on the road. If you have any concerns about your brakes, take your car to a professional mechanic to have them inspected.
