How to Paint with Watercolors: A Beginner’s Guide to Watercolor Painting
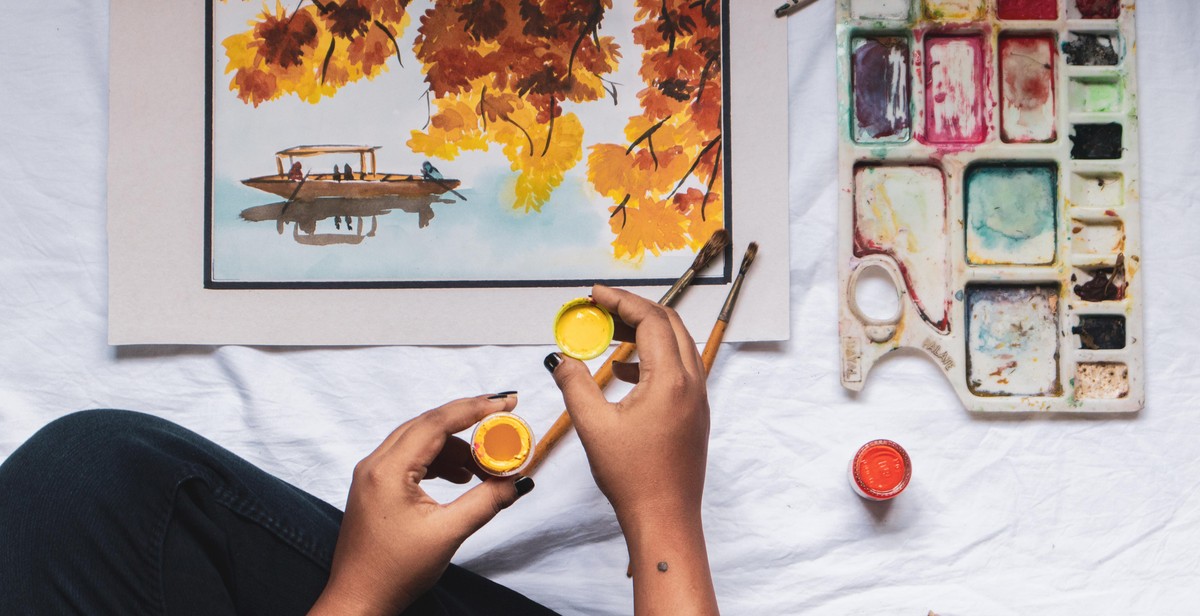
Watercolor painting is a beautiful and versatile medium that allows you to create stunning works of art. Whether you’re a beginner or an experienced artist, learning how to paint with watercolors can be a rewarding and enjoyable experience.
Why Choose Watercolors?
Watercolors are a popular choice among artists because they are easy to use, affordable, and offer a wide range of creative possibilities. With watercolors, you can create anything from vibrant, bold paintings to delicate, subtle washes of color.
Getting Started with Watercolors
If you’re new to watercolor painting, it can be overwhelming at first. However, with the right tools and techniques, you can quickly learn the basics and start creating beautiful paintings. Some essential tools you’ll need include:
- Watercolor paints
- Watercolor paper
- Paintbrushes
- Water
Once you have your supplies, you can start practicing basic techniques like wet-on-dry, wet-on-wet, and dry-brushing. These techniques will help you create a range of textures and effects in your paintings.
Tips for Success
As you start painting with watercolors, keep these tips in mind:
- Start with light washes of color and build up gradually
- Use high-quality watercolor paper to prevent buckling and warping
- Experiment with different brushes and techniques to find your style
- Don’t be afraid to make mistakes – watercolors are forgiving and can be corrected with a damp brush or paper towel
By following these tips and practicing regularly, you can improve your watercolor painting skills and create stunning works of art.

Materials Needed
Before you can start painting with watercolors, you need to gather the necessary materials. Here is a list of the materials you will need:
Watercolor Paints
The first thing you need to get started with watercolor painting is a set of watercolor paints. There are many different brands and types of watercolor paints available, but it is best to start with a basic set of colors. Look for a set that includes at least the primary colors (red, blue, and yellow) as well as a few other colors such as green, purple, and orange. You can always add more colors to your collection as you gain more experience.
Watercolor Paper
Watercolor paper is specially designed to absorb water and paint without buckling or warping. Look for paper that is at least 140lb (300gsm) and has a rough or cold-pressed texture. This texture will help your paint to adhere to the paper and create interesting textures in your paintings.
Watercolor Brushes
Watercolor brushes are designed to hold and distribute water and paint evenly. Look for brushes that are made specifically for watercolor painting and come in a variety of sizes and shapes. A good basic set includes a round brush for fine details, a flat brush for washes, and a mop brush for larger areas.
Water and Palette
You will also need water and a palette to mix and dilute your paint. A plastic or ceramic palette with wells for each color is ideal. You can use any type of water, but it is best to use distilled water to avoid any impurities that may affect the quality of your paint.
| Materials | Recommended Brands |
|---|---|
| Watercolor Paints | Winsor & Newton, Daniel Smith, M. Graham |
| Watercolor Paper | Arches, Strathmore, Fabriano |
| Watercolor Brushes | Da Vinci, Escoda, Winsor & Newton |
| Water and Palette | Any clean water and any plastic or ceramic palette |
Make sure to gather all of these materials before you start painting so that you can focus on the creative process without any interruptions.
Preparing to Paint
Before you start painting with watercolors, it’s important to set up your workspace properly. This will ensure that you have everything you need within reach and that your painting process goes smoothly.
Setting Up Your Workspace
Choose a well-lit area with plenty of natural light. Position your table or easel near a window or under a bright lamp. Make sure you have enough space to move your arms comfortably as you paint. Keep a container of water nearby to rinse your brushes and a rag or paper towels to dry them.
Mixing Your Colors
Watercolor paints come in tubes or pans. Squeeze a small amount of paint onto your palette or use the colors straight from the pans. Use a separate palette or container for each color to avoid mixing them accidentally. Use a brush to mix the colors together and create new shades. Start with the primary colors – red, yellow, and blue – and mix them together to get secondary colors like green, orange, and purple.
Testing Your Colors
Before you start painting, test your colors on a scrap piece of paper. This will help you see how the colors look when they dry and how they interact with each other. You can also test the opacity of your colors by painting a thin layer and then adding more layers on top. This will help you achieve the desired depth and richness of your colors.
| Materials | Description |
|---|---|
| Water container | A container to rinse your brushes |
| Palette | A flat surface to mix and hold your paints |
| Brushes | A variety of brushes in different sizes and shapes for different effects |
| Watercolor paper | A sturdy, absorbent paper specifically designed for watercolors |
| Easel or table | A sturdy surface to hold your paper and materials |

Basic Techniques for Watercolor Painting
Watercolor painting is a beautiful art form that requires a lot of patience and practice. Here are some basic techniques that every beginner should know:
Wet-on-Wet Technique
The wet-on-wet technique involves applying wet paint onto a wet surface. This technique is great for creating soft, blended backgrounds and gradients. Start by wetting the paper with a brush or spray bottle and then apply the paint. The wet surface will allow the colors to blend together naturally.
Dry Brush Technique
The dry brush technique involves using a dry brush with very little water to create a textured effect. This technique is great for creating rough surfaces like tree bark or rocks. Load the brush with paint and then remove most of it with a paper towel. Apply the brush strokes in a back-and-forth motion to create the desired texture.
Wet-on-Dry Technique
The wet-on-dry technique involves applying wet paint onto a dry surface. This technique is great for creating sharp edges and details. Start by painting a dry area and then add wet paint to the desired area. The dry surface will prevent the paint from bleeding into other areas.
Layering Technique
The layering technique involves building up layers of paint to create depth and dimension. Start with a light wash and then add more layers of paint to create darker areas. This technique is great for creating shadows and highlights.
By mastering these basic techniques, you can create stunning watercolor paintings. Remember to practice and experiment with different techniques to find your own unique style.

Painting Your First Watercolor
Watercolor painting can be a daunting task for a beginner. However, with a few tips and tricks, you can get started with your first painting in no time. Here are the steps to follow:
Sketching Your Design
The first step to painting with watercolors is sketching your design. You can use a pencil and paper to sketch your design. Make sure to draw lightly as the pencil marks can show through the watercolor paint. Once you have your design sketched out, you can start applying the first layers of paint.
Applying the First Layers
Start by wetting your brush and then loading it with paint. Apply the paint in thin layers, starting with the lightest color. You can gradually build up the color intensity by adding more layers. Remember to let each layer dry completely before adding the next layer. This will prevent the colors from bleeding into each other.
Adding Details and Shadows
Once you have the base layers of paint applied, you can start adding details and shadows. Use a smaller brush for this step. You can add details by using a darker tone of the same color or by adding a completely different color. Shadows can be created by adding a darker tone of the same color or by using a complementary color.
Finishing Touches
Finally, add the finishing touches to your painting. You can add highlights by using a lighter tone of the same color or by using white paint. You can also use a dry brush to create texture or to remove excess paint. Once you are satisfied with your painting, let it dry completely before framing or displaying it.
By following these simple steps, you can create your first watercolor painting with ease. Remember to practice and experiment with different techniques to improve your skills.
Common Mistakes to Avoid When Painting with Watercolors
Watercolor painting is a beautiful art form that requires patience, practice, and precision. However, there are some common mistakes that beginners often make. Here are some of the mistakes you should avoid when painting with watercolors:
Using too much water
One of the biggest mistakes beginners make is using too much water. This can cause the colors to bleed and blend too much, making the painting look muddy and dull. To avoid this, use less water and more pigment. Practice mixing your colors on a separate palette before applying them to your paper.
Not using the right paper
Watercolor paper is specially designed to absorb water and hold the pigment in place. Using regular paper or sketchbook paper can cause the paper to warp and the colors to bleed. Invest in good quality watercolor paper for the best results.
Not planning the painting
Planning your painting beforehand can help you avoid mistakes and make the painting process smoother. Sketch out your composition and decide on your color palette before you start painting.
Using muddy colors
Using too many colors or not mixing the colors properly can result in muddy colors. Take the time to mix your colors carefully and use a limited color palette to avoid this mistake.
Not allowing the paint to dry
Watercolors take time to dry, and not allowing the paint to dry properly can cause the colors to bleed and blend together. Be patient and allow the paint to dry completely before adding another layer or color.
Using too much pressure
Using too much pressure when applying the paint can cause the paper to tear or become damaged. Use a light touch when painting with watercolors to avoid this mistake.
Conclusion
By avoiding these common mistakes, you can create beautiful watercolor paintings that you can be proud of. Remember to practice, be patient, and have fun!

Conclusion
Watercolor painting is a beautiful and rewarding art form that can be enjoyed by anyone, regardless of skill level. With the right materials, techniques, and mindset, anyone can create stunning watercolor paintings that capture the beauty of the world around them.
Tips for Success
- Invest in quality materials, including paints, brushes, and paper
- Practice your techniques regularly to improve your skills
- Experiment with different styles and subjects to find what works best for you
- Don’t be afraid to make mistakes – they can often lead to unexpected and beautiful results
Final Thoughts
As someone who has been painting with watercolors for many years, I can attest to the joy and satisfaction that comes from this art form. Whether you’re a complete beginner or an experienced artist, there’s always something new to learn and discover with watercolors.
|
About the Author: Jane Doe is a professional artist and writer with over 10 years of experience in watercolor painting. She enjoys sharing her knowledge and passion for art with others, and is always looking for new ways to inspire and motivate fellow artists. |
