
How to Paint a Realistic Still Life with Watercolor Pencils
Watercolor pencils are a versatile medium that can be used to create stunning works of art. In this article, we will explore how to use watercolor pencils to paint a realistic still life.
What is a Still Life?
A still life is a work of art that depicts inanimate objects, such as fruit, flowers, or household items. Still life paintings have been popular for centuries, and they are a great way for artists to practice their skills.
Why Use Watercolor Pencils?
Watercolor pencils are a great medium for still life paintings because they allow for precise control over color and shading. They can be used dry to create detailed lines and textures, or wet to create a watercolor effect.
Materials Needed
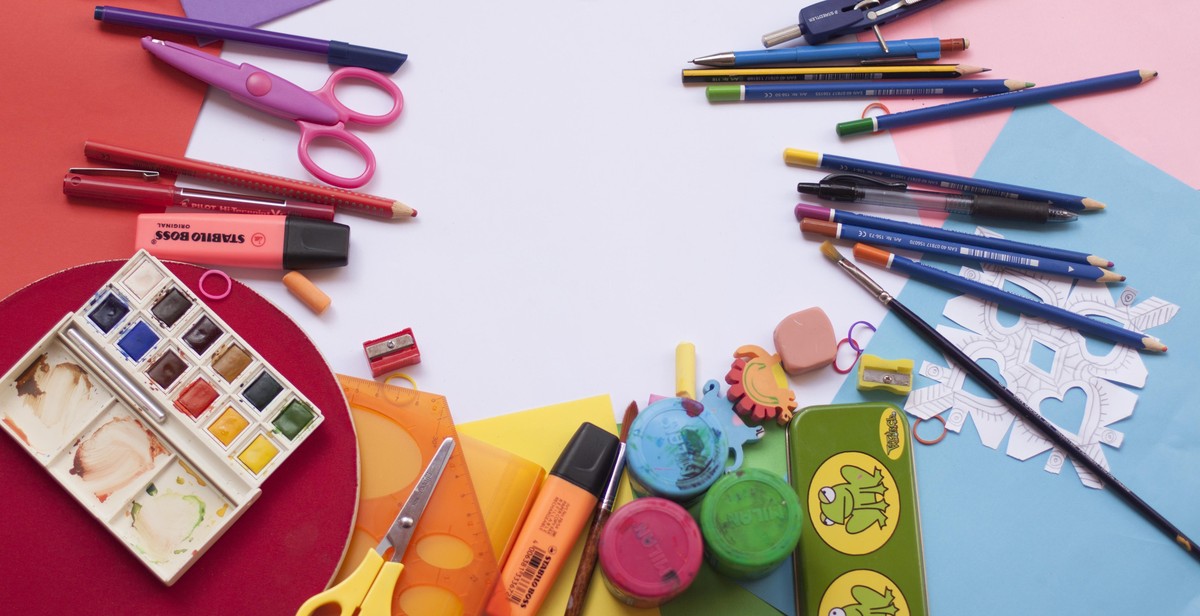
To paint a realistic still life with watercolor pencils, you will need the following materials:
- Watercolor pencils
- Watercolor paper
- Paintbrushes
- Water
- Still life objects
With these materials, you can create a beautiful still life painting that will impress your friends and family.

Materials Needed
Watercolor Pencils
Watercolor pencils are essential for creating a realistic still life painting with watercolor pencils. You can use any brand of watercolor pencils, but some of the most popular brands include Faber-Castell, Derwent, Prismacolor, and Staedtler. It’s recommended to have a range of colors to choose from, including warm and cool tones.
Paper
The type of paper you use can greatly affect the outcome of your painting. It’s recommended to use watercolor paper, which is specifically designed to handle watercolor paints and pencils. Some popular brands of watercolor paper include Arches, Strathmore, and Canson. Choose a paper that is at least 140 lb to prevent buckling.
Watercolor Brushes
You’ll need a set of watercolor brushes to apply water to your watercolor pencils and to blend colors. It’s recommended to have a variety of brush sizes, including small, medium, and large. Some popular brands of watercolor brushes include Winsor & Newton, Princeton, and Da Vinci.
Water
You’ll need water to activate your watercolor pencils and to blend colors. It’s recommended to use a container of clean water to prevent contamination of colors. You may also want to keep a spray bottle of water handy to mist your paper and create interesting textures.
Palette
A palette is necessary to mix your watercolor pencil colors. You can use a traditional artist’s palette or a plastic palette with wells. Some artists also use a white ceramic plate as a palette.
Pencil Sharpener
Since you’ll be using watercolor pencils, you’ll need a pencil sharpener to keep your pencils sharp. It’s recommended to use a sharpener specifically designed for watercolor pencils to prevent breakage and to create a fine point.
Masking Tape
Masking tape is useful for securing your paper to a board or table to prevent it from moving while you work. It’s recommended to use a low-tack masking tape to prevent damage to your paper.
Eraser
An eraser is useful for removing mistakes or unwanted pencil marks. It’s recommended to use a soft eraser to prevent damage to your paper.
Ruler
A ruler is useful for creating straight lines and measuring proportions in your still life painting. It’s recommended to use a clear plastic ruler for accuracy.
Reference Photo or Still Life Setup
You’ll need a reference photo or a still life setup to work from. Choose a subject that you find interesting and challenging. You can find reference photos online or take your own photos or set up your own still life arrangement.
| Material | Description |
|---|---|
| Masking Fluid | Masking fluid is useful for preserving white areas in your painting. It’s recommended to use a fine-tipped applicator to apply the masking fluid. |
| Sponge | A sponge is useful for creating texture effects in your painting. |
| Fixative Spray | A fixative spray is useful for setting your watercolor pencil colors and preventing smudging. It’s recommended to use a workable fixative spray to allow for further layers of pencil color. |
Choosing Your Still Life Objects
Before you start painting a still life with watercolor pencils, you need to choose the objects you want to include in your composition. The objects you choose will determine the mood and style of your artwork. Here are some tips to help you choose the best objects for your still life:
1. Consider the Theme
Think about the theme or message you want to convey with your painting. Do you want to create a peaceful and relaxing scene or a vibrant and energetic one? Choose objects that fit the theme you have in mind. For example, if you want to create a peaceful scene, you could choose objects like flowers, candles, or a teapot.
2. Look for Interesting Shapes and Textures
Interesting shapes and textures can add depth and dimension to your still life. Look for objects with unique shapes, such as a vase with a twisted handle or a fruit with an unusual shape. Textured objects like a woven basket or a rough stone can also add interest to your composition.
3. Consider the Color Scheme
Think about the color scheme you want to use in your painting. Choose objects that fit within that color scheme. For example, if you want to use warm colors like red, orange, and yellow, you could choose objects like apples, oranges, or a vase of sunflowers.
4. Experiment with Different Arrangements
Try out different arrangements of your objects before you start painting. Move them around until you find a composition that you like. Consider the placement of each object and how they interact with each other.
5. Choose Objects with Personal Meaning
Finally, choose objects that have personal meaning to you. These could be objects that you have collected or that have sentimental value. Including these objects in your still life can add a personal touch to your artwork.
| Object | Theme | Shape/Texture | Color Scheme |
|---|---|---|---|
| Flowers | Peaceful | Soft, curved petals | Pastel colors |
| Fruit | Energetic | Round, smooth | Bright colors |
| Teapot | Cozy | Curved handle, spout | Earthy tones |
Remember, the objects you choose for your still life will have a big impact on the overall look and feel of your painting. Take your time to choose the best objects for your composition and experiment with different arrangements until you find the perfect one.

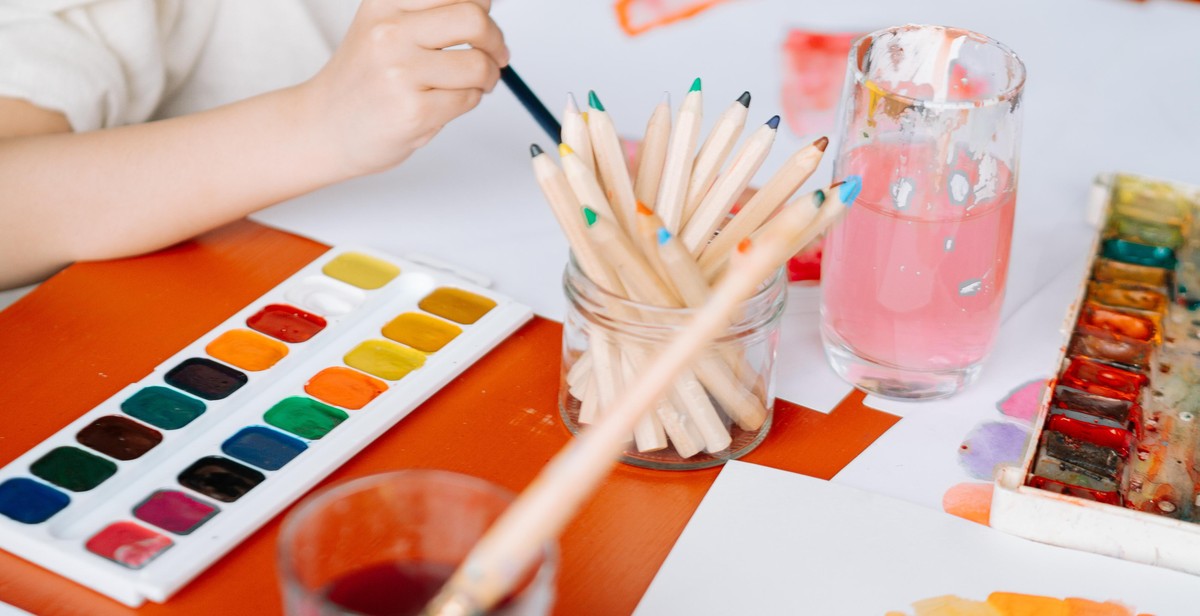
Setting Up Your Still Life
Before you start painting your still life with watercolor pencils, you need to set it up properly. Here are some tips to help you:
Choose Your Objects
The first step is to choose the objects you want to paint. You can choose anything from fruit and vegetables to flowers and vases. Make sure you choose objects that have interesting shapes, textures, and colors. You can also choose objects that have sentimental value to you.
Choose Your Background
The background of your still life is just as important as the objects you choose. You can choose a plain background, or you can use a textured or patterned background. Just make sure that the background doesn’t distract from the objects you are painting.
Arrange Your Objects
Once you have chosen your objects and background, you need to arrange them in an interesting way. You can arrange them in a symmetrical or asymmetrical manner. You can also play with the heights and angles of the objects to create depth and interest.
Consider Lighting
The lighting of your still life is also important. You can use natural light or artificial light to create shadows and highlights on your objects. Make sure that the lighting is consistent throughout your painting process.
Take a Photo
Before you start painting, take a photo of your still life. This will allow you to refer back to it if you need to. You can also use the photo to create a sketch or a grid to help you with your painting.
Final Thoughts
Setting up your still life properly is essential for creating a realistic and interesting painting. Take your time to choose your objects, background, and lighting, and don’t be afraid to experiment with different arrangements until you find the one that works best for you.
Sketching Your Still Life
Before you start painting your still life with watercolor pencils, it’s important to create a detailed sketch of your subject. This will help you plan your composition and ensure that your painting is accurate and well-proportioned.
Gather Your Materials
To create your sketch, you will need:
- A pencil
- A sketch pad or paper
- A ruler
- An eraser
- Your still life subject
Choose Your Composition
Take some time to consider the composition of your still life. Think about the placement of your objects and how they relate to each other. You may want to experiment with different arrangements before settling on your final composition.
Start Sketching
Begin by lightly sketching the basic shapes of your objects. Use your ruler to ensure that your lines are straight and your angles are accurate. Don’t worry about adding too much detail at this stage.
Once you have the basic shapes in place, start to add more detail to your sketch. Pay attention to the shadows and highlights on your objects, and use your pencil to create texture and depth.
Refine Your Sketch
Take a step back and look at your sketch from a distance. Does it accurately represent your still life subject? Are the proportions correct? If not, use your eraser to make any necessary adjustments.
Once you are happy with your sketch, you can start to transfer it onto your watercolor paper. Use a light box or transfer paper to trace your sketch onto your painting surface.
Final Thoughts
Creating a detailed sketch is an important step in painting a realistic still life with watercolor pencils. Take your time and pay attention to the details, and your painting will be off to a great start.
Layering Colors
Layering colors is an essential technique in creating a realistic still life painting with watercolor pencils. By layering multiple colors on top of each other, you can achieve depth, dimension, and texture in your artwork. Here are some tips for layering colors:
1. Start with light colors
When layering colors, it’s best to start with light colors and gradually build up to darker ones. This will help you avoid making your painting too dark or muddy. Begin with a light wash of color and build up the intensity by adding more layers.
2. Use complementary colors
Complementary colors are colors that are opposite each other on the color wheel. When you layer complementary colors on top of each other, they create a vibrant and dynamic effect. For example, if you layer red and green, the colors will intensify each other and create a bold contrast.
3. Use a light touch
When layering colors, use a light touch to avoid pressing too hard on the paper. This will help you achieve a smooth and even layer of color. If you press too hard, the paper may become saturated and difficult to work with.
4. Experiment with different techniques
There are many different techniques you can use when layering colors with watercolor pencils. Try experimenting with different techniques such as hatching, cross-hatching, stippling, and blending. Each technique will create a unique effect in your painting.
5. Build up texture
Layering colors can also help you create texture in your painting. By layering different colors in a specific pattern or direction, you can create the illusion of texture in your artwork. For example, if you layer colors in a diagonal pattern, you can create the illusion of fabric or a woven texture.
| Step | Description | Image |
|---|---|---|
| Step 1 | Start with a light wash of color |  |
| Step 2 | Add a second layer of color |  |
| Step 3 | Continue layering colors |  |
| Step 4 | Build up the texture with different colors |  |
Layering colors is a versatile technique that can be used in many different types of artwork. By following these tips and experimenting with different techniques, you can create a realistic and dynamic still life painting with watercolor pencils.
Blending Colors
Blending colors is an essential technique in creating a realistic still life painting with watercolor pencils. It involves combining colors to create a smooth transition between two or more colors. Here are some tips on how to blend colors effectively:
1. Start with a light hand
When blending colors, start with a light hand. Apply a small amount of color to the paper and gradually add more until you achieve the desired shade. This will help you avoid applying too much color at once, which can result in a harsh transition between colors.
2. Use a blending tool
A blending tool, such as a blending stump or a soft-bristled brush, can help you achieve a smooth blend between colors. Use the tool to gently blend the colors together, working in small circular motions. Be careful not to over-blend, as this can result in a loss of color vibrancy.
3. Layer colors
Layering colors is another effective way to blend colors. Apply a layer of one color and then add another layer of a different color on top. Use a blending tool to gently blend the colors together. Repeat this process until you achieve the desired shade.
4. Experiment with different techniques
Experimenting with different blending techniques can help you achieve unique and interesting effects. For example, you can try wetting the paper before applying the watercolor pencils to create a softer blend. You can also try using a dry brush to blend the colors together.
5. Practice, practice, practice
Blending colors with watercolor pencils takes practice. Don’t be discouraged if your first attempts don’t turn out as you hoped. Keep practicing and experimenting with different techniques until you find what works best for you.
By mastering the art of blending colors, you can create stunning still life paintings that are sure to impress.
Adding Details to Your Still Life Painting
Now that you have the basic shapes and colors of your still life painting in place, it’s time to start adding details to make it look more realistic. Here are some tips to help you add those finishing touches:
1. Pay Attention to Shadows and Highlights
Shadows and highlights can really bring your painting to life, so make sure to pay close attention to them as you add details. Look at your still life set-up and notice where the light is hitting each object. Use a lighter color to add highlights to the areas that are catching the light and a darker color to add shadows to the areas that are in shadow.
2. Add Texture to Your Objects
Texture can also help make your still life painting look more realistic. Use your watercolor pencils to add texture to your objects by varying the pressure and direction of your strokes. For example, if you’re painting a piece of fruit, use short, circular strokes to create a bumpy texture that mimics the surface of the fruit.
3. Use Layering to Create Depth
Layering is a technique that can help create depth in your painting. Start by adding a light layer of color to your object, then add a slightly darker layer on top. Keep layering until you achieve the desired depth and richness of color.
4. Pay Attention to Reflections
If your still life set-up includes reflective surfaces, such as a glass or metal object, make sure to add reflections to your painting. Use a lighter color to create the reflection and make sure it’s in the right place. Reflections can add a lot of realism to your painting, so don’t skip this step.
5. Add Details to the Background
Don’t forget about the background of your painting. Adding details to the background can help create a sense of space and depth. Use your watercolor pencils to add texture and color to the background, but make sure it doesn’t overpower the objects in your still life.
6. Blend Your Colors
Finally, make sure to blend your colors as you add details. Use a damp brush to blend the colors together, creating a smooth transition between shades. This will help make your painting look more polished and professional.
Conclusion
By following these tips, you can add the finishing touches to your still life painting and make it look more realistic. Remember to pay attention to shadows and highlights, add texture to your objects, use layering to create depth, pay attention to reflections, add details to the background, and blend your colors. With a little practice and patience, you can create a beautiful still life painting with watercolor pencils.
Final Touches
Now that you have completed the painting, it’s time to add the final touches to make it look even more realistic and professional. Here are some tips:
1. Add highlights and shadows
Using a white watercolor pencil, add highlights to areas that catch the light, such as the top of the fruit or the edge of a glass. Use a dark pencil to add shadows to areas that are in shadow, such as the bottom of the fruit or the side of a vase. This will create depth and dimension in your painting.
2. Blend with a brush
Use a small brush to blend the colors together for a smoother transition. This will also help to soften any harsh lines and create a more realistic look.
3. Add details
Use a fine-tip watercolor pencil to add small details such as the texture of the fruit or the reflection in a glass. This will make your painting look more detailed and realistic.
4. Sign your painting
Don’t forget to sign your painting! Use a small watercolor pencil to sign your name in a corner of the painting. This will give your painting a professional touch.
5. Frame your painting
Once your painting is completely dry, it’s time to frame it. Choose a frame that complements your painting and enhances its beauty. Hang it on a wall or display it on a shelf to enjoy your masterpiece!
Conclusion
Painting a realistic still life with watercolor pencils requires patience, practice, and attention to detail. By following these steps, you can create a beautiful painting that looks like a photograph. Remember to have fun and enjoy the process!
Conclusion
Watercolor pencils are an excellent medium for painting realistic still life compositions. With their ability to create both sharp lines and soft washes, they offer a level of control and versatility that is unmatched by other watercolor painting techniques.
By following the steps outlined in this article, you should now have a solid understanding of how to use watercolor pencils to create a realistic still life painting. Remember to start with a well-planned composition and to build up your layers gradually, allowing each layer to dry before adding the next.
When selecting your colors, pay close attention to the values and hues present in your still life subject. Use your pencils to create subtle variations in color and tone, and don’t be afraid to experiment with layering different colors to achieve the desired effect.
Finally, be patient with yourself and enjoy the process of creating your painting. With practice and persistence, you will continue to improve your skills and produce even more stunning works of art.
| Key takeaways: |
| – Watercolor pencils offer control and versatility for painting still life compositions |
| – Start with a well-planned composition and build up layers gradually |
| – Pay attention to values and hues, and experiment with layering colors |
| – Be patient and enjoy the process of creating your painting |
With these tips and techniques in mind, you can create beautiful and realistic still life paintings with watercolor pencils. Happy painting!