
How to Paint a Realistic Portrait with Watercolor Markers
Watercolor markers are a versatile and convenient medium for creating beautiful artwork. They are perfect for painting realistic portraits, as they allow you to create delicate, subtle shades and fine details. In this article, we will guide you through the process of painting a realistic portrait with watercolor markers.
Materials Required
Before you begin, you will need to gather the following materials:
- Watercolor markers in a range of colors
- Watercolor paper
- Watercolor brushes
- Water
- Pencil and eraser
- Reference photo of the portrait you want to paint
Make sure to choose high-quality materials for the best results.
Step-by-Step Guide
Now that you have your materials ready, follow these steps to paint a realistic portrait with watercolor markers:
- Start by sketching the outline of the portrait lightly with a pencil.
- Use the watercolor markers to create a base layer of color, starting with the lightest shades and gradually building up to the darker tones.
- Blend the colors together using a wet brush, being careful not to overwork the paper.
- Add finer details and shadows with darker shades of the markers, using a light touch.
- Continue to layer and blend the colors until you achieve the desired level of realism.
With practice, you can use watercolor markers to create stunning portraits that capture the essence of your subject. Follow these steps and experiment with different techniques to discover your own unique style.
What are Watercolor Markers?
Watercolor markers are a popular and versatile medium used by artists and hobbyists alike. They are essentially markers filled with watercolor ink, which makes them ideal for creating vibrant and colorful artwork. Unlike traditional watercolors, watercolor markers are portable and easy to use on-the-go.
Watercolor markers come in a variety of colors and can be used to create a range of effects, from blending and shading to fine details and textures. They can be used on a variety of surfaces, including paper, canvas, and even fabric.
Types of Watercolor Markers
There are two main types of watercolor markers: dye-based and pigment-based. Dye-based markers are more affordable and come in a wider range of colors, but they tend to fade over time. Pigment-based markers are more expensive, but they are more lightfast and tend to last longer.
How to Use Watercolor Markers
To use watercolor markers, simply apply the marker to your chosen surface and blend with a wet brush or water brush. You can also layer colors for a more complex effect. Watercolor markers can also be used to create a range of textures, from fine lines to broad washes.

Choosing the Right Paper
When it comes to creating a realistic portrait with watercolor markers, choosing the right paper is just as important as selecting the right markers. The paper you use can greatly affect the final outcome of your portrait, so it is essential to choose wisely.
Weight and Texture
The weight and texture of the paper you choose will determine how the watercolor markers interact with the surface. Heavier paper with a rough texture will absorb more pigment and create a more textured look, while lighter weight paper with a smoother texture will create a smoother, more polished look.
It is important to note that heavier paper may require more layers of color to achieve the desired level of saturation, while lighter weight paper may be more prone to buckling or warping as it absorbs moisture from the markers.
Sizing
The sizing of the paper refers to the treatment applied to the surface to control its absorbency. Papers that are unsized or have a low sizing content will absorb more pigment and create a more textured look, while papers with a higher sizing content will absorb less pigment and create a smoother look.
When selecting paper for a watercolor portrait, it is recommended to choose a paper with a medium to high sizing content to achieve a balance between texture and smoothness.
| Weight | Texture | Sizing |
|---|---|---|
| Heavy | Rough | Low |
| Light | Smooth | High |
Overall, the paper you choose will depend on your personal preference and the desired outcome of your portrait. Experiment with different weights, textures, and sizing to find the perfect paper for your watercolor portrait.
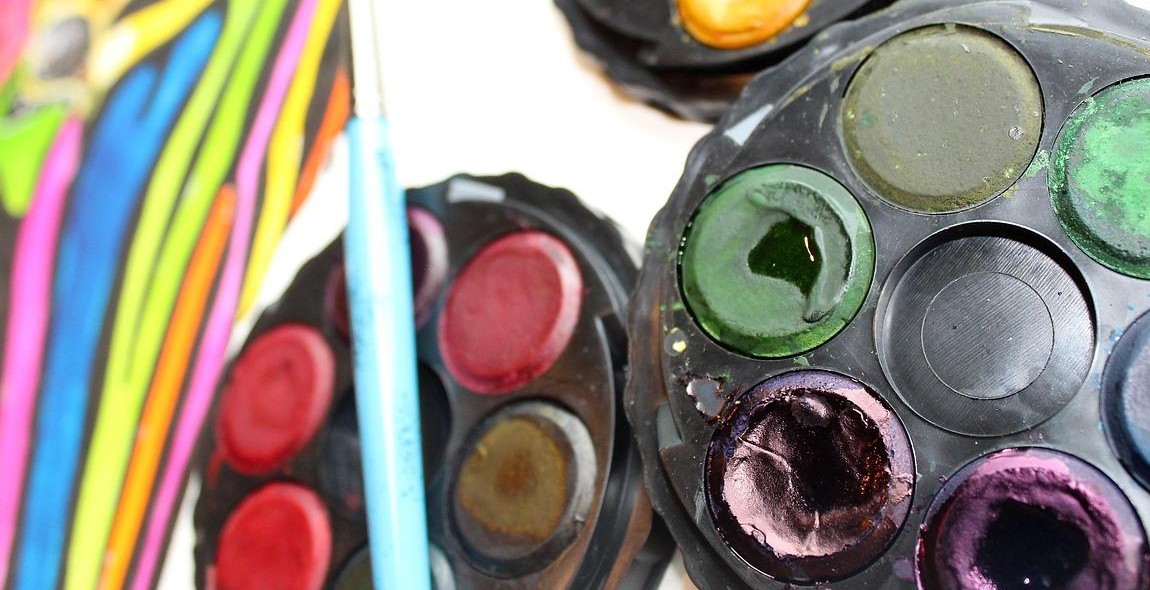
Choosing the Right Markers
Choosing the right watercolor markers is essential to achieving a realistic portrait. Consider the brand and color range of the markers before making a purchase.
Brand
There are several brands of watercolor markers available in the market, and each brand has its unique features. Some of the popular brands include Winsor & Newton, Tombow, Copic, and Prismacolor. Winsor & Newton markers are known for their high-quality pigments, while Tombow markers are known for their dual tips. Copic markers are refillable, and Prismacolor markers have a wide color range.
Color Range
The color range of the markers is also an important factor to consider. Look for a set of markers that has a wide range of colors to choose from. This will give you the flexibility to mix and match colors to achieve the desired shade and tone. Some markers come in sets of 12, while others come in sets of 24 or more. Consider purchasing a set with a higher number of markers if you are looking for more color options.
| Brand | Color Range |
|---|---|
| Winsor & Newton | 72 colors |
| Tombow | 96 colors |
| Copic | 358 colors |
| Prismacolor | 200 colors |
Choosing the right watercolor markers can make a big difference in the final outcome of your portrait. Consider the brand and color range before making a purchase to ensure that you have the right tools for the job.
Preparing Your Workspace
Before you start painting with watercolor markers, it’s important to prepare your workspace. This will help ensure that you have a comfortable and organized environment to work in, which can ultimately improve the quality of your artwork.
Gathering Materials
The first step in preparing your workspace is to gather all the necessary materials. Here is a list of the materials you will need:
- Watercolor markers
- Watercolor paper
- Paintbrushes
- Water cup
- Paper towels
You may also want to have a pencil and eraser on hand to sketch out your portrait before you start painting.
Setting Up Your Workspace
Once you have all your materials, it’s time to set up your workspace. Here are some tips:
- Find a flat surface to work on, such as a desk or table.
- Cover your work surface with a protective material, such as a plastic tablecloth or newspaper.
- Make sure you have good lighting so you can see the colors clearly.
- Set up your water cup and paper towels nearby for easy access.
| Tip: | Consider using a watercolor palette to mix and blend your colors. This will help you create a wider range of shades and tones. |
|---|
By following these steps, you can create a comfortable and organized workspace that will help you create a beautiful and realistic portrait with watercolor markers.

Sketching Your Portrait
Before you start painting your portrait, it’s important to sketch out the basic structure of your subject. This will help you to create a more realistic and accurate representation of them, and will also give you a framework to work within as you start to add color and detail.
Choosing Your Reference Photo
The first step in sketching your portrait is to choose a reference photo to work from. This should be a clear, high-quality image that shows your subject’s face and features in detail. Look for a photo that has good lighting and a clear focus, and try to find a pose and expression that you find interesting or emotive.
Transferring the Sketch
Once you have your reference photo, you can start to sketch out the basic structure of your portrait. You can either draw directly onto your watercolor paper using a pencil, or you can use tracing paper to transfer your sketch from your reference photo.
When sketching your portrait, focus on capturing the overall shape and proportions of your subject’s face and features. Start with a light touch and make adjustments as needed, using your reference photo as a guide.
Remember, your sketch doesn’t need to be perfect – it’s just a starting point for your painting. Once you have your basic structure in place, you can start to add color and detail to bring your portrait to life.
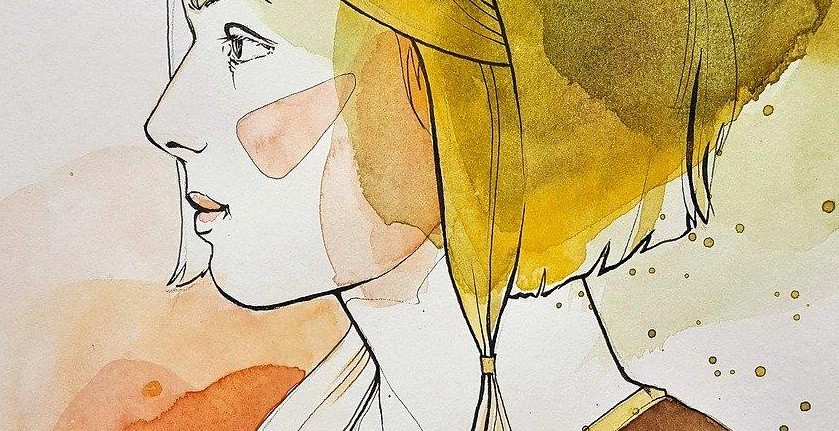
Painting Your Portrait
Now that you have gathered your supplies and have a basic understanding of watercolor marker techniques, it’s time to start painting your portrait. The following steps will guide you through the process:
Layering Colors
Start by sketching the outline of the portrait lightly with a pencil. Then, begin layering colors on the face using light strokes. Start with the lightest colors and gradually build up to the darker ones. Use a light touch to avoid saturating the paper too quickly. Remember to keep the skin tones realistic by using a variety of colors to create depth and dimension.
Creating Depth and Shadows
To create depth and shadows, use darker colors to add shading to the areas of the face that would naturally be in shadow. Use a light touch and build up the color gradually to avoid over-saturating the paper. Blend the colors together with a damp brush to create a seamless transition between the light and dark areas.
Adding Details
Once you have established the basic colors and shadows, it’s time to add details to the portrait. Use fine-tipped markers or a small brush to add details such as the eyes, nose, and mouth. Take your time and work slowly to ensure that the details are accurate and realistic. Remember to use a light touch and build up the colors gradually to avoid over-saturating the paper.
| 1. | Work from light to dark. |
| 2. | Blend colors together with a damp brush. |
| 3. | Use fine-tipped markers or a small brush for details. |
With practice, you will become more comfortable with watercolor markers and be able to create even more realistic portraits. Remember to take your time and work slowly, building up the colors gradually to achieve the desired effect. Happy painting!
Final Touches and Finishing Up
Now that your portrait is complete, it’s time to add those final touches and finishing up. This section will cover removing masking fluid, fixing mistakes, and signing and framing your work.
Removing Masking Fluid
If you used masking fluid to protect certain areas of your painting, it’s time to remove it. Gently rub the masking fluid with your fingers or use an eraser to remove it. Make sure the paper is completely dry before removing the masking fluid to avoid tearing the paper.
Fixing Mistakes
If you notice any mistakes, don’t panic. You can fix them by using a damp brush to lift the paint or by adding more layers of paint to cover it up. Remember, mistakes are part of the learning process, and they can often lead to happy accidents.
Signing and Framing Your Work
Finally, it’s time to sign and frame your work. Use a small, fine-tipped brush and your favorite color to sign your name and date on the bottom right corner of your painting.
When it comes to framing, choose a frame that complements your painting and enhances its beauty. Make sure the frame is sturdy and fits your painting perfectly. If you’re unsure about framing, you can always take your painting to a professional framer.
Conclusion
Painting a realistic portrait with watercolor markers requires patience, practice, and a willingness to learn. By following the steps outlined in this article, you can create a stunning portrait that you’ll be proud to display in your home or give as a gift to your loved ones. Remember, the key is to have fun and enjoy the process.