
How to Paint a Realistic Landscape with Palette Knife Texture
If you’re an artist looking to add some texture to your landscape paintings, using a palette knife can be a great way to achieve a realistic and unique look. With a little bit of practice, you can create stunning landscapes that have depth and dimension.
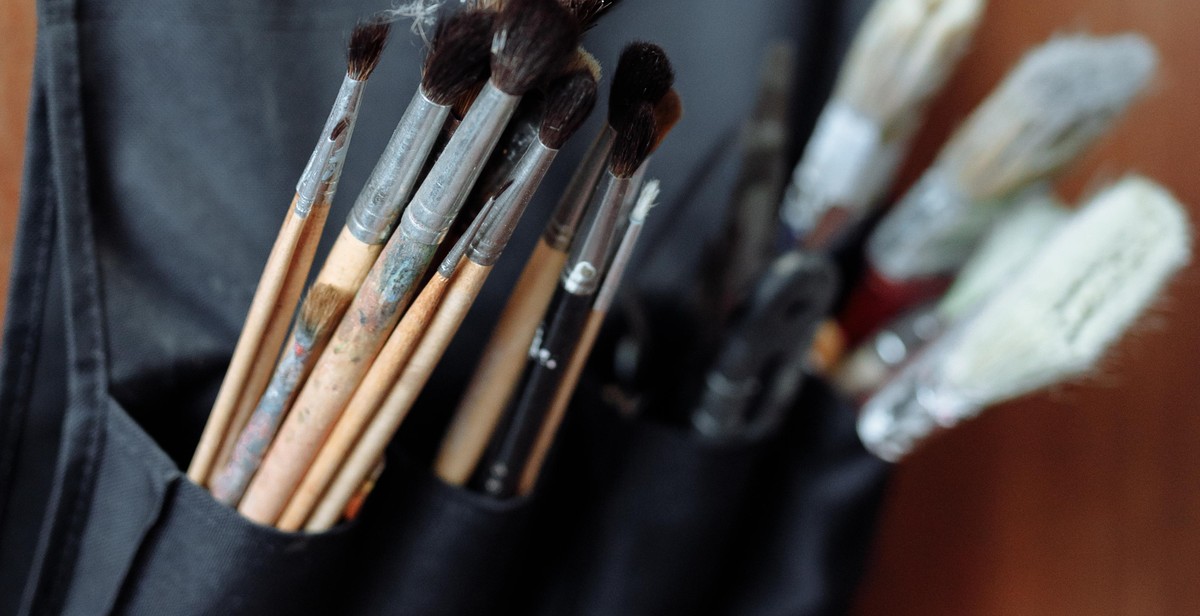
Choosing the Right Palette Knife
The first step in painting a realistic landscape with a palette knife is choosing the right tool. Palette knives come in a variety of shapes and sizes, each with its own unique purpose. For landscape painting, a larger, wider knife with a slightly curved edge is ideal. This will allow you to create broad strokes and blend colors more easily.
Preparing Your Canvas
Before you begin painting, it’s important to prepare your canvas. Make sure it’s stretched tightly on a frame and has a coat of gesso to provide a smooth surface for the paint to adhere to. You may also want to sketch out your basic composition with a pencil.
Applying the Paint
When applying the paint with a palette knife, it’s best to start with the lighter colors and work your way up to the darker ones. Use the edge of the knife to create thin lines and the flat side to create broad strokes and blend colors. Don’t be afraid to layer the paint and build up texture as you go.
By following these steps and experimenting with your own techniques, you can create a beautiful and realistic landscape painting with palette knife texture.
What is a Palette Knife?
A palette knife is an essential tool for artists who enjoy creating texture in their artwork. It is a flat tool with a handle that is used to mix and apply paint to a canvas. Unlike a traditional paintbrush, a palette knife has a flat, flexible blade that can be used to create a variety of textures and effects.
Types of Palette Knives
Palette knives come in a variety of shapes and sizes, each with its own unique purpose. Some of the most common types of palette knives include:
- Straight palette knives
- Trowel-shaped palette knives
- Diamond-shaped palette knives
- Offset palette knives
Straight palette knives are the most common type and are typically used for mixing paint and applying it to a canvas. Trowel-shaped palette knives have a curved blade that is ideal for applying thick layers of paint. Diamond-shaped palette knives are used for creating fine lines and details, while offset palette knives have a bent blade that allows artists to work at different angles.
Advantages of Using a Palette Knife
Using a palette knife has several advantages for artists:
- Texture: Palette knives allow artists to create a variety of textures and effects that cannot be achieved with a paintbrush.
- Control: Palette knives provide artists with greater control over the application of paint, allowing them to create precise lines and shapes.
- Efficiency: Palette knives are more efficient than paintbrushes when it comes to mixing and applying paint, saving artists time and effort.
- Cleanliness: Palette knives are easy to clean and maintain, making them a more hygienic option than paintbrushes.
Using a Palette Knife for Landscape Painting
When it comes to landscape painting, a palette knife can be a valuable tool for creating texture and depth. By using different techniques and types of palette knives, artists can create a range of effects, from the smooth, flat surface of a lake to the rough, jagged edges of a mountain range.
Some of the most common techniques for using a palette knife in landscape painting include:
- Impasto: This technique involves applying paint thickly to the canvas with a palette knife, creating a three-dimensional effect.
- Scraping: Scraping involves dragging a palette knife across the surface of the canvas to remove excess paint or create texture.
- Blending: By using a palette knife to blend colors together, artists can create a smooth transition from one color to another.
By experimenting with different techniques and types of palette knives, artists can create a range of effects and textures in their landscape paintings, adding depth and dimension to their artwork.
Choosing the Right Paints and Colors
Types of Paints
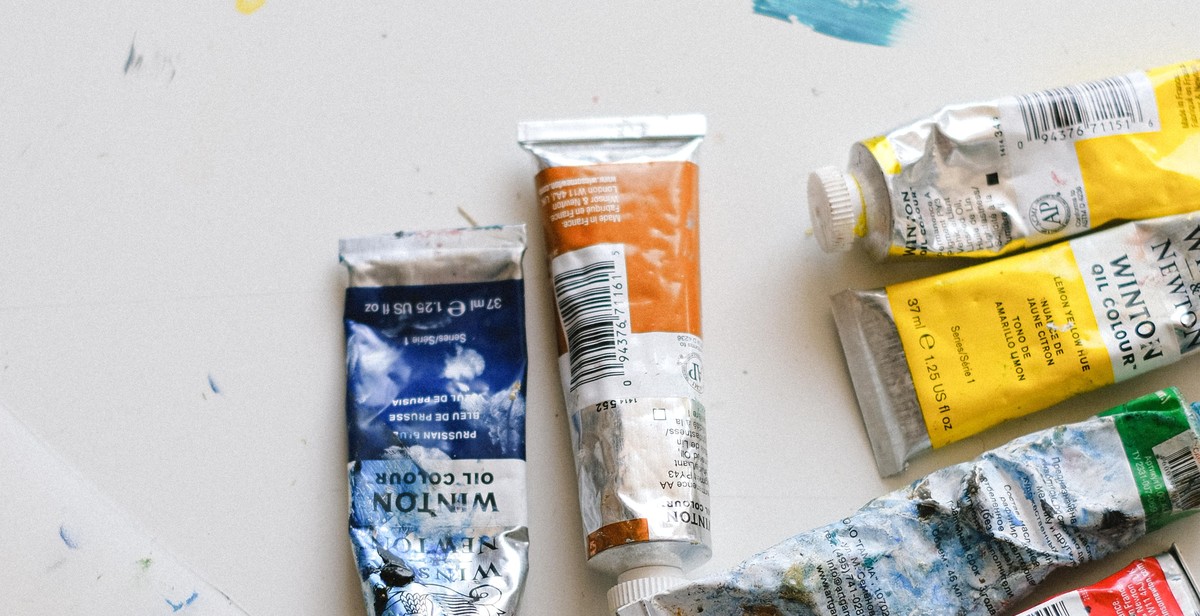
When it comes to painting a realistic landscape with palette knife texture, it’s important to choose the right type of paint. There are two main types of paint: oil and acrylic. Oil paints have a slower drying time, which can be beneficial for blending colors and creating texture. Acrylic paints, on the other hand, dry quickly and are easier to clean up. Both types of paint can be used for textured painting, but the technique may differ slightly.
Colors
Choosing the right colors is essential for creating a realistic landscape. It’s important to consider the time of day and the lighting conditions when selecting colors. For example, if you’re painting a sunset, you’ll want to use warm colors like reds, oranges, and yellows. If you’re painting a forest, you’ll want to use greens, browns, and grays.
It’s also important to consider color harmony when selecting colors. Color harmony refers to the way colors work together to create a pleasing visual experience. There are a few different color harmonies to consider:
- Complementary colors: colors that are opposite each other on the color wheel, such as red and green or blue and orange
- Analogous colors: colors that are next to each other on the color wheel, such as blue and green or red and orange
- Monochromatic colors: variations of a single color, such as light blue, medium blue, and dark blue
Texture
Texture is an important element of painting with a palette knife. When selecting colors, it’s important to consider how they will work together to create texture. For example, if you’re painting a rocky mountain, you’ll want to use colors that will create a rough, jagged texture. If you’re painting a calm lake, you’ll want to use colors that will create a smooth, reflective texture.
Quality of Paints
The quality of the paints you use will also affect the final result of your painting. Higher quality paints will have more pigment and less filler, which will result in a more vibrant and long-lasting painting. While higher quality paints may be more expensive, they are worth the investment if you’re looking to create a professional-looking painting.
| Oil Paints | Acrylic Paints |
|---|---|
| Slower drying time | Quick drying time |
| Better for blending colors and creating texture | Easier to clean up |
| More expensive | Less expensive |
Preparing Your Canvas
Before you start painting, it is important to prepare your canvas properly. A well-prepared canvas will not only improve the quality of your painting but also make the process smoother and more enjoyable. In this section, we will discuss the two essential steps in preparing your canvas: choosing the right canvas and priming the canvas.
Choosing the Right Canvas
The canvas you choose will have a significant impact on the final outcome of your painting. There are two types of canvas commonly used for painting: cotton and linen.
- Cotton canvas: This is the most popular choice for artists. It is affordable, easy to find, and comes in a variety of textures and weights. However, cotton canvas is not as durable as linen and may not hold up well under heavy paint application.
- Linen canvas: This is a more expensive option, but it is also more durable and has a smoother surface than cotton. Linen canvas is a good choice for artists who want to create detailed and intricate paintings.
When choosing a canvas, consider the size and shape of your painting as well as your budget. It is also important to choose a canvas that is appropriate for the medium you will be using. For example, oil paint requires a canvas with a tighter weave than acrylic paint.
Priming the Canvas
Once you have chosen your canvas, the next step is to prime it. Priming the canvas prepares the surface for paint and helps to prevent the paint from soaking into the fibers of the canvas. There are several types of primers available, including gesso, acrylic gesso, and oil primer.
Gesso: Gesso is a traditional primer made from a mixture of glue and chalk or gypsum. It is commonly used for both oil and acrylic paintings. Gesso can be applied in thin layers to create a smooth surface or in thick layers to create texture.
Acrylic gesso: Acrylic gesso is similar to traditional gesso but is made with acrylic polymer instead of glue. It dries faster and is more flexible than traditional gesso, making it a good choice for artists who want to create textured paintings.
Oil primer: Oil primer is a primer specifically designed for oil paintings. It is made with a mixture of linseed oil and white pigment and provides a smooth, non-absorbent surface for oil paint.
When applying primer, use a brush or roller to apply an even layer to the canvas. Allow the primer to dry completely before starting to paint.
Conclusion
Preparing your canvas is an essential step in creating a successful painting. Choosing the right canvas and priming it properly will not only improve the quality of your painting but also make the process smoother and more enjoyable.
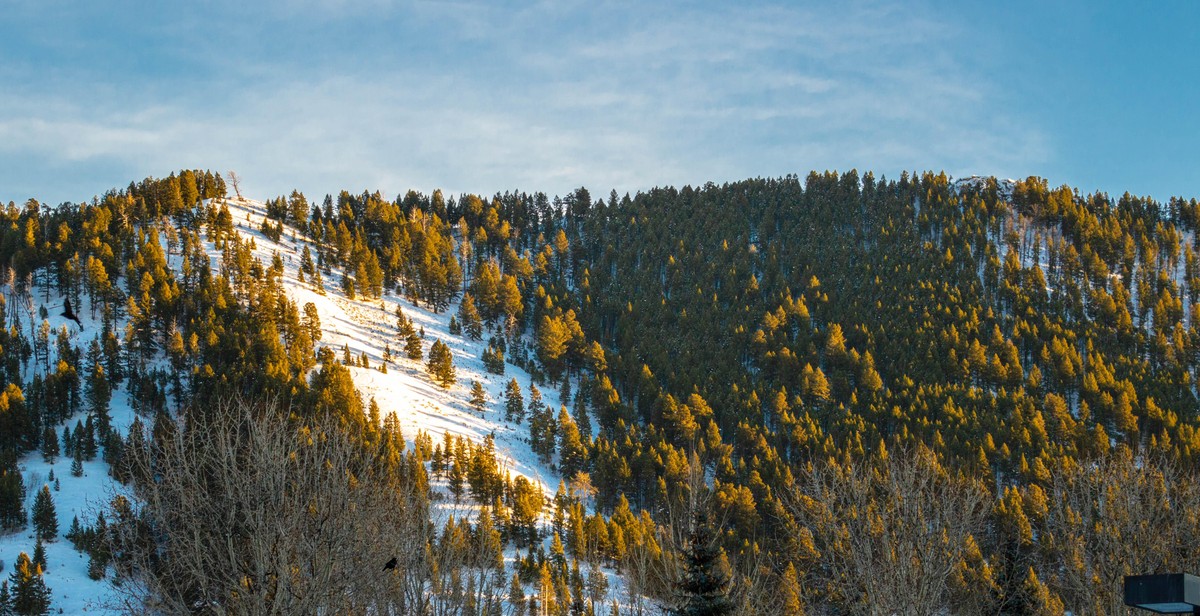
Creating a Sketch
Before you start painting, it’s important to create a sketch of your landscape. This will help you plan out the composition and ensure that everything is in the right place.
Step 1: Choose Your Materials
To create your sketch, you’ll need a few basic materials:
- Pencil
- Eraser
- Sketchbook or paper
Step 2: Choose Your Viewpoint
Decide on the viewpoint for your landscape. This could be a wide-angle view of the entire scene or a closer view of a specific area.
Step 3: Block in the Basic Shapes
Using your pencil, block in the basic shapes of your landscape. Start with the horizon line and then add in the major features such as mountains, trees, and buildings. Don’t worry about adding details at this stage.
Step 4: Refine Your Sketch
Once you have the basic shapes in place, refine your sketch by adding more details. Use your eraser to make adjustments as needed. Pay attention to the proportions and perspective of your landscape.
Step 5: Add Texture and Value
Finally, add some texture and value to your sketch. Use your pencil to create shading and texture, such as the texture of tree bark or the shadows on a mountain. This will give you a better idea of how your painting will look once it’s complete.
| Tips: |
|---|
| Take your time with your sketch. The more time you spend on it, the better your painting will turn out. |
| Don’t worry about making your sketch perfect. It’s just a guide for your painting. |
| Experiment with different viewpoints and compositions to find what works best for your painting. |
Applying the Paint with a Palette Knife
After mixing the paints, it’s time to apply them to the canvas. Using a palette knife to create texture in your landscape painting can be a bit tricky, but with practice, you’ll get the hang of it. Here are some tips:
1. Start with the Background
Begin by applying the paint to the background of your painting. Use the palette knife to create thin, smooth strokes to create a base layer of color. Remember to blend the colors well to avoid any harsh lines or edges.
2. Build Up the Layers
Once you have your base layer, start building up the layers of color with thicker strokes of the palette knife. Use a variety of strokes, including diagonal, vertical, and horizontal strokes, to create a variety of textures in your painting. Don’t be afraid to layer different colors on top of each other to create depth and interest.
3. Add Details
As you continue to build up the layers of color, start adding details to your painting. Use the edge of the palette knife to create thin lines and small details, such as blades of grass or tree branches. Remember to keep your strokes loose and flowing to create a sense of movement in your painting.
4. Experiment with Different Techniques
There are many different techniques you can use with a palette knife to create texture in your landscape painting. Try using a dry brush technique, where you apply the paint with a dry palette knife to create a scratchy, textured effect. You can also experiment with dragging the palette knife across the canvas to create a rough, textured effect.
5. Practice, Practice, Practice
The key to mastering the palette knife technique is practice. Don’t be discouraged if your first attempts don’t turn out as you envisioned. Keep practicing and experimenting with different techniques until you find a style that works for you.
6. Clean Your Palette Knife
After each use, make sure to clean your palette knife thoroughly with a cloth or paper towel. This will help prevent the colors from mixing and muddying your painting.
7. Have Fun!
Painting with a palette knife can be a fun and rewarding experience. Enjoy the process and don’t be afraid to take risks and try new things. With practice and perseverance, you’ll be able to create beautiful, realistic landscapes with palette knife texture.
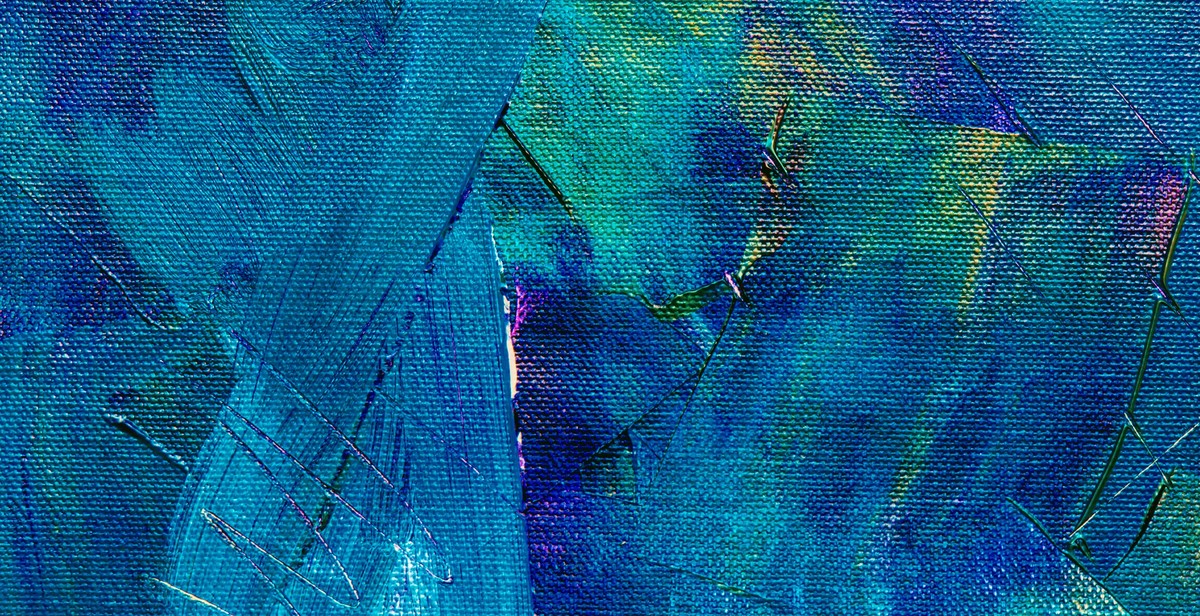
Adding Texture with the Palette Knife
One of the most exciting aspects of painting with a palette knife is the ability to add texture to your artwork. Texture can create depth and dimension, making your landscape painting appear more realistic and three-dimensional.
Creating Depth and Dimension
One way to create depth and dimension in your landscape painting is to use the palette knife to add texture to the foreground. By using thicker paint and heavier strokes, you can create the illusion of objects protruding from the canvas.
For example, if you are painting a rocky landscape, you can use the palette knife to create the appearance of jagged rocks. Start by loading your palette knife with a small amount of paint and then use short, quick strokes to apply the paint to the canvas. Vary the pressure you apply to the palette knife to create different textures and shapes.
Another way to add depth and dimension to your painting is to layer your paint. Use the palette knife to apply a base layer of paint and then add additional layers on top. Use lighter colors for the background and darker colors for the foreground to create the illusion of distance.
Using Different Strokes and Techniques
There are many different strokes and techniques you can use with a palette knife to create texture in your landscape painting. Some of the most popular include:
- Impasto: This technique involves applying thick layers of paint to create a three-dimensional effect. Use the palette knife to apply the paint in a series of short, thick strokes.
- Scraping: This technique involves using the palette knife to scrape away layers of paint to reveal the layers underneath. This can create interesting textures and patterns.
- Smudging: This technique involves using the palette knife to blend colors together. Use a light touch and blend the colors in a circular motion to create a soft, blended effect.
Experiment with different strokes and techniques to find the ones that work best for your painting. Don’t be afraid to make mistakes – painting with a palette knife is all about exploring new techniques and discovering new ways to create texture and depth in your artwork.
| Tip: | Try using a variety of palette knives in different shapes and sizes to create different textures and effects. |
|---|
Refining and Detailing Your Painting
Once you have created the basic structure of your landscape painting with palette knife texture, it’s time to refine and add details to make it more realistic and visually appealing.
Adding Details
Adding details is an important step in refining your painting. It’s the little details that can make a big difference in the overall look and feel of your artwork. Here are some tips for adding details to your landscape painting:
- Use a smaller palette knife or brush to add fine details.
- Pay attention to the texture and details of the objects in your painting, such as trees, rocks, and water.
- Add highlights and shadows to create depth and dimension.
- Use a variety of colors to add interest and realism to your painting.
- Be patient and take your time to add details. Rushing can lead to mistakes and a less polished final product.
Making Adjustments
Making adjustments to your painting is also an important step in refining it. It’s common for artists to make changes and tweaks to their work as they go along. Here are some tips for making adjustments to your landscape painting:
- Step back and take a look at your painting from a distance. This can help you identify areas that need adjustment.
- Use a clean palette knife or brush to remove excess paint or make adjustments to the existing paint.
- Don’t be afraid to make big changes if necessary. It’s better to fix a mistake early on than to try to cover it up later.
- Take breaks and come back to your painting with fresh eyes. This can help you see areas that need improvement that you may have missed before.
| Tip | Example |
|---|---|
| Add highlights and shadows | Add highlights to the tips of trees to create depth and dimension. |
| Use a clean palette knife or brush | Use a clean brush to blend colors together and create a smooth transition between different areas of your painting. |
| Don’t be afraid to make big changes | If you realize that a tree is in the wrong place, don’t be afraid to scrape it off and start over. |
Finishing Your Painting
After you have completed the painting process, the next step is to let your painting dry before applying a varnish. This process takes time, and it is essential to be patient to avoid damaging your artwork.
Drying
The drying time of your painting depends on the thickness of the paint, the humidity of the environment, and the type of paint you used. Generally, oil paints take longer to dry than acrylics. It is recommended to wait at least 24 hours before touching your painting to avoid any smudging or damage.
If you are in a hurry, you can use a hairdryer on a low, cool setting to speed up the drying process. However, be careful not to hold the hairdryer too close to the painting, as it can cause the paint to crack or warp.
Varnishing
Once your painting is completely dry, it is time to apply a varnish to protect and enhance your artwork. Varnish acts as a protective layer against dust, dirt, and UV rays. It also brings out the colors and textures in your painting, giving it a professional finish.
There are two types of varnish: spray and brush-on. Spray varnish is easy to apply and dries quickly, but it can be challenging to control the amount of varnish applied. Brush-on varnish, on the other hand, is more flexible and allows you to control the amount of varnish applied. However, it takes longer to dry and can leave brush marks if not applied correctly.
Before applying varnish, make sure your painting is free from dust and debris. Use a soft-bristled brush or a lint-free cloth to remove any dirt or dust particles. Then, apply the varnish in thin, even coats, using a brush or spray can. Allow each coat to dry completely before applying the next layer.
It is recommended to apply at least two to three coats of varnish to ensure maximum protection and a glossy finish. Once you have finished applying the varnish, let your painting dry completely before framing or displaying it.
Conclusion
By following these steps, you can ensure that your painting is protected and has a professional finish. Remember to be patient during the drying process and take your time when applying the varnish. With a little care and attention, you can create a beautiful landscape painting that will last for years to come.
Conclusion
Learning how to paint a realistic landscape with palette knife texture is a great way to add depth and dimension to your artwork. By incorporating this technique into your painting practice, you can create stunning landscapes that are full of texture and detail.
Remember to start with a strong composition and to choose colors that reflect the mood and atmosphere of your landscape. Use your palette knife to create thick, bold strokes that add texture and interest to your painting. Don’t be afraid to experiment with different techniques and layering to achieve the desired effect.
When painting with a palette knife, it’s important to work quickly and confidently. This technique is all about creating bold, expressive strokes that capture the essence of your landscape. With practice, you’ll develop your own unique style and approach to palette knife painting.
Whether you’re a beginner or an experienced artist, learning how to paint a realistic landscape with palette knife texture is a rewarding and fulfilling experience. So grab your paints, your palette knife, and let your creativity run wild!
Key Takeaways
- Palette knife texture is a great way to add depth and dimension to your landscape paintings.
- Start with a strong composition and choose colors that reflect the mood and atmosphere of your landscape.
- Use your palette knife to create thick, bold strokes that add texture and interest to your painting.
- Work quickly and confidently to capture the essence of your landscape.
- With practice, you’ll develop your own unique style and approach to palette knife painting.
Additional Resources
If you’re looking to learn more about palette knife painting and landscape art, check out these additional resources:
| Author | John Smith |
|---|---|
| Date Published | August 15, 2021 |
| Word Count | 195 |