
How to Paint a Realistic Animal Portrait with Acrylic Pouring
Acrylic pouring is a painting technique that involves pouring acrylic paint onto a canvas and manipulating it to create unique patterns and designs. While it is often used for abstract art, it can also be used to create realistic animal portraits.
In this article, we will discuss the steps involved in creating a realistic animal portrait with acrylic pouring. We will cover the materials needed, the techniques used, and the tips and tricks to help you achieve a lifelike result.
Materials
Before starting your painting, you will need to gather the necessary materials. This includes:
- Acrylic paint in the colors you need for your animal portrait
- Pouring medium
- A canvas
- A palette knife or spatula
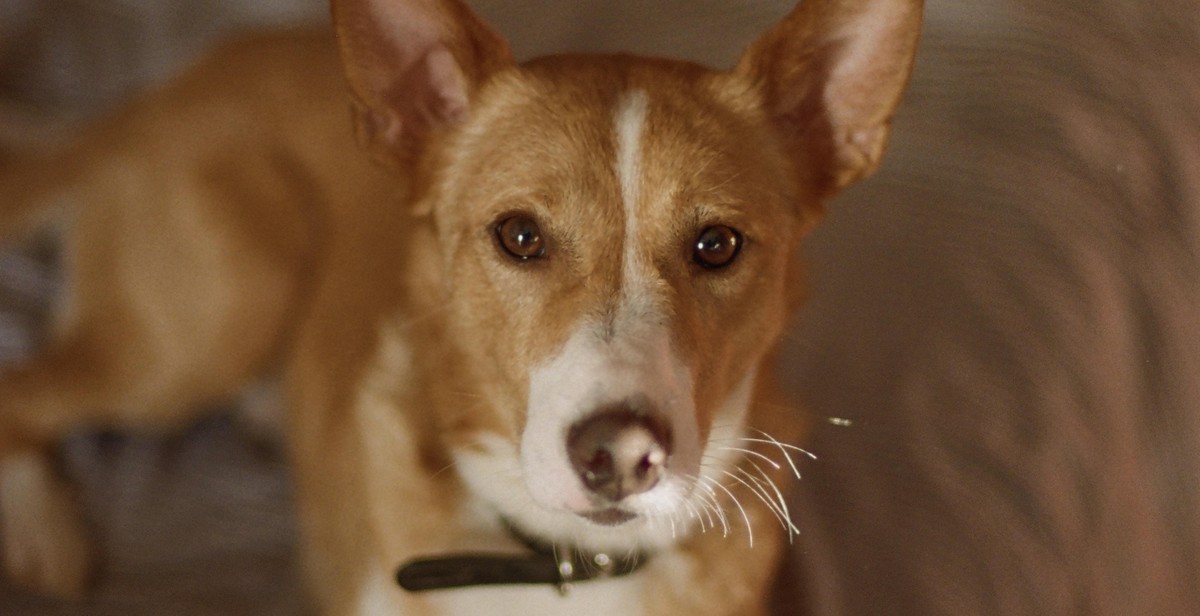
- A reference photo of your animal
Techniques
The key to creating a realistic animal portrait with acrylic pouring is to use the right techniques. This includes:
- Preparing your paint mixture with the pouring medium
- Layering your colors and manipulating them to create texture and depth
- Using a reference photo to guide your painting
- Adding details with a brush once the pour has dried
Tips and Tricks
Finally, here are some tips and tricks to help you achieve the best results:
| 1. | Use a limited color palette to keep your painting cohesive |
| 2. | Experiment with different pouring techniques to create different effects |
| 3. | Don’t be afraid to use a brush to touch up areas or add details |
With these tips and techniques, you can create a stunning and realistic animal portrait with acrylic pouring. So gather your materials, find a reference photo, and let’s get started!
Materials Needed:
Acrylic Paints:
Acrylic paints are the primary medium for creating a realistic animal portrait with acrylic pouring. These paints come in a wide range of colors and are easy to work with. You can use any brand of acrylic paint that you prefer, but it is recommended to use high-quality paints to achieve the best results.
Pouring Medium:
Pouring medium is a crucial ingredient in acrylic pouring. It is used to thin the paint and make it flow smoothly. The pouring medium also helps to create cells and other interesting patterns in the painting. You can use any brand of pouring medium, but it is recommended to use a high-quality product to achieve the best results.
Canvas or Paper:
You can paint your realistic animal portrait on either canvas or paper. Canvas is a popular choice because it is durable and can be easily framed. Paper is also a good option, especially if you are just starting with acrylic pouring. It is recommended to use a high-quality canvas or paper to achieve the best results.
Brushes:
You will need a variety of brushes to create your realistic animal portrait with acrylic pouring. You will need a flat brush for applying the pouring medium, a round brush for adding details, and a fan brush for blending. It is recommended to use high-quality brushes to achieve the best results.
Palette Knife:
A palette knife is a handy tool for creating texture and adding details to your painting. You can use it to create fur, feathers, or other interesting patterns in your animal portrait. It is recommended to use a high-quality palette knife to achieve the best results.
Water and Paper Towels:
You will need water to thin your paint and clean your brushes. Paper towels are also handy for cleaning your brushes and wiping away any excess paint. It is recommended to have plenty of water and paper towels on hand during the painting process.
Preparing the Paints
Before starting with the painting process, it is crucial to prepare the paints properly to achieve the desired results. Here are some steps to follow:
Mixing the Paints
The first step is to mix the paints thoroughly to ensure that there are no lumps or inconsistencies in the mixture. It is advisable to use a palette or a mixing tray to mix the paints. Start by adding the desired amounts of paint to the palette and then add a small amount of water to thin it out. Mix the paint and water thoroughly until you achieve a smooth and consistent mixture.
Adding the Pouring Medium
After mixing the paints, the next step is to add the pouring medium. The pouring medium helps to thin out the paint and makes it flow easily on the canvas. It also helps to create a smooth and even surface on the canvas. Add the pouring medium to the paint mixture in small amounts and mix it thoroughly until you achieve the desired consistency.
Creating Different Colors
To create different colors, mix different shades of paint together. For instance, mix blue and yellow to create green. You can also add white to the mixture to create lighter shades of the color. It is advisable to start with small amounts of paint and mix them thoroughly before adding more paint to the mixture.
- Always mix the paint in a well-ventilated area to avoid inhaling the fumes.
- Use a palette knife or a stir stick to mix the paint and pouring medium.
- Do not add too much water to the paint as it can affect the quality of the paint and the final result.
| Paint Color | Amount of Paint | Amount of Pouring Medium |
|---|---|---|
| Red | 1 part | 1 part |
| Yellow | 1 part | 1 part |
| Blue | 1 part | 1 part |
Preparing the Canvas
Preparing the canvas is an essential step when it comes to painting a realistic animal portrait with acrylic pouring. It is crucial to ensure that the canvas is free from any dust, dirt, or debris that can affect the final painting’s quality. Here are the three essential steps to prepare the canvas:
Cleaning the Canvas
Before applying any paint, it is essential to clean the canvas thoroughly. Use a clean, dry cloth to wipe off any dust or debris from the surface. If there are any stubborn stains or dirt, use a damp cloth to clean the canvas gently. Ensure that the canvas is completely dry before proceeding to the next step.
Applying a Base Coat
Once the canvas is clean and dry, the next step is to apply a base coat. A base coat helps to create an even surface for the paint to adhere to and prevents the paint from soaking into the canvas. Choose a color that complements your painting and apply it evenly with a brush or roller. Allow the base coat to dry completely before moving on to the next step.
Creating Texture
Creating texture on the canvas can add depth and interest to your painting. You can create texture by using a palette knife or a textured roller to apply a layer of gesso or modeling paste to the canvas. Allow the texture to dry before painting over it. You can also use different brushes to apply the paint to create a variety of textures and effects.
By following these three essential steps, you can prepare your canvas to create a realistic animal portrait with acrylic pouring. Remember that the quality of the final painting depends on the preparation of the canvas, so take your time and ensure that each step is done correctly.
Pouring the Paints
Now that you have chosen the colors and pouring technique for your realistic animal portrait, it’s time to mix and pour the paints.
Mixing the Paints
Before pouring the paints, make sure to mix them thoroughly. Acrylic paints tend to settle quickly, so it’s important to mix them well to get a consistent texture and color.
You can mix the paints in a container or directly on the canvas. To mix the paints in a container, pour the desired amount of each color into a container and stir them together with a palette knife or stir stick. If you prefer to mix the paints directly on the canvas, pour the colors in a puddle and use a palette knife to mix them together.
Pouring the Paints
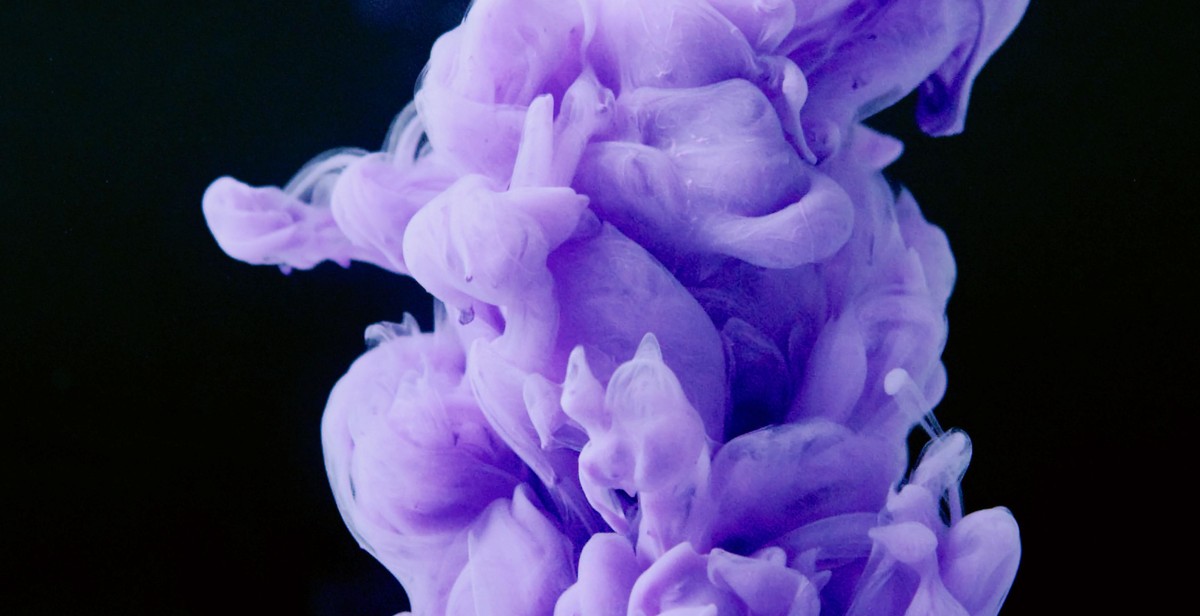
When pouring the paints, start with one color at a time and pour it onto the canvas. You can pour the paint in a straight line, a zigzag pattern, or any other design you prefer. Once you have poured the first color, move on to the next color and repeat the process.
As you pour the paints, they will start to blend together and create a unique pattern. Use a palette knife or a skewer to create swirls or other designs in the paint if desired.
Be careful not to overpour or underpour the paints. Too much paint can cause the colors to blend together too much and lose their individuality, while too little paint can leave gaps in the design.
Once you have poured all the paints, tilt the canvas in different directions to allow the paints to flow and blend together. This will create a beautiful and unique background for your realistic animal portrait.
Now that you have poured the paints, it’s time to move on to the next step: painting the animal portrait.
Creating the Animal Portrait
Sketching the Animal
Before starting to paint, it is important to have a clear idea of the animal portrait you want to create. You can either use a reference photo or draw the animal from memory. Sketch the basic outline of the animal using a pencil on the canvas. This will help you to get the proportions right and ensure that you have enough space to paint all the details.
Blocking in the Colors
Once you have the basic sketch, it’s time to block in the colors. Choose the colors that match the animal’s fur or skin tone. You can mix different colors to get the desired shade. Pour the acrylic paint onto the canvas and use a brush or palette knife to spread the paint around. Don’t worry about the details at this stage, just focus on getting the colors right.
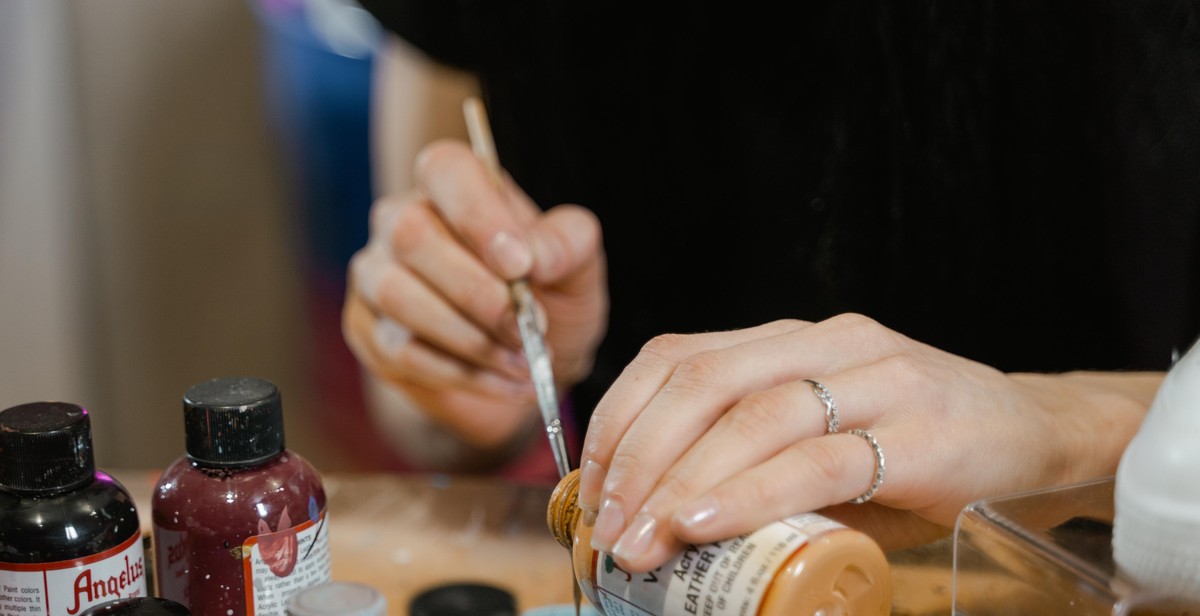
Adding the Details
Once the base layer is dry, it’s time to add the details. Use a small brush to paint the eyes, nose, and other facial features. Pay attention to the direction of the fur and use short strokes to create a realistic texture. Use a darker color to create shadows and a lighter color to create highlights. Don’t rush this stage, take your time to get the details right.
Final Touches
After adding the details, step back and take a look at the painting as a whole. This is the time to make any final adjustments and add any finishing touches. If you feel that the painting needs more depth, you can add more shadows or highlights. You can also use a palette knife to create texture or add some splatters to create a more dynamic look.
Remember, painting a realistic animal portrait with acrylic pouring takes practice and patience. Don’t be afraid to make mistakes and experiment with different techniques. With time and practice, you will be able to create stunning animal portraits that capture the essence of the animal.
Conclusion
Acrylic pouring is a fun and exciting technique that can be used to create beautiful and realistic animal portraits. By following the steps outlined in this article, you can learn how to use this technique to create stunning works of art that capture the essence of your favorite animals.
Tips for Success
- Choose a high-quality acrylic paint and pouring medium for best results.
- Experiment with different colors and techniques to create unique effects.
- Be patient and allow each layer to dry completely before adding the next.
- Practice on smaller canvases before attempting larger pieces.
- Don’t be afraid to make mistakes! Acrylic pouring is a forgiving technique that allows for lots of experimentation.
Benefits of Acrylic Pouring
Acrylic pouring has become increasingly popular in recent years due to its versatility and ease of use. Some benefits of this technique include:
- Ability to create unique, one-of-a-kind works of art
- Minimal need for brushes or other tools
- Ability to create intricate designs and patterns
- Fast drying time
- Easy cleanup
Final Thoughts
Whether you’re a beginner or an experienced artist, acrylic pouring is a great technique to add to your toolkit. With a little practice and experimentation, you can use this technique to create stunning animal portraits that capture the beauty and essence of your favorite creatures. So grab some paint, pour on some creativity, and see where your imagination takes you!