
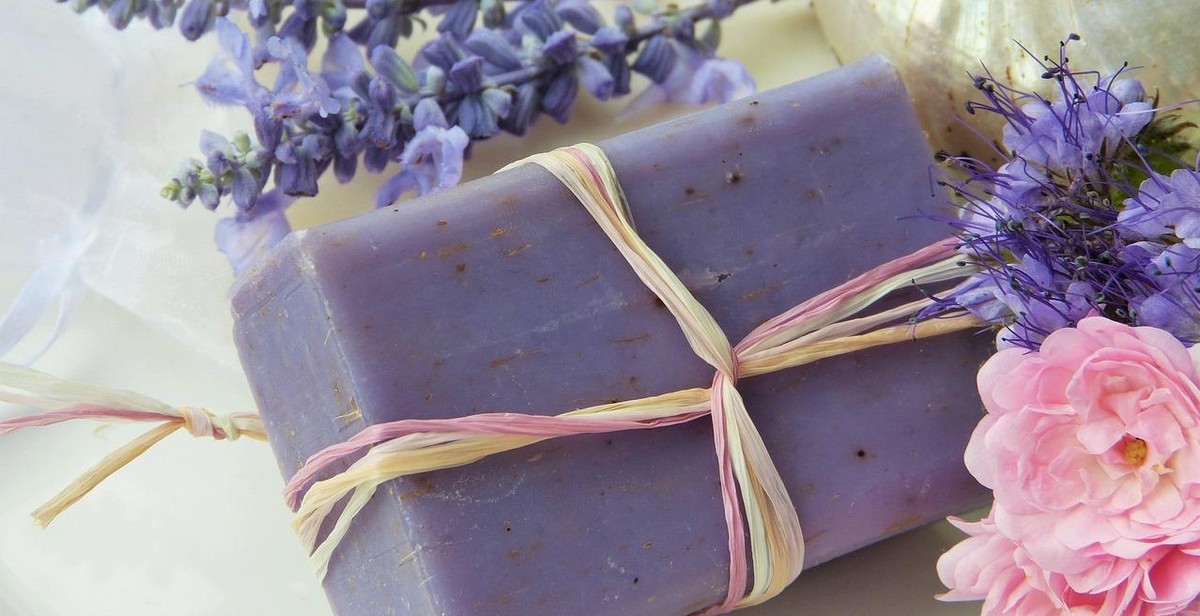
Introduction: Why Make Your Own Soap Bars
Soap bars are an essential part of our daily hygiene routine. However, many commercial soaps contain harsh chemicals and artificial fragrances that can irritate sensitive skin. That’s why more and more people are turning to natural, homemade soap bars.
Making your own soap bars may seem daunting at first, but it’s actually quite simple and can be a fun and rewarding hobby. Not only do homemade soap bars provide a more natural and gentle cleansing experience, but they also allow you to customize the ingredients to suit your individual needs and preferences.
The Benefits of Homemade Soap Bars
One of the main benefits of making your own soap bars is that you have complete control over the ingredients. You can choose high-quality oils and butters that nourish and moisturize the skin, as well as natural additives like herbs, clays, and essential oils that provide additional benefits such as exfoliation, detoxification, and aromatherapy.
In addition, homemade soap bars are often more environmentally friendly than their commercial counterparts. Many commercial soaps come in plastic packaging and contain synthetic ingredients that are harmful to the environment. By making your own soap bars, you can reduce your plastic consumption and use natural, biodegradable ingredients.
Conclusion
If you’re looking for a fun and rewarding DIY project, making your own natural homemade soap bars is a great option. Not only do homemade soap bars provide a more natural and gentle cleansing experience, but they also allow you to customize the ingredients to suit your individual needs and preferences. Plus, they’re often more environmentally friendly than commercial soaps. So why not give it a try?
Ingredients for Making Natural Homemade Soap Bars
Homemade soap bars are a great way to take care of your skin using natural ingredients that are gentle and nourishing. To make your own natural soap bars, you will need the following ingredients:
Base Oils
The base oils are the main ingredients in your soap and will determine the properties of your soap. Some popular base oils include:
- Coconut oil – creates a hard bar with lots of lather
- Olive oil – produces a mild soap with a creamy lather
- Sweet almond oil – adds moisturizing properties to your soap
- Avocado oil – makes a gentle soap that is great for sensitive skin
- Castor oil – contributes to a rich, creamy lather
You can use a single oil or a combination of oils to create your soap recipe. Be sure to use high-quality oils that are suitable for soap making.
Lye
Lye is an essential ingredient in soap making as it reacts with the oils to create soap. Be sure to handle lye with care and follow all safety precautions when working with it. You can purchase lye at most hardware stores or online.
Additives
Additives are optional ingredients that can enhance the properties of your soap. Some popular additives include:
- Essential oils – add fragrance and therapeutic benefits to your soap
- Herbs – can add color and texture to your soap, as well as skin-loving properties
- Milk – adds creaminess and nourishing properties to your soap
- Honey – adds moisturizing properties and a natural sweetness to your soap
- Clays – can add color and detoxifying properties to your soap
Be sure to research any additives you plan to use and test them in small batches before adding them to your soap recipe.
| Ingredient | Function |
|---|---|
| Base Oils | Main ingredients that determine soap properties |
| Lye | React with oils to create soap |
| Additives | Optional ingredients that enhance soap properties |
Now that you know the basic ingredients for making natural homemade soap bars, you can start experimenting with different oils and additives to create your own unique soap recipes.
Equipment
Making your own natural homemade soap bars requires some basic equipment. Here are the tools you’ll need to get started:
Basic Equipment Needed
- Large Mixing Bowl: You’ll need a large mixing bowl to combine your ingredients and create your soap mixture.
- Measuring Cups and Spoons: Measuring cups and spoons are essential to ensure your ingredients are accurately measured. This is important to ensure the right chemical reaction in your soap mixture.
- Thermometer: A thermometer is crucial to ensure that your soap mixture reaches the correct temperature. This is important for the saponification process to occur.
- Stick Blender: A stick blender is used to mix and blend your soap mixture. It is important to ensure that all the ingredients are evenly mixed.
- Molds: Soap molds are used to shape and form your soap bars. You can use silicone molds, plastic molds, or even repurpose everyday items like milk cartons or Pringles cans.
- Gloves: Wearing gloves is important to protect your skin from the harsh chemicals used in soap making.
Optional Equipment
While the above equipment is necessary to get started, there are a few optional tools that can make the soap making process easier and more enjoyable:
- Scale: A scale can be used to measure your ingredients by weight, which can be more accurate than using measuring cups and spoons.
- Crockpot: A crockpot can be used to melt and combine your ingredients. This can be a convenient way to make soap without having to constantly monitor the temperature.
- Essential Oil Dropper: Essential oil droppers can be used to add the perfect amount of fragrance to your soap bars.
- Spatula: A spatula can be used to scrape the sides of your mixing bowl and ensure that all ingredients are incorporated.
- Soap Cutter: A soap cutter can be used to cut your soap bars into even and uniform shapes. This is especially important if you plan on selling or gifting your homemade soap bars.
| Basic Equipment | Optional Equipment |
|---|---|
| Large Mixing Bowl | Scale |
| Measuring Cups and Spoons | Crockpot |
| Thermometer | Essential Oil Dropper |
| Stick Blender | Spatula |
| Molds | Soap Cutter |
| Gloves |
Instructions for Making Natural Homemade Soap Bars
Making your own natural homemade soap bars is a fun and rewarding activity that can also be great for your skin. Follow these simple instructions to create your own soap bars:
Step 1: Prepare Your Work Area
Before you start, make sure you have a clean and organized workspace. Cover your work area with newspaper or a plastic drop cloth to protect it from any spills or splatters. Wear gloves and safety glasses to protect your skin and eyes.
Step 2: Measure Your Ingredients
Measure out your ingredients carefully using a kitchen scale. You will need a combination of oils, lye, water, and any additional additives you want to include in your soap recipe.
Step 3: Combine Oils and Lye
Combine your oils and lye in a heat-resistant container and mix well. Use a hand mixer or immersion blender to blend the mixture until it reaches a trace, which is when the mixture thickens and leaves a trail on the surface.
Step 4: Add Additives
Add any additional additives, such as essential oils, herbs, or exfoliants, to your soap mixture and stir well. Be sure to follow any recommended usage rates for these additives.
Step 5: Pour Into Molds
Pour your soap mixture into your molds and tap them gently on a flat surface to remove any air bubbles. Cover the molds with a towel or plastic wrap and let them sit for 24 hours to allow the soap to harden.
Step 6: Cure Your Soap Bars
After 24 hours, remove the soap from the molds and cut it into bars. Place the bars on a wire rack or tray and let them cure for 4-6 weeks in a cool, dry place. This will help the soap harden and improve its texture and lather.
That’s it! With these simple instructions, you can create your own natural homemade soap bars that are great for your skin and free from harmful chemicals.
Tips and Tricks for Making Natural Homemade Soap Bars
Making your own soap bars is a fun and creative process that allows you to customize the ingredients and scents to your liking. Here are some tips and tricks to help you make the best natural homemade soap bars:
Use Distilled Water Instead of Tap Water
Using distilled water instead of tap water can make a big difference in the quality of your soap bars. Tap water contains minerals and impurities that can affect the texture and color of your soap bars. Distilled water is pure and free of these impurities, which can result in a smoother and more consistent soap bar.
Experiment with Different Additives
One of the best things about making your own soap bars is that you can experiment with different additives to achieve different textures, scents, and benefits. Some popular additives include essential oils, herbs, and natural colorants like spirulina or turmeric. Be sure to research the properties of each additive to ensure that it is safe and appropriate for use in soap making.
Be Patient with the Curing Process
After you have made your soap bars, it is important to be patient with the curing process. Curing is the process of letting the soap bars sit and dry out for several weeks. This allows the excess water to evaporate and the soap to harden and become more mild. While it can be tempting to use your soap bars right away, waiting for the curing process to complete will result in a better quality soap bar.
| Tips: | Tricks: |
|---|---|
| Use distilled water for a smoother soap bar | Experiment with different additives for unique soap bars |
| Research the properties of each additive before use | Be patient with the curing process for a better quality soap bar |

Conclusion
Learning how to make your own natural homemade soap bars is a fun and rewarding experience. Not only do you get to customize the ingredients to suit your skin type and preferences, but you also get to avoid the harsh chemicals found in many commercial soaps.
Remember to always use caution when working with lye and to follow safety guidelines. It’s also important to properly cure your soap bars before using them to ensure they are gentle on your skin.
Experiment with different oils, scents, and additives to create unique and personalized soap bars. You can even make them as gifts for friends and family.
- Choose high-quality ingredients
- Follow a recipe carefully
- Be patient during the curing process
- Have fun and get creative!
With a little practice, you’ll be making beautiful and luxurious soap bars that are gentle on your skin and kind to the environment.
| Author: | Your Name |
| Published: | Month Day, Year |
| Category: | DIY |