
How to Make Milk-Based Soap: DIY Guide to Crafting Nourishing and Moisturizing Cleansers
Making your own soap is a fun and rewarding hobby that allows you to know exactly what ingredients are in your skincare products. Milk-based soap is a popular choice due to its nourishing and moisturizing properties. It is also an excellent option for people with sensitive skin as it is gentle and soothing.
As a professional article writer and content creator, I have been making soap for over a decade. Through my personal experience, I have learned that making milk-based soap is relatively easy and requires only a few ingredients. In this DIY guide, I will share with you my step-by-step process for crafting nourishing and moisturizing milk-based soap.
The Benefits of Milk-Based Soap
Milk-based soap is rich in vitamins and minerals that nourish and moisturize the skin. The lactic acid in milk helps to exfoliate dead skin cells and brighten the complexion. Additionally, the fat content in milk provides a protective barrier that keeps the skin hydrated and prevents moisture loss.
The Ingredients You Will Need
- 1 pound of soap base
- 1 cup of milk
- Essential oils (optional)
- Soap molds
- Double boiler
- Thermometer
The Step-by-Step Process
- Cut the soap base into small cubes and place them into a double boiler.
- Heat the soap base over low heat until it melts completely.
- Add the milk to the melted soap base and stir well.
- Add any essential oils or fragrances to the mixture and stir well.
- Pour the mixture into soap molds and let it cool for several hours.
- Remove the soap from the molds and let it cure for at least two weeks.
By following these steps, you can create your own nourishing and moisturizing milk-based soap that is perfect for your skin. So, let’s get started!
Why Milk-Based Soap?
If you’re looking for a soap that can provide nourishment and moisture to your skin, then milk-based soap is the way to go. Milk-based soap is made by adding milk to the soap mixture during the soap-making process. The milk used can be cow’s milk, goat’s milk, or even coconut milk, and each type of milk offers unique benefits for the skin.
Benefits of Milk-Based Soap
Milk-based soap has many benefits for the skin, including:
- Moisturizing: Milk is a natural moisturizer that can help hydrate dry skin. The fat in milk helps to moisturize and nourish the skin, leaving it soft and supple.
- Exfoliating: Milk contains lactic acid, which is a natural exfoliant. Lactic acid helps to remove dead skin cells and reveal brighter, smoother skin.
- Nourishing: Milk is rich in vitamins and minerals that are essential for healthy skin. These nutrients can help to nourish and protect the skin, leaving it looking and feeling healthy.
- Soothing: Milk has anti-inflammatory properties that can help to soothe irritated skin. This makes milk-based soap a great choice for those with sensitive skin.
How Milk-Based Soap Differs from Regular Soap
Milk-based soap differs from regular soap in several ways:
| Milk-Based Soap | Regular Soap |
|---|---|
| Contains milk, which provides nourishment and moisture for the skin | Does not contain milk |
| Has a creamy, luxurious lather | Has a more traditional lather |
| Is often more gentle on the skin | May be harsher on the skin, depending on the ingredients used |
Overall, milk-based soap is a great choice for those looking for a soap that can provide nourishment, moisture, and other benefits for the skin. Whether you choose cow’s milk, goat’s milk, or coconut milk, you’re sure to love the luxurious lather and skin-loving benefits of milk-based soap.
Ingredients You’ll Need
Base Oils
For this milk-based soap recipe, you’ll need a combination of base oils that will create a nourishing and moisturizing soap. Here are the base oils you’ll need:
- Coconut oil (76 degree) – 12 ounces
- Olive oil – 16 ounces
- Sweet almond oil – 4 ounces
- Castor oil – 4 ounces
Lye
Lye is a crucial ingredient in soap making as it causes a chemical reaction with the oils to create soap. You’ll need the following:
- Sodium hydroxide – 6.08 ounces
- Distilled water – 14 ounces
Milk
The milk in this recipe provides extra nourishment and moisturization to the soap. You can use any type of milk, but for the best results, use either goat milk or cow milk. You’ll need:
- Goat milk or cow milk – 16 ounces
Additives
You can add various additives to your milk-based soap to give it a unique scent or color. Here are some suggestions:
| Additive | Amount |
|---|---|
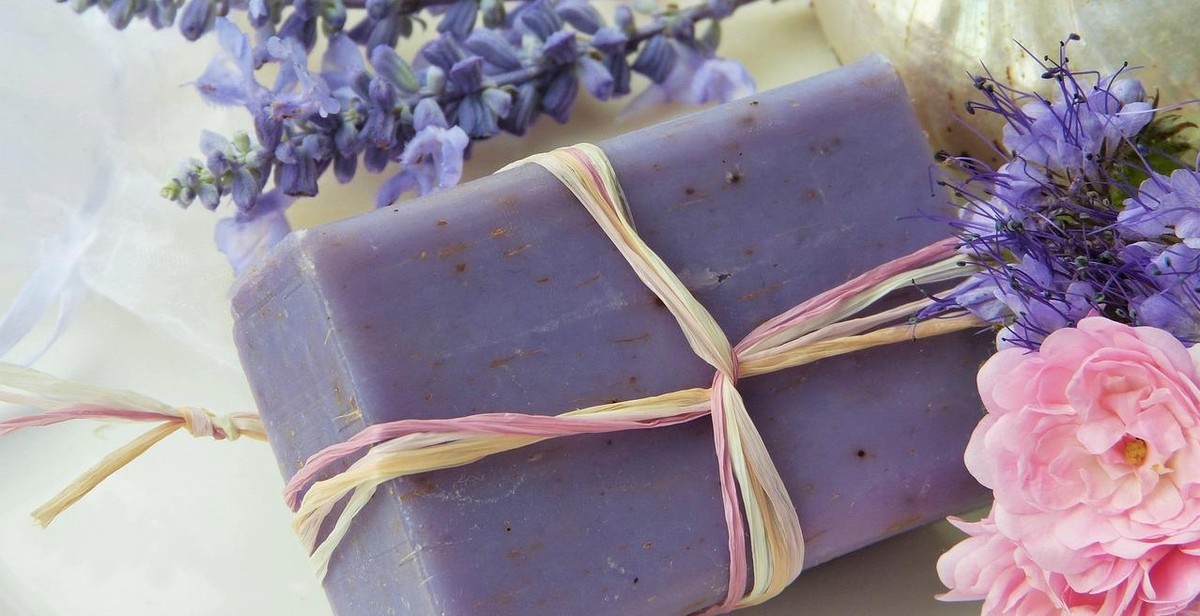
| Lavender essential oil | 0.5 ounces |
| Peppermint essential oil | 0.5 ounces |
| Activated charcoal powder | 1 tablespoon |
| Mica powder (for color) | 1 teaspoon |
With these ingredients, you’ll be able to create a nourishing and moisturizing milk-based soap that is perfect for those with sensitive skin. Now, let’s move on to the next step – making the soap!
Step-by-Step Guide: How to Make Milk-Based Soap
Preparing the Workspace
Before you begin making milk-based soap, it’s important to ensure that your workspace is clean and organized. Clear any clutter and sanitize all surfaces, utensils, and equipment you will be using. Make sure to wear protective gear, including gloves and goggles, to avoid any accidents.
Measuring the Ingredients
Measure out all ingredients carefully and accurately to ensure that the soap turns out as desired. For milk-based soap, you’ll need milk, lye, and oils. Use a digital scale to measure the ingredients. Remember to handle lye with care as it is caustic and can cause serious burns.
Mixing the Ingredients
In a well-ventilated area, mix the lye and milk together. Then, in a separate container, melt the oils and mix them together. Once both mixtures have cooled to around 100 degrees Fahrenheit, slowly pour the lye mixture into the oils while stirring continuously. Use a stick blender to mix until the soap reaches a thick trace.
Pouring the Soap into the Mold
Once the soap has reached a thick trace, pour it into the mold. Tap the mold gently to remove any air bubbles and smooth the top with a spatula. Cover the mold with plastic wrap and a towel to keep it warm and prevent soda ash from forming. Let the soap sit for 24-48 hours.
Unmolding and Cutting the Soap
After 24-48 hours, the soap should be firm enough to unmold. Remove the soap from the mold and cut it into bars using a sharp knife. Place the bars on a rack to dry and cure for 4-6 weeks. Turn the bars every few days to ensure that they dry evenly.
Curing the Soap
Curing the soap is an important step in the soap-making process. It allows the soap to harden and become milder, gentler, and longer-lasting. Store the bars in a cool, dry place with good air circulation. After 4-6 weeks, the soap will be ready to use.
Tips for Success
Safety Precautions
Before starting the soap-making process, it is important to take certain safety precautions to ensure your well-being. Always wear protective gear such as gloves, goggles, and a mask to prevent any accidental exposure to harmful chemicals. Additionally, work in a well-ventilated area to avoid inhaling any fumes. Keep a fire extinguisher nearby and be cautious when handling hot liquids and equipment.
Choosing the Right Milk
The type of milk you choose to use in your soap-making process can greatly affect the final product. Consider using whole milk for a creamier and more moisturizing soap. If you have sensitive skin, opt for goat milk, which has natural anti-inflammatory properties. For an extra nourishing boost, try using almond or coconut milk.
Using Essential Oils
Adding essential oils to your milk-based soap can provide a variety of benefits, such as aromatherapy and skin-healing properties. Be sure to research the properties of each essential oil before adding them to your soap mixture. Some popular essential oils for soap-making include lavender for relaxation, peppermint for a refreshing scent, and tea tree oil for its antibacterial properties.
Troubleshooting Tips
| Issue | Solution |
|---|---|
| Soap is too soft | Use less milk and more lye in your mixture |
| Soap is too hard | Use more milk and less lye in your mixture |
| Soap has air pockets | Tap the soap mold on a hard surface to release any air bubbles before letting it set |
| Soap has a strong odor | Use less fragrance oil or essential oil in your mixture |
Remember that making soap is a process of trial and error, and it may take a few attempts to get it just right. Don’t be afraid to experiment with different ingredients and techniques to find what works best for you.
Conclusion
Making milk-based soap is a fun and rewarding DIY project that can result in nourishing and moisturizing cleansers for your skin. By following the steps outlined in this guide, you can create your own soap using natural ingredients that are gentle on your skin and the environment.
Remember to always wear protective gear when working with lye, and to follow safety guidelines carefully. It’s also important to experiment with different ingredients and ratios to find what works best for your skin type and preferences.
Benefits of Milk-Based Soap
Milk-based soap offers a range of benefits for your skin, including:
- Moisturizing and hydrating properties due to the natural fats and proteins found in milk
- Gentle cleansing that doesn’t strip the skin of its natural oils
- Anti-inflammatory and soothing effects that can help reduce redness and irritation
- Exfoliating properties that can help remove dead skin cells and promote cell turnover
Final Thoughts
Making your own soap can be a fun and rewarding way to take control of what you put on your skin. By using natural ingredients like milk, you can create a nourishing and moisturizing cleanser that will leave your skin feeling soft and refreshed. So why not give it a try and see the results for yourself?
| Author: | Your Name |
| Date Published: | Insert Date |