How to Make Homemade Jam: Recipes and Techniques for Preserving Fresh Fruits
As a passionate home cook and food enthusiast, I have always been fascinated by the art of preserving fresh fruits and vegetables. One of my favorite techniques is making homemade jam, which not only allows me to enjoy the flavors of summer all year round, but also helps me reduce food waste by using up excess produce.
Over the years, I have experimented with a variety of fruits, from classic strawberries and raspberries to more exotic options like figs and apricots. I have also tried different recipes and techniques, from traditional stovetop cooking to modern methods like sous vide and pressure canning.
In this article, I will share my experience and knowledge with you, providing step-by-step instructions, helpful tips, and delicious recipes for making homemade jam. Whether you are a seasoned home cook or a beginner, you will find plenty of inspiration and guidance to create your own unique jams and jellies.
Why Make Homemade Jam?
There are many reasons why making homemade jam is a rewarding and worthwhile endeavor. Here are just a few:
- Preserve the flavors of fresh fruits
- Reduce food waste by using up excess produce
- Create unique flavor combinations and variations
- Control the ingredients and sweetness level
- Give homemade gifts to friends and family
What You Will Need
Before you get started, it’s important to gather all the necessary equipment and ingredients. Here is a basic list:
| Equipment | Ingredients |
|---|---|
| Canning jars with lids and rings | Fresh fruit |
| Canning pot or large stockpot | Granulated sugar |
| Jar lifter | Lemon juice or pectin (optional) |
| Funnel | Spices or herbs (optional) |
| Bubble remover or chopstick | Butter (optional) |
| Labels and markers (optional) |

Why Make Homemade Jam?
Making homemade jam is a time-honored tradition that has been passed down from generation to generation. Not only is it a great way to preserve fresh fruits, but it also has several benefits that make it worth the effort.
1. Taste
Homemade jam tastes infinitely better than store-bought jam. When you make jam at home, you have control over the ingredients and can adjust the sweetness and flavor to your liking. You can also experiment with different fruit combinations and add spices or herbs to create unique flavor profiles.
2. Health Benefits
Homemade jam is a healthier option than store-bought jam, which is often loaded with preservatives and artificial ingredients. By making your own jam, you can ensure that it is made with fresh, natural ingredients. You can also control the amount of sugar that goes into the jam, making it a healthier option for those watching their sugar intake.
3. Cost-effective
Homemade jam can be a cost-effective way to enjoy your favorite fruits all year round. When fruit is in season, it is often abundant and inexpensive. By making jam, you can take advantage of these low prices and preserve the fruit for later use.
4. Personal Satisfaction
Making homemade jam can be a satisfying and rewarding experience. There is something special about creating something from scratch and being able to share it with others. Homemade jam also makes a great gift for friends and family.
5. Environmental Benefits
By making homemade jam, you can reduce your environmental impact. Store-bought jam often comes in plastic containers that contribute to landfill waste. By making your own jam, you can use reusable glass jars and reduce your carbon footprint.
| Benefits of Homemade Jam |
|---|
| Taste |
| Health Benefits |
| Cost-effective |
| Personal Satisfaction |
| Environmental Benefits |
In conclusion, making homemade jam is a worthwhile endeavor that has many benefits. Whether you are looking for a healthier alternative to store-bought jam, a cost-effective way to enjoy your favorite fruits, or a satisfying and rewarding experience, making homemade jam is a great option.

Choosing the Right Fruit
Choosing the right fruit is crucial when making homemade jam. Seasonal fruits are the best choice for jam making, as they are at their peak flavor and sweetness. They are also abundant and often less expensive than out-of-season fruits. When selecting fruits, it’s important to choose ripe ones as they will have the highest sugar content, which is essential for making a good quality jam.
Seasonal Fruits
Seasonal fruits are those that are harvested during their natural season. They are often available locally and are at their peak flavor and sweetness. Some of the best fruits for making jam during their respective seasons include:
- Spring: strawberries, rhubarb, apricots
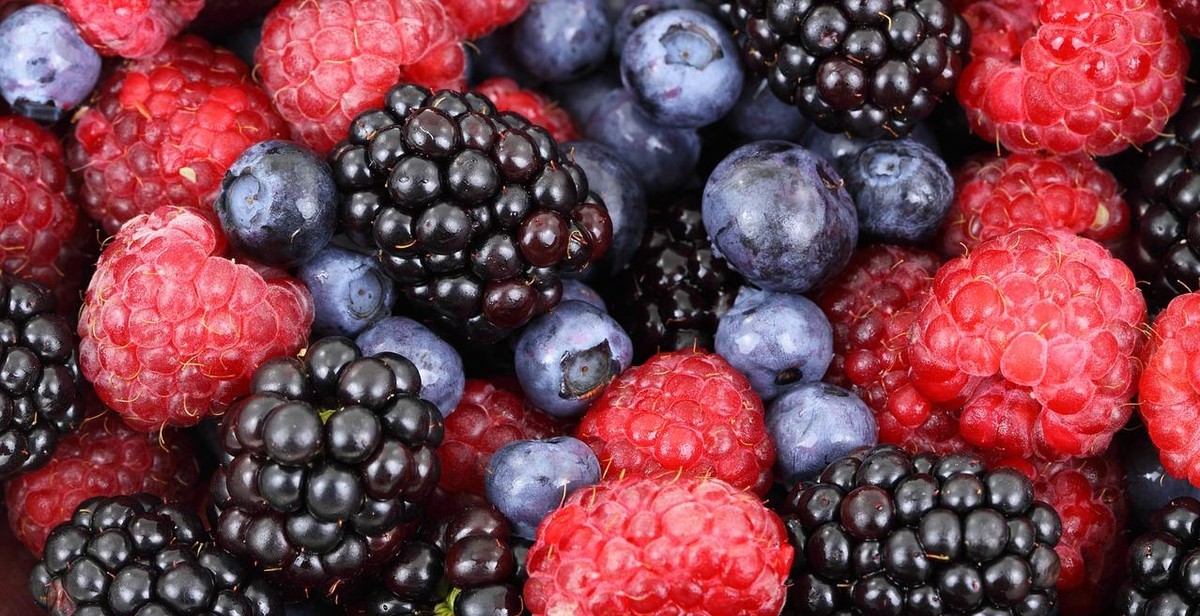
- Summer: raspberries, blackberries, blueberries, peaches, plums
- Fall: apples, pears, quince, cranberries
- Winter: citrus fruits (oranges, lemons, grapefruits)
When choosing seasonal fruits, it’s important to consider their ripeness.
Ripe vs. Unripe Fruits
When making jam, it’s important to use ripe fruits as they will have the highest sugar content. This is important because sugar acts as a natural preservative and helps the jam to set properly. Unripe fruits will not have the same sugar content, which can result in a runny or under-sweetened jam.
When selecting fruits, look for those that are plump, fragrant, and have a vibrant color. Avoid fruits that are too soft or have bruises or blemishes. If you can’t find ripe fruits, you can ripen them at home by placing them in a paper bag at room temperature for a few days.
| Ripe Fruits | Unripe Fruits |
|---|---|
| Plump | Hard |
| Fragrant | No aroma |
| Vibrant color | Dull color |
By choosing the right fruit, you can ensure that your homemade jam is delicious and full of flavor. Remember to choose seasonal fruits and opt for ripe ones for the best results.
Equipment
Before starting to make homemade jam, it is important to have the right equipment to ensure that the process is efficient and safe. Here are some essential pieces of equipment:
| Equipment | Description |
|---|---|
| Canning pot | A large pot with a rack to hold jars during processing. |
| Jars and lids | Use jars specifically designed for canning, with new lids and bands. |
| Jar lifter | A tool to lift hot jars in and out of the canning pot. |
| Funnel | A wide-mouthed funnel to fill jars with hot jam. |
| Ladle | A large spoon to transfer the hot jam into jars. |
| Candy thermometer | To ensure that the jam reaches the proper temperature for canning. |
Ingredients List
Homemade jam requires fresh, high-quality ingredients to achieve the best flavor. Here is a list of ingredients you will need:
- Fresh fruit – Choose ripe, seasonal fruit for the best flavor.
- Granulated sugar – Used to sweeten and preserve the fruit.
- Lemon juice – Adds acidity to the jam and helps it set.
- Pectin – A natural thickening agent found in fruits, but can also be purchased in powdered form.
- Salt – Optional, but can enhance the flavor of the jam.
It is important to follow the recipe closely and measure ingredients accurately for the best results. With the right equipment and ingredients, making homemade jam is a fun and rewarding process that will result in delicious jars of jam to enjoy throughout the year.
Basic Jam Making Techniques
Making homemade jam is a fun and rewarding process that allows you to enjoy fresh fruits all year round. Whether it’s your first time making jam or you’re a seasoned pro, there are a few basic techniques you should follow to ensure your jam turns out perfectly every time.
Preparing the Fruit
The first step in making jam is to prepare your fruit. Begin by washing and drying your fruit thoroughly. Next, remove any stems, seeds, or pits from the fruit, and cut it into small, uniform pieces. If you’re using berries, you may want to crush them slightly to release their juices.
Once your fruit is prepared, it’s time to add sugar. The amount of sugar you need will depend on the type of fruit you’re using and your personal preference. A good rule of thumb is to use equal parts fruit and sugar, but you can adjust this ratio to taste.
Cooking the Jam
After you’ve added sugar to your fruit, it’s time to start cooking. Place your fruit and sugar mixture in a large pot and heat it over medium-high heat. Stir constantly to prevent the mixture from burning or sticking to the bottom of the pot.
As the mixture cooks, it will begin to thicken and the fruit will break down. You can use a potato masher or immersion blender to help break down any large pieces of fruit. Cook the jam until it reaches your desired consistency, usually around 220°F (104°C) on a candy thermometer.
Jarring and Preserving
Once your jam has reached the desired consistency, it’s time to jar and preserve it. Begin by sterilizing your jars and lids in boiling water for 10 minutes. Remove them from the water and let them dry completely.
Next, carefully ladle your hot jam into the sterilized jars, leaving about 1/4 inch of space at the top. Wipe the rims of the jars clean with a damp cloth, then place the lids on top and screw on the bands.
To preserve your jam, you can either process it in a water bath canner or store it in the refrigerator for up to a month. If you’re using a water bath canner, place the jars in the canner and process for the recommended amount of time based on your altitude and the size of your jars.
By following these basic jam making techniques, you’ll be able to create delicious homemade jam that will last all year round.

How to Make Homemade Jam: Recipes and Techniques for Preserving Fresh Fruits
Strawberry Jam
If you’re a fan of sweet and tangy flavors, strawberry jam is a must-try. Here’s how to make it:
- Wash and hull 2 pounds of fresh strawberries.
- Crush the berries in a large pot with a potato masher.
- Add 4 cups of sugar and 1/4 cup of lemon juice to the pot.
- Stir the mixture over low heat until the sugar dissolves.
- Turn the heat up to high and bring the mixture to a rolling boil.
- Boil for 10-15 minutes, stirring frequently, until the jam thickens.
- Remove the pot from the heat and let it cool for a few minutes.
- Spoon the jam into clean jars and seal them tightly.
- Process the jars in a boiling water bath for 10 minutes.
- Let the jars cool and check the seals before storing.
Blueberry Jam
Blueberry jam has a rich, deep flavor that’s perfect for spreading on toast or using as a topping for ice cream. Here’s how to make it:
- Wash and pick over 2 pounds of fresh blueberries.
- Crush the berries in a large pot with a potato masher.
- Add 4 cups of sugar and 1/4 cup of lemon juice to the pot.
- Stir the mixture over low heat until the sugar dissolves.
- Turn the heat up to high and bring the mixture to a rolling boil.
- Boil for 10-15 minutes, stirring frequently, until the jam thickens.
- Remove the pot from the heat and let it cool for a few minutes.
- Spoon the jam into clean jars and seal them tightly.
- Process the jars in a boiling water bath for 10 minutes.
- Let the jars cool and check the seals before storing.
Peach Jam
Peach jam is a classic flavor that’s perfect for summertime. Here’s how to make it:
- Wash, peel, and pit 2 pounds of fresh peaches.
- Chop the peaches into small pieces and put them in a large pot.
- Add 4 cups of sugar and 1/4 cup of lemon juice to the pot.
- Stir the mixture over low heat until the sugar dissolves.
- Turn the heat up to high and bring the mixture to a rolling boil.
- Boil for 10-15 minutes, stirring frequently, until the jam thickens.
- Remove the pot from the heat and let it cool for a few minutes.
- Spoon the jam into clean jars and seal them tightly.
- Process the jars in a boiling water bath for 10 minutes.
- Let the jars cool and check the seals before storing.
| Ingredients | Strawberry Jam | Blueberry Jam | Peach Jam |
|---|---|---|---|
| Fresh fruit | 2 lbs | 2 lbs | 2 lbs |
| Sugar | 4 cups | 4 cups | 4 cups |
| Lemon juice | 1/4 cup | 1/4 cup | 1/4 cup |
