
How to Give a Professional Haircut: Step-by-Step Guide for Salon-Quality Results
As a professional hairstylist with over a decade of experience, I have seen many people struggle with giving themselves or others a proper haircut. Some people end up with uneven or choppy hair, while others simply can’t achieve the desired look they want. However, with a little bit of knowledge and practice, anyone can give a professional-looking haircut at home.
The Importance of Preparation
Before starting any haircut, it’s important to have the right tools on hand. This includes sharp scissors, clippers, combs, and sectioning clips. Additionally, it’s essential to have a clear idea of the desired haircut and style. This means taking into consideration the hair texture, face shape, and personal preferences.
Step-by-Step Guide
In this article, I will provide a step-by-step guide to giving a professional haircut at home. From sectioning the hair to achieving the perfect finish, I will cover everything you need to know to get salon-quality results.
- Step 1: Section the Hair
- Step 2: Cut the Hair to the Desired Length
- Step 3: Create Layers (If Desired)
- Step 4: Blend the Layers
- Step 5: Trim the Bangs (If Applicable)
- Step 6: Finish the Haircut
By following these steps and having the right tools on hand, anyone can achieve a professional-looking haircut at home. So, let’s get started!
Step 1: Gathering the Tools
Before you start giving a professional haircut, you need to have the right tools. Here are the essential tools you need:
1. Clippers
Clippers are a must-have tool for any haircut. They come in various sizes and styles, so make sure you choose the one that fits your needs. Some clippers come with adjustable blades, which are great for different hair lengths.
2. Scissors
Scissors are another essential tool for a professional haircut. They are used to trim and shape the hair. Make sure you choose a pair of scissors that are sharp and comfortable to hold.
3. Comb
A comb is necessary to part the hair and to create a guide for the clippers or scissors. You can choose a comb with finer teeth for more precision, or a wider tooth comb for thicker hair.
4. Cape
A cape is used to protect the client’s clothes from hair clippings and other debris. It is also helpful for keeping the hair in one place while cutting.
5. Spray Bottle
A spray bottle is used to wet the hair before cutting. This makes it easier to cut and style the hair. Make sure you fill the spray bottle with water or a styling product that you prefer.
6. Hair Dryer
A hair dryer is used to dry the hair after washing or wetting. It is also helpful in styling the hair. Make sure you choose a hair dryer that has various settings for heat and speed.
7. Clipper Guards
Clipper guards are used to adjust the length of the hair when using clippers. They come in different sizes, so make sure you have a variety of guards to choose from.
8. Neck Duster
A neck duster is used to remove hair clippings from the client’s neck and shoulders. It is also helpful in keeping the client comfortable during the haircut.
9. Razor
A razor is used for trimming and shaping the hair. It is also helpful in creating texture and layers in the hair. Make sure you choose a razor that fits your needs and is comfortable to hold.
10. Styling Products
Styling products are used to create the desired look for the hair. You can choose from various products such as pomade, gel, mousse, or hairspray, depending on the client’s hair type and style.
| Essential Tools | Optional Tools |
|---|---|
| Clippers | Thinning Shears |
| Scissors | Straight Razor |
| Comb | Texturizing Shears |
| Cape | Flat Iron |
| Spray Bottle | Crimping Iron |
| Hair Dryer | Curling Iron |
| Clipper Guards | |
| Neck Duster | |
| Razor | |
| Styling Products |
While the above tools are essential for a professional haircut, there are also optional tools that you can use to achieve specific styles or techniques.
Now that you have gathered all the necessary tools, you are ready to move on to the next step, which is preparing the hair for the cut.
Step 2: Preparing the Hair
Before you start cutting the hair, it is important to prepare it properly. This will ensure that the haircut looks professional and the client is satisfied with the end result. In this step, we will cover two important aspects of preparing the hair: washing and drying the hair and sectioning the hair.
Washing and Drying the Hair
The first step in preparing the hair is to wash and dry it. This is important because clean hair is easier to cut and style. It is also important to remove any product buildup or dirt that may be present in the hair.
When washing the hair, use a shampoo that is appropriate for the client’s hair type. Massage the shampoo into the scalp and hair, and rinse thoroughly with warm water. Follow up with a conditioner, if necessary, to help detangle the hair and make it easier to comb through.
After washing the hair, gently towel-dry it to remove excess water. Avoid rubbing the hair vigorously with the towel, as this can cause damage and frizz. Instead, blot the hair gently with the towel to remove moisture.
Once the hair is towel-dried, use a blow dryer to dry it completely. Set the blow dryer to medium heat and use a round brush to smooth the hair as you dry it. This will help to create a smooth and polished look.
Sectioning the Hair
After the hair is washed and dried, it is important to section it properly. This will make it easier to cut the hair evenly and ensure that no sections are missed.
To section the hair, use a comb to create a part down the center of the head, from the forehead to the nape of the neck. Then, create another part from ear to ear, dividing the hair into four sections.
Clip each section of hair out of the way, leaving only the section you are working on loose. This will make it easier to focus on one section at a time and ensure that the haircut is even.
Use hair clips or hair ties to secure the sections of hair that are not being worked on. This will prevent them from getting in the way and ensure that they do not get cut accidentally.
By washing and drying the hair and sectioning it properly, you can ensure that the haircut looks professional and polished. These steps are essential for achieving salon-quality results and ensuring that the client is happy with the end result.
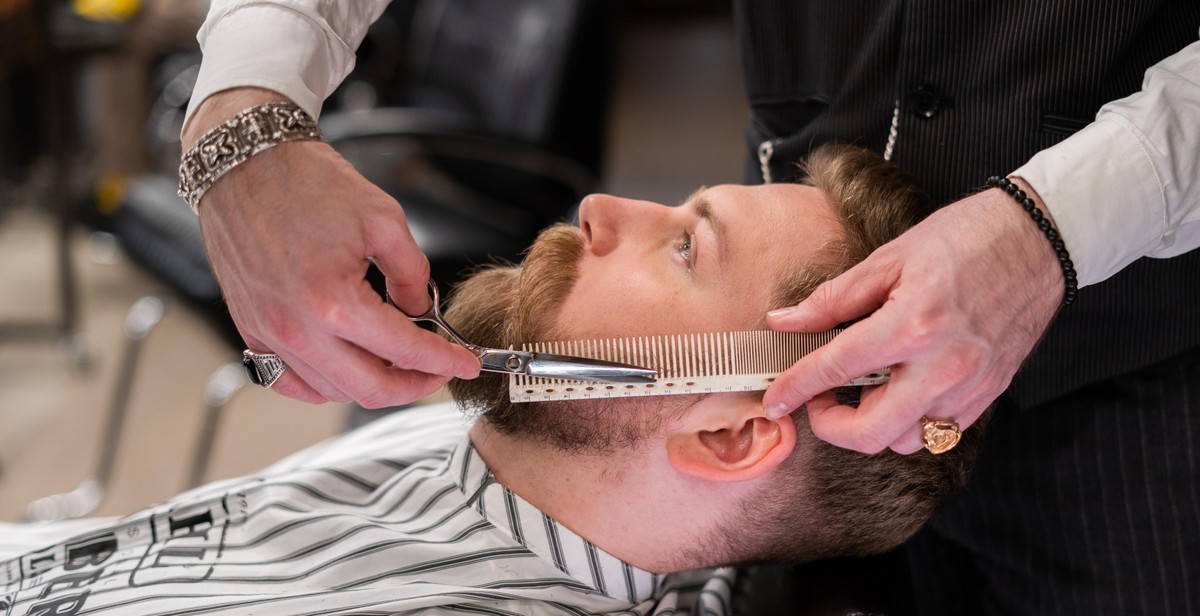
Step 3: Cutting the Hair
Now that you have prepared the hair and chosen the right tools, it’s time to start cutting. Cutting hair is a skill that takes time and practice to master, but with these techniques, you can achieve salon-quality results.
Choosing the Right Technique
When it comes to cutting hair, there are various techniques to choose from. The technique you choose will depend on the style you want to achieve and the texture of the hair. Some popular techniques include:
- Straight cutting: This involves cutting the hair straight across to achieve a blunt look.
- Point cutting: This involves cutting the hair at an angle to create texture and movement.
- Razor cutting: This involves using a razor to create a soft, wispy look.
- Thinning: This involves using thinning shears to remove bulk and create texture.
It’s important to choose the right technique for the style you want to achieve and to ensure that you have the appropriate tools for the technique you choose.
Trimming the Ends
Start by trimming the ends of the hair to remove any split ends and create a clean, even edge. Use your cutting shears to trim the hair in small sections, starting from the back and working your way forward. Make sure to keep the sections even and to cut in a straight line.
Texturizing the Hair
Texturizing the hair involves creating movement and volume by removing some of the bulk. To do this, use thinning shears to remove small sections of hair. Make sure to use the shears in a controlled manner to avoid removing too much hair. Texturizing the hair can also be done with point cutting or razor cutting.
Blending the Layers
If the haircut involves layers, it’s important to blend them together to create a seamless look. To do this, use your cutting shears to cut small sections of hair at an angle, blending the layers together. Make sure to keep the sections even and to cut in a controlled manner to avoid removing too much hair.
| Tip: | Always cut less hair than you think you need to. You can always go back and cut more, but you can’t put hair back once it’s been cut! |
|---|
By following these techniques, you can achieve a professional-looking haircut that your clients will love. Remember to take your time and practice your cutting skills to continue improving your technique.
Step 4: Styling the Hair
Now that you have successfully cut the hair, it’s time to style it to perfection. Styling the hair is an essential step in giving a professional haircut. Here are some tips to help you style the hair like a pro:
Using the Right Products
Using the right products is crucial to achieve the desired hairstyle. Before styling the hair, apply a styling product that suits the hair type, such as mousse, gel, or pomade. These products will help to hold the hairstyle in place and add texture and volume to the hair.
Using the Right Tools
Using the right tools is equally important as using the right products. A blow dryer, flat iron, curling iron, or hot rollers can be used to style the hair. A round brush is also essential when blow-drying the hair to achieve a smooth and sleek finish. Using the right tools will make styling the hair easier and more efficient.
Finishing the Look
After styling the hair, it’s time to finish the look. Apply a finishing product, such as hairspray or serum, to add shine and hold the hairstyle in place. Use a comb or brush to smooth out any flyaways or stray hairs. Finally, inspect the hair from all angles to ensure that the style is even and balanced.
Remember, practice makes perfect. With time and experience, you’ll be able to style the hair effortlessly and achieve salon-quality results.