
How to Give a Fade Haircut: Step-by-Step Guide to Achieving a Fade Hairstyle
Are you tired of paying a fortune for a fade haircut at the barbershop? Do you want to learn how to give yourself or someone else a fade haircut at home? Look no further! In this guide, I will share my personal experience and step-by-step instructions on how to achieve a perfect fade hairstyle.
Why Choose a Fade Haircut?
A fade haircut is a stylish and trendy hairstyle that involves a gradual transition from short hair at the top of the head to longer hair at the sides and back. It is a versatile haircut that can be customized to suit any face shape, hair type, and personal style. A fade haircut can also make your hair look thicker and fuller, and it requires minimal maintenance.
Tools You Will Need
- Clippers
- Clipper guards
- Scissors
- Comb
- Hair spray or gel
- Mirror
Step-by-Step Guide
In this guide, I will explain how to give a fade haircut with clippers. If you prefer scissors, you can follow the same steps, but use scissors instead of clippers.
- Choose the right clipper guard size
- Cut the top of the hair
- Cut the sides and back of the hair
- Blend the hair with a higher guard size
- Blend the hair with a lower guard size
- Clean up the hairline and sideburns
- Style the hair with hair spray or gel
Follow these steps, and you will be able to give yourself or someone else a professional-looking fade haircut at home. With practice, you can perfect your technique and experiment with different fade styles.

What is a Fade Haircut?
A fade haircut is a popular men’s hairstyle that features a gradual transition from short hair to longer hair on the top of the head. The hair is tapered and blended, creating a seamless and smooth look. This type of haircut is versatile and can be customized to suit different hair lengths, textures, and styles.
Different Types of Fades
There are several different types of fades, including:
- Low Fade: The hair gradually tapers down towards the neck.
- High Fade: The hair is cut very short or shaved around the sides and back of the head.
- Mid Fade: The hair is tapered halfway between the top of the head and the ears.
- Bald Fade: The hair is cut very short or shaved to the skin, creating a seamless transition from the hair to the skin.
Each type of fade can be customized with different lengths and styles on the top of the head, allowing for a unique and personalized look.
Benefits of a Fade Haircut
There are several benefits to getting a fade haircut:
- Low maintenance: Fades require minimal styling and upkeep, making them a great option for men who don’t want to spend a lot of time on their hair.
- Versatile: Fades can be customized to suit different hair types, lengths, and styles, making them a versatile option for any man.
- Professional: Fades are a popular choice for professionals and can help create a polished and put-together look.
- Cool and trendy: Fades are a stylish and modern haircut that can help you stand out from the crowd.
Overall, a fade haircut is a great option for any man who wants a low-maintenance, versatile, and stylish haircut. With different types of fades to choose from, you can find the perfect look to suit your personal style and preferences.
Tools You Need
Before you start giving a fade haircut, you need to make sure you have the right tools. Here are the essential tools you need:
1. Clippers
Clippers are the most important tool you need to achieve a fade haircut. They come in different sizes and shapes, and you need to choose the right one for the job. Look for clippers with adjustable blades and guards to help you achieve the desired length. A good pair of clippers will make the process faster and smoother.
2. Scissors
While clippers are the go-to tool for most of the haircut, scissors are also important for blending and detailing. You will need a good pair of scissors with sharp blades and comfortable handles to make the process easier and more precise.
3. Comb
A comb is an essential tool for any haircut, but it is especially important for a fade. You will need a comb to section off the hair and to blend the different lengths. Look for a comb with fine teeth and a long handle for better control.
4. Mirror
A mirror is crucial for checking your work and making sure the fade is even on both sides. You will need a handheld mirror and a larger mirror to see the back of the head. Make sure the lighting is good, so you can see the details clearly.
With these tools in hand, you are ready to give a fade haircut. But before you start, make sure you have a clear idea of the style you want to achieve and practice on a mannequin or a willing friend to perfect your technique.
Step-by-Step Guide to Achieving a Fade Hairstyle
Giving a fade haircut can be intimidating, but with the right tools and technique, you can achieve a professional-looking cut. Here’s a step-by-step guide to help you achieve the perfect fade hairstyle:
Step 1: Choose the Right Clipper Guard Size
The first step is to choose the right clipper guard size. The size you choose will depend on the length of hair you want to leave on top. For a classic fade, start with a longer guard size like a #4 or #5. If you want a shorter fade, start with a #2 or #3.
Step 2: Start with the Bottom
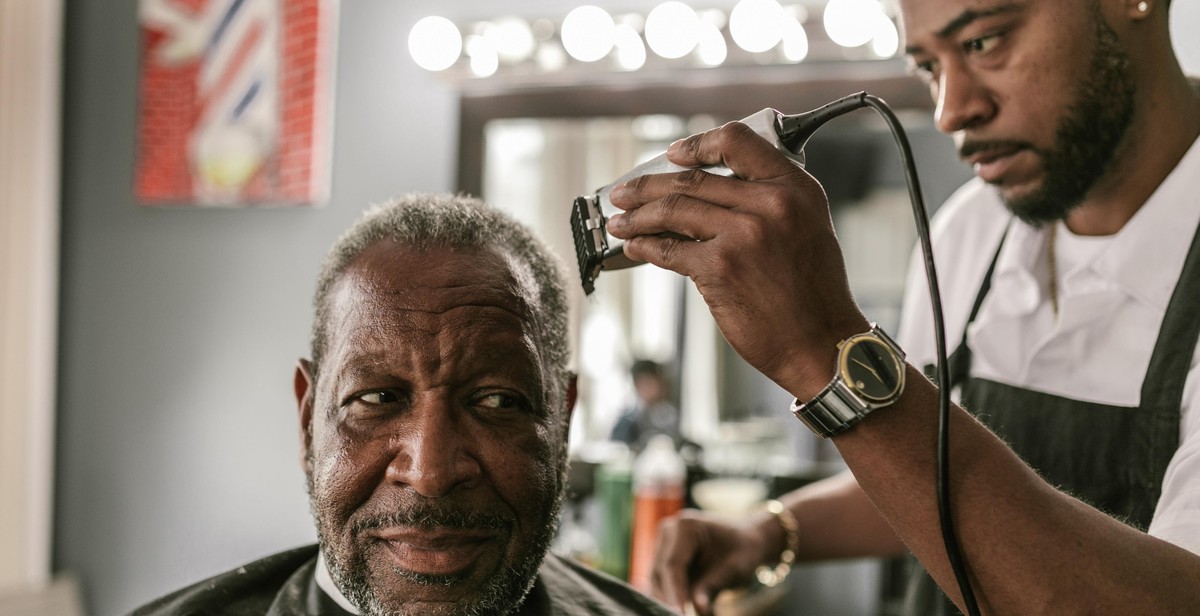
Start with the bottom of the head and work your way up. Begin by trimming the hair at the nape of the neck and work your way up towards the crown of the head. Use the clipper guard you chose in step one and make sure to keep the clippers level with the head as you work.
Step 3: Move Up to the Top
Once you’ve finished trimming the bottom, move up to the top of the head. Use the same clipper guard size you used on the bottom and work in sections, starting at the back and moving forward. Make sure to blend the top with the sides as you go.
Step 4: Blend the Sides and the Top
Next, blend the sides and the top of the head. Use a shorter clipper guard size like a #2 or #3 to trim the hair around the sides and back of the head. Use a blending comb to blend the hair on the sides with the hair on top.
Step 5: Define the Hairline and Neckline
Once you’ve finished blending, define the hairline and neckline. Use a trimmer to clean up the hairline around the ears and the back of the neck. Make sure to create a clean and defined line.
Step 6: Style the Hair
Finally, style the hair. Apply a small amount of styling product to the hair and use your fingers or a comb to create the desired style. You can leave the hair on top longer for a more dramatic look or keep it shorter for a more subtle fade.
- Choose the right clipper guard size for the length you want to leave on top.
- Start with the bottom of the head and work your way up.
- Blend the top with the sides as you go.
- Use a shorter clipper guard size to trim the hair around the sides and back of the head.
- Define the hairline and neckline with a trimmer.
- Apply styling product and style the hair to finish the look.

Tips for Giving a Perfect Fade Haircut
If you’re new to giving fade haircuts, it can be a bit intimidating. However, with practice and attention to detail, you can master the technique and give your clients the perfect fade every time. Here are some tips to keep in mind:
Practice Makes Perfect
Like any skill, giving a fade haircut takes practice. Don’t be discouraged if your first few attempts don’t turn out the way you want them to. Keep practicing and you’ll get better over time.
Don’t Rush the Process
Rushing through a fade haircut is a surefire way to make mistakes. Take your time and work slowly and methodically. This will help you achieve a clean and even fade.
Pay Attention to Detail
Details matter when it comes to giving a fade haircut. Pay attention to the length of the hair and the angle of your clippers. Even small mistakes can be noticeable, so take the time to get everything just right.
Communicate with Your Client
Before you start cutting, have a conversation with your client about what they want. Ask them about the length they prefer and how high they want the fade to go. This will help ensure that you deliver the haircut they’re looking for.
By following these tips and practicing regularly, you can give your clients the perfect fade every time. Remember to take your time, pay attention to detail, and communicate with your client to achieve the best results.

Conclusion
Now that you have read through this step-by-step guide on how to give a fade haircut, you should feel confident in your ability to achieve a stylish and professional-looking fade hairstyle. Remember, practice makes perfect, so don’t be discouraged if your first attempt doesn’t turn out exactly as you envisioned.
It’s important to take your time and follow each step carefully, as rushing through the process can lead to mistakes and uneven results. Additionally, investing in high-quality tools and products, such as clippers, scissors, and styling products, can make a significant difference in the outcome of your haircut.
Whether you’re a professional barber or just looking to give yourself or a friend a fresh new look, mastering the art of the fade is a valuable skill to have. By following the techniques outlined in this guide, you’ll be able to create a fade that is both stylish and flattering.
- Take your time and follow each step carefully
- Invest in high-quality tools and products
- Mastering the art of the fade is a valuable skill to have
So, go ahead and give it a try! With a little practice, you’ll be able to give a fade haircut like a pro.