
How to Fix a Flat Tire: Step-by-Step Guide for Roadside Emergencies
As a professional and experienced driver, I know firsthand how frustrating it can be to experience a flat tire while on the road. It can be even more frustrating if you don’t know how to fix it. But don’t worry, with the right tools and knowledge, fixing a flat tire can be a quick and easy process.
Tools You’ll Need
Before we dive into the step-by-step guide, it’s important to have the necessary tools on hand. These include:
- Spare tire
- Lug wrench
- Jack
- Tire pressure gauge
- Tire repair kit (optional)
Step-by-Step Guide
Now that we have the tools, let’s get started with the step-by-step guide:
- Find a safe location to pull over
- Turn on your hazard lights
- Remove the hubcap or wheel cover
- Loosen the lug nuts
- Use the jack to lift the vehicle
- Remove the lug nuts and flat tire
- Mount the spare tire
- Tighten the lug nuts
- Lower the vehicle
- Check the tire pressure
Following these steps will help you fix a flat tire quickly and safely. In some cases, a tire repair kit may be useful for temporary repairs until you can get to a mechanic. Remember to always drive with caution and prioritize safety on the road.
Step 1: Find a Safe Location
The first step in fixing a flat tire is to find a safe location to work on your vehicle. If you’re on a busy road or highway, try to pull over to the side of the road as far as possible, away from traffic. Look for a flat and level surface where you can safely jack up your car.
If you’re on a highway, try to find the nearest exit or rest area where you can safely change your tire. Don’t attempt to change your tire on a slope or uneven surface, as this can be dangerous.
It’s also important to turn on your hazard lights and set up reflective triangles or flares to alert other drivers of your presence. This will help ensure your safety while you work on your vehicle.
- Find a flat and level surface to safely jack up your car
- Turn on your hazard lights and set up reflective triangles or flares
- Don’t attempt to change your tire on a slope or uneven surface
Step 2: Gather the Necessary Tools
Before fixing a flat tire, it’s essential to gather the necessary tools to make the process smoother and easier. Here are the tools you will need:
Spare Tire
Make sure that the spare tire you have is in good condition. Check the tire pressure and inspect for any damages or punctures. If the spare tire is not in good condition, it’s best not to use it and call for roadside assistance.
Tire Iron
A tire iron is a tool used to remove lug nuts. Make sure that the tire iron fits the lug nuts of your vehicle.
Jack
A jack is used to lift the vehicle off the ground to remove the flat tire and replace it with a spare. Make sure that the jack is appropriate for your vehicle’s weight and size.
Wheel Wedges
Wheel wedges are used to prevent the vehicle from rolling while changing the tire. Place them on the opposite tire of the flat tire.
Flashlight
A flashlight is useful when changing a tire at night or in low-light conditions.
With these tools, you can now proceed to the next step of fixing a flat tire.
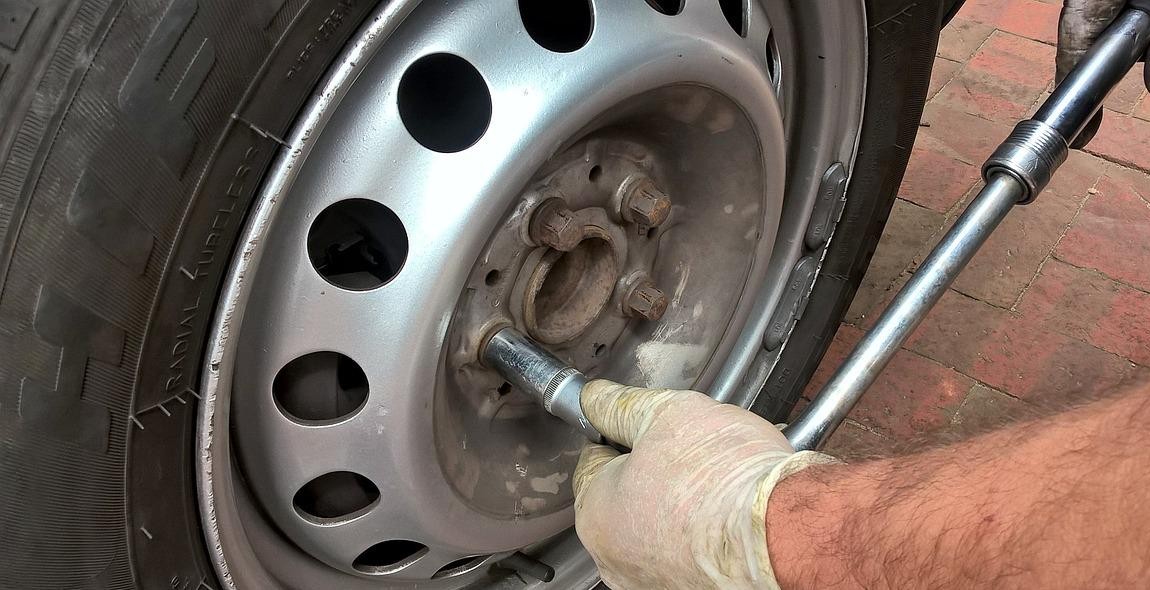
Step 3: Loosen the Lug Nuts
Once you have the jack in place and the vehicle is secure, it’s time to loosen the lug nuts on the flat tire. This step is important as it will allow you to easily remove the flat tire and replace it with the spare tire.
- Using a lug wrench, turn the lug nuts counterclockwise to loosen them. You may need to use some force as they can be tight.
- Don’t remove the lug nuts completely at this point, as it’s easier to do so when the tire is off the ground.
- If the lug nuts are too tight to loosen by hand, you can use your foot or body weight to apply more force to the wrench.
- Repeat this process for all the lug nuts on the flat tire, making sure to keep them in a safe place where they won’t get lost.
With the lug nuts loosened, you’re now ready to lift the vehicle off the ground and remove the flat tire.
Step 4: Jack Up the Vehicle
Now it’s time to jack up the vehicle. Proper jack placement is crucial to avoid any damage to the car. Locate the jack points on your car, which are usually indicated by notches or arrows on the frame of the car. These points are the strongest parts of the car’s frame and are designed to support the weight of the car when lifted.
Once you have located the jack points, position the jack under the car and pump the handle until the car is lifted off the ground. Make sure the car is stable and doesn’t wobble before getting under it.
It’s important to note that not all jacks are created equal. Some jacks are designed specifically for certain types of vehicles, so make sure you are using the appropriate jack for your car.
Also, never jack up the car on an uneven surface or on a slope. This can cause the car to tip over or the jack to slip, which could result in serious injury or damage to the car.
Follow these steps carefully to ensure a safe and successful tire change.
Step 5: Remove the Flat Tire
Before removing the flat tire, inspect it for any signs of damage or punctures. If the tire is severely damaged, do not attempt to remove it. Instead, call for professional assistance.
If the tire appears to be in good condition, follow these steps to remove it:
- Loosen the lug nuts: Use a lug wrench to loosen the lug nuts, but do not remove them yet.
- Position the jack: Place the jack in the designated spot under the vehicle and raise it until it just lifts the tire off the ground.
- Remove the lug nuts: Now that the tire is off the ground, remove the lug nuts and place them in a secure location where they won’t get lost.
- Remove the flat tire: Carefully pull the flat tire towards you until it comes off the wheelbase.
With the flat tire removed, inspect the wheel and brake components for any signs of damage or wear. If everything looks good, you can proceed with installing the spare tire.
Step 6: Mount the Spare Tire
Once you have removed the flat tire, the next step is to mount the spare tire. Here’s how:
- Align the spare tire with the wheel bolts and push it onto the hub.
- Tighten the lug nuts by hand until they are snug.
- Using a wrench, tighten the lug nuts further, turning them in a star pattern.
- Lower the vehicle to the ground.
- Use the wrench to tighten the lug nuts again, turning them in a star pattern.
- Check the tire pressure to ensure it is at the recommended level.
- Replace the hubcap or wheel cover if necessary.
It’s important to note that spare tires are not designed for long-term use and should only be used as a temporary solution until a new tire is installed. Make sure to get your tire repaired or replaced as soon as possible.
Step 7: Tighten the Lug Nuts
Once the new tire is in place, you need to tighten the lug nuts. Here are the steps:
- Use your hands to tighten the nuts as much as possible.
- Use the wrench to further tighten the nuts, turning them in a clockwise direction.
- Make sure the nuts are tightened as much as possible, but don’t overdo it, as it can damage the threads.
- Lower the vehicle to the ground.
- Use the wrench again to give a final tightening to the nuts, but this time, do it in a star pattern. Tighten one nut, then the one opposite to it, and so on.
It’s important to keep in mind that the lug nuts need to be tightened properly, or the wheel could come off while driving. If you’re not sure how tight they should be, check your car’s owner manual for the recommended torque.
By following these steps, you can safely and effectively fix a flat tire on the side of the road.
Step 8: Lower the Vehicle
After you have finished tightening the lug nuts, it is time to lower the vehicle back onto the ground. You can do this by using the jack in reverse order. Make sure that you are standing away from the vehicle as you lower it.
If you used a scissor jack, turn the crank counterclockwise to lower the vehicle. If you used a hydraulic jack, turn the release valve counterclockwise to slowly lower the vehicle.
Once the vehicle is back on the ground, use a torque wrench to tighten the lug nuts to the manufacturer’s specifications. This is an important step to ensure that the wheel is securely attached to the vehicle.
Double-check that all lug nuts are tightened properly before driving the vehicle. It is recommended to check the lug nuts again after driving for a short distance.
Remember to remove the wheel chocks and put away all tools and equipment before getting back on the road.
| Tools Required: | Jack, lug wrench, torque wrench, wheel chocks |
|---|
Step 9: Check the Tire Pressure
Once you have installed the spare tire, it is important to check the tire pressure before driving your vehicle. Incorrect tire pressure can cause handling issues and even lead to another flat tire. Here’s how to check the tire pressure:
- Locate the tire pressure information in your vehicle’s owner manual or on the driver side door jamb.
- Remove the valve cap on the spare tire.
- Attach the tire pressure gauge to the valve stem and press down until the gauge reads the pressure.
- If the tire pressure is too low, use an air compressor to fill the tire to the recommended pressure. If the tire pressure is too high, release air until it reaches the recommended pressure.
- Replace the valve cap.
It is important to check the tire pressure of all four tires regularly to ensure safe driving conditions and prolong the life of your tires.

Conclusion
Knowing how to fix a flat tire is a crucial skill for any driver. It can save you time, money, and headaches when you experience a roadside emergency. With the step-by-step guide outlined in this article, you can confidently change a flat tire in just a few minutes.
Remember to always stay safe and be aware of your surroundings when changing a tire on the side of the road. Keep a spare tire, jack, and lug wrench in your car at all times, and consider investing in a tire repair kit for added convenience.
If you are not comfortable changing a tire on your own, don’t hesitate to call for roadside assistance. Many insurance companies offer this service as part of their coverage, and it can provide peace of mind in case of an emergency.
Final Thoughts
Flat tires can happen to anyone, but with the right tools and knowledge, you can handle the situation with ease. By following the steps outlined in this article, you can quickly and safely change a flat tire and get back on the road in no time.
Remember, prevention is key when it comes to flat tires. Regularly check your tire pressure and tread depth, and avoid driving over debris or potholes whenever possible. With a little bit of caution and preparation, you can minimize your risk of experiencing a flat tire and enjoy a safer, smoother ride.