
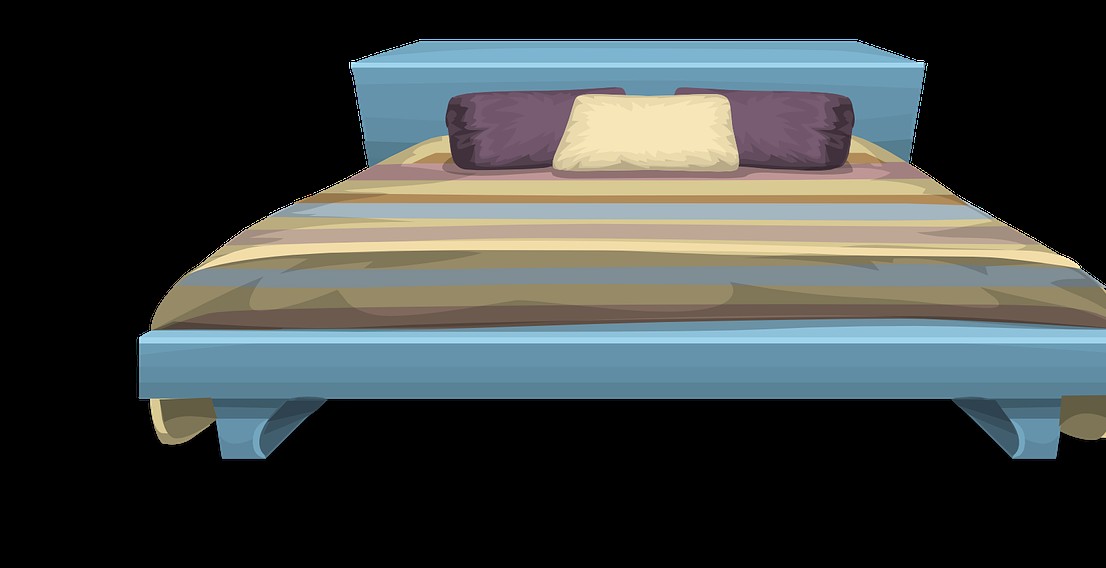
Introduction: How to Create a DIY Custom Headboard for Your Bed
Are you tired of the same old boring headboard on your bed? Do you want to add a touch of personality and style to your bedroom without breaking the bank? Creating a DIY custom headboard is the perfect solution!
Why create a DIY custom headboard?
First and foremost, creating a DIY custom headboard allows you to express your creativity and individuality. You can choose the materials, colors, and design that best reflect your personal style and taste. Plus, it’s a fun and rewarding project that can be completed in just a few hours.
Another advantage of creating a DIY custom headboard is the cost savings. Store-bought headboards can be expensive, especially if you’re looking for something unique and high-quality. By creating your own headboard, you can save money and still achieve the same level of style and functionality.
Finally, a custom headboard can add a sense of warmth and coziness to your bedroom. It can serve as a focal point and create a sense of harmony and balance in the room.
In this article, we’ll guide you through the process of creating your own DIY custom headboard. From choosing the right materials to adding finishing touches, we’ll cover everything you need to know to create a beautiful and functional headboard for your bed.
Step 1: Measure your bed
The first step in creating a DIY custom headboard for your bed is to measure your bed. This is an important step as it will determine the size of the headboard you need to create. Here are the tools you will need:
- Tape measure
- Pencil
- Paper
Once you have gathered your tools, follow these steps to measure your bed:
1. Measure the width
Start by measuring the width of your bed. Place the tape measure at the top of the bed frame and measure across to the other side. Be sure to measure from the widest points, including any protruding hardware or footboards. Write down the measurement on your paper.
2. Measure the height
Next, measure the height of your bed. Place the tape measure at the floor and measure up to the top of the mattress. Again, be sure to measure from the highest points, including any decorative elements or pillows. Write down the measurement on your paper.
3. Decide on the thickness
Finally, decide on the thickness of your headboard. This will depend on your personal preference and the style of your room. A thicker headboard will have a more substantial look, while a thinner headboard will be more streamlined. Write down your desired thickness on your paper.
| Measurement | Value |
|---|---|
| Width | [insert width measurement] |
| Height | [insert height measurement] |
| Thickness | [insert desired thickness] |
With these measurements in hand, you are ready to move on to the next step in creating your DIY custom headboard for your bed.
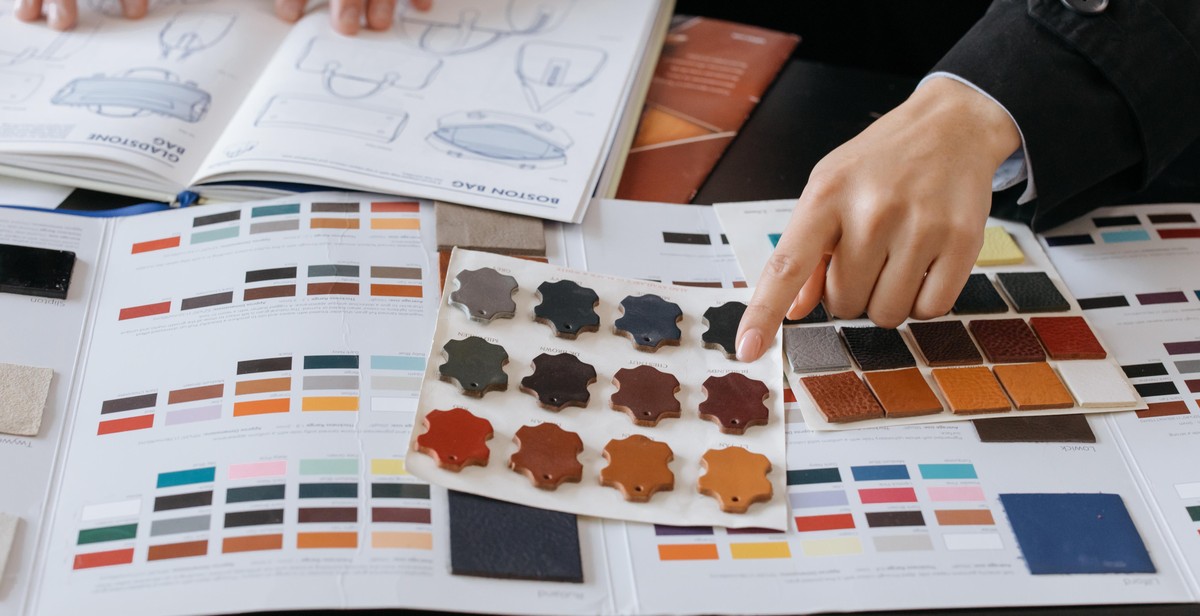
Step 2: Choose your materials
Choosing the right materials for your DIY custom headboard is crucial to ensure both the durability and aesthetic appeal of the final product. Here are some common types of materials you can use:
Wood
Wood is a popular material for headboards because it’s sturdy, versatile, and can be stained or painted to match any decor. You can use plywood, MDF, or solid wood boards to make your headboard. Solid wood is the most expensive option but provides the most natural and authentic look.
Upholstery fabric
If you want a soft and cozy headboard, upholstery fabric is a great choice. You can use any type of fabric, from cotton to velvet, depending on your preference. You’ll also need some foam padding to create the cushioned effect.
Metal
Metal headboards can add a touch of elegance and sophistication to your bedroom. You can use wrought iron, brass, or aluminum to create a modern or vintage look. Metal headboards are also easy to maintain and clean.
Where to buy
You can buy materials for your DIY custom headboard at any home improvement store, craft store, or online retailer. Here are some popular options:
- The Home Depot
- Lowe’s
- Joann Fabrics
- Hobby Lobby
- Amazon
Compare prices and quality before making a purchase. Don’t forget to take measurements of your bed and room to ensure the materials you buy fit perfectly.
| Material | Pros | Cons |
|---|---|---|
| Wood | Sturdy, versatile, can be stained or painted | Heavy, can be expensive |
| Upholstery fabric | Soft, cozy, comes in various colors and patterns | Requires foam padding, can be challenging to clean |
| Metal | Elegant, sophisticated, easy to maintain | Can be noisy, limited design options |
Step 3: Design your Headboard
Now that you have gathered your materials and tools and decided on the size and shape of your headboard, it’s time to get creative and design your headboard. Here are some tips to get you started:
Ideas and Inspiration
Before you start sketching your design, it’s a good idea to gather some inspiration. Browse through home decor magazines, websites, and social media platforms like Pinterest and Instagram to get ideas for different styles, colors, patterns, and textures. You can also visit furniture stores or online marketplaces to see what’s available and what catches your eye.
Remember that your headboard should complement your bedroom decor and reflect your personal style. You can choose a simple or elaborate design, a traditional or modern style, a bold or muted color scheme, or a pattern or texture that adds interest and dimension.
Sketching your Design
Once you have some ideas and inspiration, it’s time to sketch your design. You don’t have to be an artist to create a simple sketch or outline of your headboard. Use a pencil and paper or a digital drawing tool to create a rough draft of your design.
Consider the size and shape of your headboard, the materials you are using, and the tools you have available. You can create a simple rectangular headboard or a more elaborate shape like a curved or arched top. You can also add details like tufting, nailhead trim, or decorative buttons.
When you’re happy with your design, make a final sketch or outline and use it as a guide for the next step.
| Design Tips: |
|---|
| Use graph paper to create a scale drawing of your headboard. |
| Consider the height of your headboard in relation to your bed and ceiling. |
| Experiment with different materials, colors, and textures. |
With your design complete, you’re ready to move on to the next step: building your headboard.
Step 4: Build your headboard
Now that you have gathered all the necessary materials and tools, it’s time to start building your custom headboard. Follow these step-by-step instructions:
Tools needed:
- Drill
- Screws
- Screwdriver
- Saw
- Sandpaper
- Staple gun
Step-by-step instructions:
- Begin by measuring the width of your bed frame and adding a few inches to each side to determine the size of your headboard.
- Cut a piece of plywood to the desired size of your headboard using a saw.
- Sand down the edges of the plywood to smooth out any rough spots.
- Attach foam padding to the plywood using a staple gun. Make sure to pull the foam taut and staple it securely to prevent any lumps or bumps.
- Cut your fabric to size, leaving enough excess on each side to wrap around the edges of the plywood and foam padding.
- Using a staple gun, attach the fabric to the back of the plywood, starting in the middle and working your way outwards. Make sure to pull the fabric taut and staple it securely to prevent any wrinkles or sagging.
- Attach the headboard to your bed frame using screws and a screwdriver.
And there you have it – a beautiful, custom headboard that perfectly complements your bedroom decor. Enjoy your new piece of furniture!
Step 5: Install Your Headboard
After completing the DIY custom headboard for your bed, the next step is to install it properly. Here are the steps to follow:
1. Attach to Bed Frame
First, determine the height at which you want to place the headboard. Once you have decided on the height, hold the headboard up to the bed frame and align the mounting brackets on the headboard with the slots in the bed frame. Then, insert the bolts through the holes in the brackets and tighten them with a wrench. Make sure to use the appropriate size bolts for your bed frame.
Tips for Stability:
- Ensure that the headboard is level and flush against the bed frame.
- Use washers to prevent the bolts from loosening over time.
- If your bed frame doesn’t have slots for the mounting brackets, drill holes into the frame and insert threaded inserts to attach the headboard.
- If your headboard is heavy, consider adding extra support by attaching L-brackets to the back of the headboard and the wall.
2. Test for Stability
Once the headboard is attached to the bed frame, test it for stability. Give it a gentle shake to ensure that it is firmly attached. If it wobbles or feels loose, re-tighten the bolts or add extra support as needed.
| Materials Needed: | Tools Needed: |
|---|---|
| Bolts | Wrench |
| Washers | Level |
| Threaded Inserts (if necessary) | Drill (if necessary) |
| L-Brackets (if necessary) | Screws (if necessary) |

Conclusion
Creating a custom headboard for your bed is a great way to add a personal touch to your bedroom décor. With the right tools and materials, the process can be simple and affordable. By following the steps outlined in this article, you can create a headboard that perfectly matches your style and preferences.
Remember to measure your bed and choose a design that complements the size and shape of your room. Whether you opt for a classic upholstered headboard or a more modern DIY wood design, there are endless possibilities to explore.
Don’t be afraid to get creative with your materials and embellishments. Consider adding buttons, tufting, or decorative trim to give your headboard a unique look. And if you’re feeling extra adventurous, try incorporating LED lights or other innovative features.
With a little bit of time and effort, you can transform your bedroom into a cozy and stylish retreat. So grab your tools and get started on your DIY headboard project today!
| Pros | Cons |
|---|---|
|
|