
How to Photograph Artwork: Lighting, Composition, and Editing Tips
As a professional photographer and artist, I understand the importance of capturing the true essence of artwork through photography. Whether you are an artist looking to showcase your pieces online or a gallery owner in need of high-quality images for your website, knowing how to photograph artwork is crucial.
Photographing artwork involves more than just pointing and shooting. Proper lighting, composition, and editing are essential to ensure that the photograph accurately represents the artwork’s colors, textures, and details. In this article, I will share my personal experience and tips on how to photograph artwork effectively.
Lighting
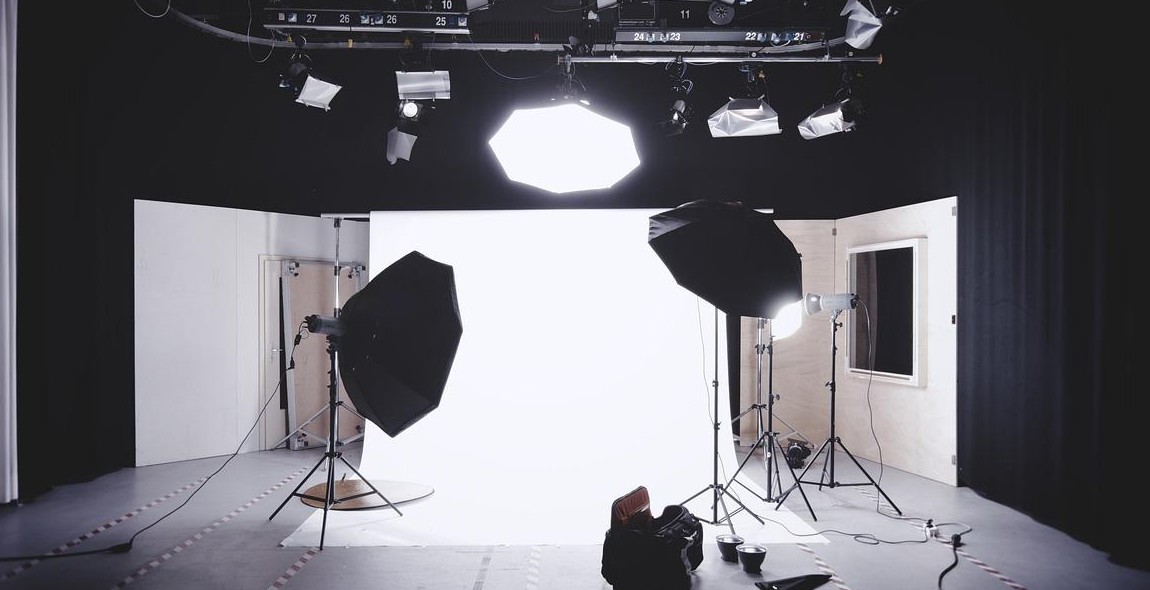
The lighting used to photograph artwork can significantly impact the final image’s quality. Natural light is ideal, but it’s not always available or consistent. In such cases, using artificial lighting, such as softbox lights or LED panels, can help create a consistent and even light source. I will discuss the best lighting setups for photographing artwork in detail.
Composition
Composition is crucial when it comes to photographing artwork. Proper composition can help highlight the artwork’s unique features, textures, and colors. I will share some tips on how to frame your shots and create an appealing composition that accurately represents the artwork.
Editing
After capturing the photograph, editing is necessary to enhance the image’s colors and details. I will discuss some editing techniques that can help bring out the artwork’s true essence and create a visually appealing final image.
Whether you are a professional photographer or an artist looking to showcase your work, this article will provide you with the necessary tips and techniques to photograph artwork effectively.
Equipment Needed
Photographing artwork requires specific equipment to capture the details and colors accurately. Here are the essential pieces of gear you need:
Camera
The most important piece of equipment you need is a camera with manual controls. A DSLR or mirrorless camera with a high resolution is ideal for capturing the details of the artwork. If you don’t have a professional camera, a smartphone with a good camera can also work. However, you won’t have as much control over the settings.
Tripod
Using a tripod is essential for keeping your camera steady and avoiding any blur in your photos. A sturdy tripod will also allow you to make small adjustments to the camera’s position without moving the entire setup. Look for a tripod with adjustable legs and a ball head for maximum flexibility.
Lighting Equipment
The right lighting is crucial for capturing the colors and details of the artwork accurately. You can use natural light if you have a well-lit room, but if not, you’ll need artificial lighting. Here are some options:
- Softbox Lights: These lights provide a soft and even light source that’s ideal for photographing artwork. They come in various sizes and shapes, and you can adjust the brightness and temperature of the light.
- LED Lights: LED lights are energy-efficient and come in various sizes and shapes. They’re also adjustable, so you can change the brightness and temperature of the light.
- Ring Lights: These lights are ideal for photographing small pieces of artwork. They provide a soft and even light source and are adjustable, so you can change the brightness and temperature of the light.
With these essential pieces of equipment, you’ll be able to capture stunning photos of artwork. In the next section, we’ll go over the best ways to set up your equipment for optimal results.

Lighting for Artwork Photography
When it comes to photographing artwork, lighting is one of the most important factors to consider. The right lighting can make all the difference in capturing the true colors, textures, and details of a piece of art. There are two main types of lighting to consider: natural light and artificial light.
Natural Light vs. Artificial Light
Natural light can be a great option for photographing artwork, especially if you have access to a space with large windows and plenty of natural light. However, it’s important to keep in mind that natural light can be inconsistent and may change throughout the day, affecting the colors and overall look of the artwork. If you do choose to use natural light, try to shoot during a time of day when the light is consistent, such as mid-morning or mid-afternoon.
Artificial light, on the other hand, allows for more control over the lighting conditions. You can choose the exact color temperature and brightness of the light, ensuring that the artwork looks its best. This can be especially useful if you need to photograph artwork at night or in a space without access to natural light.
Positioning the Light Source
No matter what type of lighting you choose, it’s important to position the light source correctly. Ideally, the light should be positioned at a 45-degree angle to the artwork, coming from either side of the piece. This will help to minimize any glare or reflections on the artwork.
Diffusing the Light
Diffusing the light can also help to create a more even, natural-looking light source. This can be done by using a softbox or umbrella to diffuse the light, or by bouncing the light off of a white surface to create a softer, more diffused light source.
- Choose natural or artificial light depending on the situation
- Position the light at a 45-degree angle from the artwork
- Diffuse the light for a more even and natural-looking light source
By following these tips for lighting artwork photography, you can ensure that your photos accurately capture the beauty and detail of each piece of art.

Composition Tips
When it comes to photographing artwork, proper composition is key to capturing the essence of the piece. Here are some tips on how to frame your artwork:
Framing the Art
When framing your artwork, make sure the edges of the frame are parallel to the edges of the photograph. This will ensure that the artwork appears straight and proportional in the final image. If the artwork is not centered in the frame, adjust your position or the camera angle until it is.
Choosing the Right Angle
The angle at which you photograph the artwork can greatly affect the final image. Experiment with different angles to find the one that best showcases the artwork. For example, shooting from a low angle can create a sense of grandeur and make the artwork appear larger than life. On the other hand, shooting from a high angle can create a sense of intimacy and make the artwork feel more personal.
Creating Depth
To create depth in your photograph, try using the rule of thirds. Imagine dividing the frame into thirds both horizontally and vertically, and place the artwork at the intersection of those lines. This will create a more dynamic and interesting composition. Additionally, try to include some background or foreground elements in the shot to add depth and context to the artwork.
| Framing the Art | Choosing the Right Angle | Creating Depth |
|---|---|---|
| Parallel edges of the frame and photograph | Experiment with different angles | Use the rule of thirds and include background/foreground elements |
By following these composition tips, you can elevate your artwork photography to the next level and create stunning images that truly capture the essence of the piece.
Editing Your Artwork Photos
Once you have captured your artwork photos, it’s time to edit them. Editing is an essential step in the process of creating high-quality photos of your artwork. In this section, we will discuss some crucial editing tips that will help you enhance the quality of your artwork photos.
Adjusting Brightness and Contrast
Adjusting brightness and contrast can make a significant difference in the quality of your photos. In some cases, the photo may look too dark or too bright, which can affect the details of the artwork. By adjusting the brightness and contrast, you can bring out the details and make the photo look more vibrant.
Color Correction
Color correction is a crucial step in editing your artwork photos. Sometimes, the colors in the photo may not match the actual colors of the artwork. In such cases, color correction can help you adjust the colors and make them look more accurate. You can use the color correction tools in your photo editing software to adjust the hue, saturation, and brightness of the colors in the photo.
Removing Glare and Reflections
Glare and reflections can be distracting and take away from the focus of the artwork. It’s essential to remove them to create a clear and focused photo. You can use the clone stamp or healing brush tool in your photo editing software to remove the glare and reflections. These tools allow you to sample a part of the photo and apply it to another area to remove the glare and reflections.
Conclusion
Editing your artwork photos is an essential step in the process of creating high-quality photos. By adjusting the brightness and contrast, color correction, and removing glare and reflections, you can enhance the quality of your artwork photos. Take the time to edit your photos correctly, and you will have photos that showcase your artwork in the best possible light.
Conclusion: Capturing the Beauty of Artwork through Photography
Photographing artwork can be a challenging yet rewarding experience. With the right lighting, composition, and editing techniques, you can capture the beauty and essence of the artwork in a digital format.
When it comes to lighting, natural light is your best friend. However, in cases where natural light is not available or ideal, artificial lighting can be used. Experiment with different angles and intensities to find the best lighting setup for your artwork.
Composition is also crucial in capturing the artwork’s beauty. Consider the artwork’s size, shape, and texture when framing your shot. Use the rule of thirds and negative space to create visually appealing photos.
Lastly, editing can enhance the artwork’s colors and details and remove any unwanted distractions. Use editing software like Adobe Photoshop or Lightroom to adjust the brightness, contrast, saturation, and sharpness of your photos.
With these tips, you can create stunning photographs of artwork that accurately represent the artist’s vision. Remember to experiment and have fun with your photography, and you’ll be sure to capture the beauty of artwork through your lens.