
How to Sew Your Own Custom Dress: Step-by-Step Guide for Beginners
Are you tired of never finding the perfect dress that fits you just right? Or perhaps you want to create a unique piece that nobody else has? Whatever your reason, sewing your own custom dress can be a fun and rewarding experience. Not only will you have a one-of-a-kind garment that fits you perfectly, but you’ll also learn a valuable skill that you can use to create other clothing items in the future.
Why Sew Your Own Dress?
Sewing your own dress is a great way to express your creativity and personal style. It allows you to choose the fabric, design, and fit that you want, instead of settling for what’s available in stores. Additionally, sewing your own dress can save you money in the long run, as you’ll be able to create high-quality garments that last longer than store-bought ones.
Whether you’re a complete beginner or an experienced sewist, this step-by-step guide will walk you through the process of sewing your own custom dress. From choosing the right fabric to creating a pattern and sewing the final product, you’ll learn everything you need to know to create a beautiful and unique dress that you’ll be proud to wear.
Choosing the Right Fabric
One of the most important steps in sewing your own custom dress is choosing the right fabric. The fabric you choose can make or break your project, so it’s important to take the time to consider all of your options before making a decision.
Types of Fabric to Consider
There are many different types of fabric to choose from, each with its own unique characteristics and properties. Some of the most popular fabrics for dressmaking include:
- Cotton: A versatile and easy-to-work-with fabric that is breathable and comfortable to wear.
- Silk: A luxurious and elegant fabric that drapes beautifully and has a soft, smooth texture.
- Chiffon: A lightweight and sheer fabric that is perfect for creating flowing, ethereal dresses.
- Lace: A delicate and intricate fabric that can add a touch of romance and femininity to any dress.
- Denim: A sturdy and durable fabric that is ideal for creating casual, everyday dresses.
How Much Fabric Do You Need?
The amount of fabric you will need for your dress will depend on several factors, including the style of dress you are making, your body measurements, and the width of the fabric you are using. As a general rule, you should always buy a little bit more fabric than you think you will need, just to be on the safe side.
| Size | Yardage Required (45″ wide fabric) | Yardage Required (60″ wide fabric) |
|---|---|---|
| Small (4-6) | 3 yards | 2 1/4 yards |
| Medium (8-10) | 3 1/2 yards | 2 1/2 yards |
| Large (12-14) | 4 yards | 2 3/4 yards |
| X-Large (16-18) | 4 1/2 yards | 3 yards |
By considering the type of fabric you want to use and how much you will need, you can ensure that you have everything you need to start sewing your own custom dress.

Taking Accurate Measurements
Before you start sewing your custom dress, it is important to take accurate measurements of your body. This will ensure that your dress fits perfectly and looks amazing. Here are the tools you will need for measuring:
- Measuring tape
- Pencil and paper to record your measurements
Taking Your Measurements
When taking your measurements, it is important to stand up straight and breathe normally. Here are the measurements you will need to take:
| Measurement | How to Take |
|---|---|
| Bust | Measure around the fullest part of your bust, making sure the measuring tape is level. |
| Waist | Measure around the narrowest part of your waist, typically just above the belly button. |
| Hips | Measure around the fullest part of your hips, making sure the measuring tape is level. |
| Length | Measure from the shoulder down to where you want the dress to end, typically at the knee or ankle. |
| Sleeve Length | Measure from the shoulder down to where you want the sleeve to end, typically at the wrist or elbow. |
Make sure to write down your measurements and keep them in a safe place for future reference. With these accurate measurements, you can start sewing your custom dress with confidence!

Drafting the Pattern
When it comes to sewing your own custom dress, there are two options for creating a pattern: using a commercial pattern or drafting your own pattern.
Using a Commercial Pattern
Commercial patterns are pre-made patterns that you can purchase from a fabric store or online. They come in a range of sizes and styles and usually include instructions for how to cut and sew the fabric. When using a commercial pattern, it’s important to choose the correct size and to follow the instructions carefully.
Here are some tips for using a commercial pattern:
- Measure yourself accurately before selecting a size
- Read the instructions carefully before starting
- Use the recommended fabric and notions
- Make a muslin or test garment before cutting into your final fabric
Drafting Your Own Pattern
If you want to create a truly custom dress, you can draft your own pattern. This involves taking your own measurements and creating a pattern from scratch. While this may seem daunting, there are plenty of resources available to help you.
Here are some steps for drafting your own pattern:
- Take accurate measurements of your bust, waist, hips, and other key areas
- Create a basic bodice or skirt block using your measurements
- Add design elements such as darts, pleats, or gathers
- Create a muslin or test garment to check the fit
- Adjust the pattern as necessary and create a final pattern on paper or cardstock
While drafting your own pattern may take more time and effort than using a commercial pattern, it can result in a truly unique and personalized dress.
Cutting the Fabric
Now that you have your pattern and fabric ready, it’s time to cut the fabric. Here are the steps you need to follow:
Step 1: Pre-wash the Fabric
Before cutting the fabric, it’s important to pre-wash it to avoid any shrinkage or color bleeding later on. Follow the washing instructions provided on the fabric label.
Step 2: Prepare the Fabric
Iron the fabric to remove any wrinkles and lay it out on a flat surface. Make sure the fabric is folded in half with the right sides facing each other.
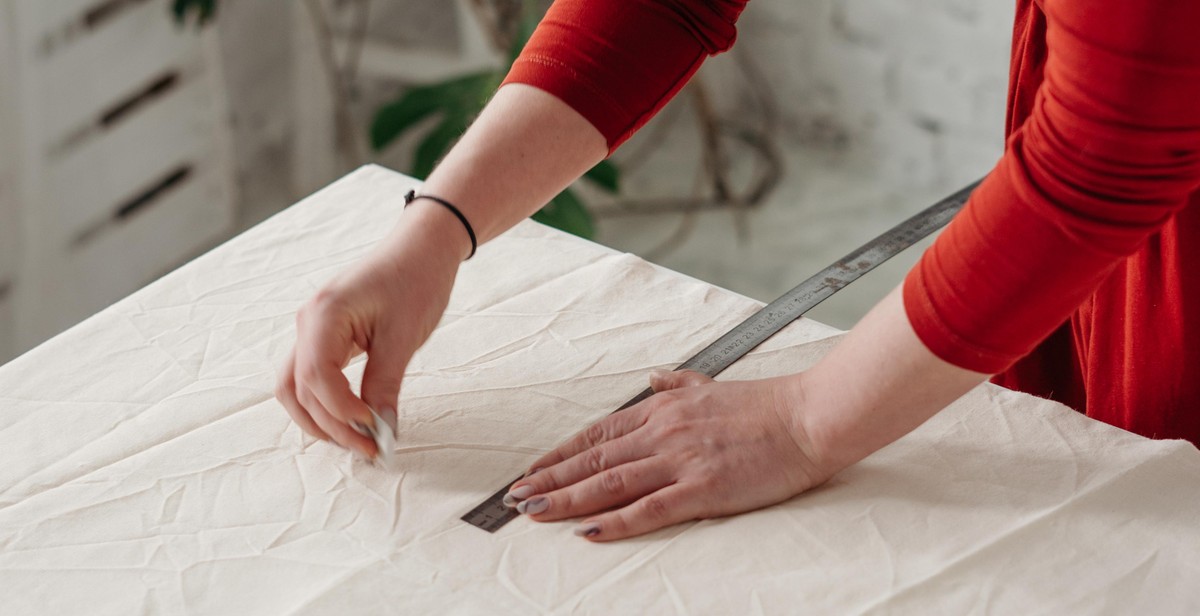
Step 3: Pin the Pattern
Place the pattern on the fabric and pin it in place. Make sure it’s aligned properly and the grain line is straight. Use scissors to cut around the pattern.
Step 4: Mark the Fabric
Use tailor’s chalk or a fabric marker to mark any notches, darts, or other pattern markings on the fabric. This will help you later on when you’re sewing the dress.
Step 5: Cut the Fabric
Carefully cut the fabric along the marked lines. Take your time and make sure you’re cutting accurately.
Remember to label each piece of fabric with the corresponding pattern piece number to avoid confusion later on.
Once you’ve cut all the pieces, you’re ready to start sewing your custom dress!
Sewing the Dress
Sewing Techniques to Know
Before you start sewing your dress, it is important to know some basic sewing techniques. These techniques will help you achieve a professional finish on your dress. Here are some sewing techniques you should know:
- Seam allowances: This refers to the amount of fabric that extends beyond the stitching line. It is important to know the correct seam allowance for your project.
- Pinning: You will need to pin your fabric pieces together before sewing to ensure they stay in place.
- Pressing: Pressing your seams and fabric will make a big difference in the final look of your dress. It will help your dress lay flat and give it a professional finish.
- Topstitching: This is a decorative stitch that is visible on the outside of your garment. It is often used to secure edges or create a finished look.
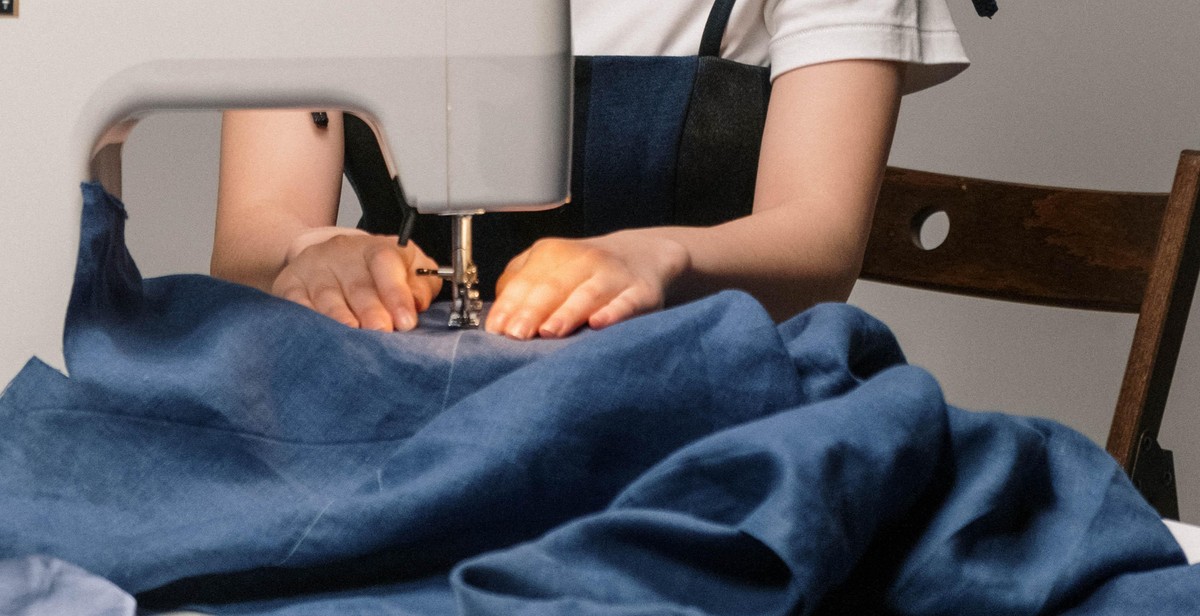
Step-by-Step Guide to Sewing the Dress
Now that you know some basic sewing techniques, let’s start sewing your dress:
- Cut out your fabric pieces: Use the pattern you created in the previous section to cut out your fabric pieces. Be sure to follow the pattern instructions carefully.
- Pin and sew the bodice: Pin the bodice pieces together and sew them using the correct seam allowance. Press the seams open.
- Pin and sew the skirt: Pin the skirt pieces together and sew them using the correct seam allowance. Press the seams open.
- Attach the bodice and skirt: Pin the bodice and skirt together, right sides facing. Sew them together using the correct seam allowance. Press the seams up towards the bodice.
- Add the zipper: Follow the instructions on your zipper to attach it to the back seam of your dress.
- Finish the hem: Hem the bottom of your dress using a topstitch or a blind hem stitch.
With these steps, you can easily sew your own custom dress. Remember to take your time, follow instructions carefully, and practice your sewing techniques to achieve the best results.
Final Touches
After completing the main construction of your custom dress, it’s time to add the final touches to give it a professional finish. This section covers adding buttons, zippers, and other details, as well as pressing and finishing the dress.
Adding Buttons, Zippers, and Other Details
Buttons and zippers are essential components of any dress, and adding them is relatively easy. To add buttons, measure the distance between the buttonholes and mark the placement of each button. Sew the buttons securely in place using a buttonhole stitch. For zippers, mark the placement on the fabric and sew the zipper in place using a zipper foot.
Other details, such as pockets, ruffles, or embellishments, can also be added to enhance your dress’s look. Follow the pattern instructions carefully and use a high-quality thread for durability.
Pressing and Finishing the Dress
Pressing is a crucial step in sewing, and it can make a significant difference in the final appearance of your dress. Use a pressing cloth and a steam iron to press the seams and hems, as well as any other details you have added. This will give your dress a polished look.
Finally, finish the dress by trimming any loose threads and checking for any missed stitches. Try on the dress and make any necessary adjustments to ensure a perfect fit. With these final touches, your custom dress is ready to wear!
Conclusion
Learning how to sew your own custom dress can be a fun and rewarding experience, especially for beginners. With the right tools, materials, and techniques, you can create a dress that fits perfectly and reflects your personal style.
Before you start, make sure to choose a pattern that matches your skill level and desired style. Take your time to measure and cut your fabric accurately, and use pins to hold everything in place before sewing. Remember to iron your seams and finish your edges for a professional-looking finish.
As you gain more experience, you can experiment with different fabrics, patterns, and designs to create even more unique and personalized dresses. Don’t be afraid to make mistakes and learn from them, as they are a natural part of the sewing process.
Lastly, don’t forget to enjoy the journey. Sewing can be a relaxing and meditative activity, and the satisfaction of creating something with your own hands is priceless. With this step-by-step guide, you have all the tools you need to start your sewing journey and create your own custom dress.
| Tools: | sewing machine, scissors, pins, measuring tape, iron, ironing board, fabric marker, seam ripper, thread |
| Materials: | fabric, thread, zipper, buttons, interfacing, lining (optional) |
- Choose a pattern that matches your skill level and desired style
- Measure and cut your fabric accurately, and use pins to hold everything in place before sewing
- Iron your seams and finish your edges for a professional-looking finish
- Experiment with different fabrics, patterns, and designs to create even more unique and personalized dresses
- Enjoy the journey and the satisfaction of creating something with your own hands