How to Sew a DIY Dress: Step-by-Step Guide for Beginners
Sewing a dress can be a fun and rewarding project for beginners who are interested in learning how to sew. With the right tools, materials, and a bit of patience, you can create a beautiful dress that fits you perfectly and showcases your personal style.
Choosing the Right Fabric
The first step in sewing a dress is choosing the right fabric. Look for a fabric that is easy to work with, such as cotton or linen, and choose a color and pattern that you love. Make sure to wash and dry your fabric before starting your project to avoid any shrinkage.
Getting the Right Measurements
Before you start cutting your fabric, you need to take accurate measurements of your body to ensure a proper fit. Use a measuring tape to measure your bust, waist, hips, and length from your shoulder to your desired hemline.
Tools and Materials
Aside from the fabric, you will need a few basic sewing tools and materials to complete your dress. These include a sewing machine, thread, scissors, pins, measuring tape, and a pattern (if you choose to use one).
Step-by-Step Guide
Follow these steps to sew your own DIY dress:
- Cut out your fabric according to your measurements and pattern (if using).
- Sew the front and back pieces of the dress together at the shoulders and sides.
- Add sleeves or finish the armholes, if desired.
- Create the neckline and finish the edges of the dress.
- Add any finishing touches, such as buttons or a zipper.
With these steps and a bit of practice, you can sew your own beautiful and unique dress that you can wear with pride.

Choosing the Right Fabric
Understanding Fabric Types and Weaves
Before you start sewing your DIY dress, it’s important to understand the different types of fabrics and weaves available. This will help you select the right fabric for your dress, ensuring that it looks and feels the way you want it to.
Fabric Types
Here are some common fabric types:
- Cotton: a soft, breathable fabric that’s easy to work with
- Silk: a luxurious fabric that drapes beautifully but can be difficult to work with
- Chiffon: a lightweight, sheer fabric that’s perfect for flowing dresses
- Denim: a sturdy, durable fabric that’s great for casual dresses
- Jersey: a stretchy, comfortable fabric that’s ideal for bodycon dresses
Fabric Weaves
Here are some common fabric weaves:
- Plain weave: a simple over-under weave that creates a flat, smooth fabric
- Twill weave: a diagonal weave that creates a textured fabric
- Satin weave: a weave that creates a shiny, smooth fabric
- Knit weave: a stretchy, comfortable weave that’s great for bodycon dresses
When choosing a fabric for your dress, consider the weave as well as the type of fabric. A plain weave cotton will look and feel very different from a satin weave silk, for example.
Selecting the Right Fabric for Your Dress
When selecting a fabric for your dress, consider the following:
- The occasion: is this a casual or formal dress?
- The season: is the fabric appropriate for the weather?
- The style: does the fabric drape the way you want it to?
- The color and pattern: does the fabric match your vision for the dress?
By considering these factors, you can select the right fabric for your DIY dress and ensure that it looks and feels the way you want it to.

Taking Accurate Measurements
Before you start sewing your DIY dress, it is crucial to take accurate measurements of your body and the sample dress (if you have one). This will ensure that your dress fits perfectly and looks great.
Measuring Your Body
When measuring your body, it is best to wear tight-fitting clothes or just your undergarments. This will give you the most accurate measurements. Use a soft measuring tape and stand up straight with your feet together.
Here are the measurements you will need:
- Bust: Measure around the fullest part of your bust, making sure the tape is straight across your back.
- Waist: Measure around the narrowest part of your waist, usually an inch or two above your belly button.
- Hips: Measure around the fullest part of your hips, usually 7-9 inches below your waist.
- Length: Measure from the top of your shoulder to where you want the dress to end.
Measuring a Sample Dress
If you have a dress that fits you well, you can use it as a reference to create your own DIY dress. Lay the dress flat on a table and measure the following:
- Bust: Measure from underarm to underarm and double the measurement.
- Waist: Measure the narrowest part of the dress and double the measurement.
- Hips: Measure the widest part of the dress and double the measurement.
- Length: Measure from the top of the shoulder to where the dress ends.
Once you have all your measurements, you are ready to start sewing your DIY dress!

Preparing the Fabric
Before you start sewing your DIY dress, preparing the fabric is a crucial step. This step ensures that your dress fits well and looks great after it’s finished. Here are the two essential steps to prepare your fabric:
Washing and Ironing the Fabric
It is essential to wash and iron your fabric before you start cutting it. This step is necessary because fabrics tend to shrink when they are washed. If you skip this step, you may end up with a dress that does not fit well after it’s washed.
Washing your fabric is simple; all you need is a washing machine and some laundry detergent. Make sure to wash your fabric in cold water and on a gentle cycle. Once it’s washed, hang it to dry or put it in the dryer on low heat.
After your fabric is dry, it’s time to iron it. Ironing your fabric will remove any wrinkles and make it easier to cut. Be sure to use the appropriate heat setting for your fabric to avoid damaging it. If your fabric is delicate, place a pressing cloth between the iron and the fabric to protect it.
Cutting the Fabric
Now that your fabric is washed and ironed, it’s time to cut it. Before cutting, lay your fabric flat on a cutting mat or a large table. Make sure the fabric is smooth and free of wrinkles.
Use fabric scissors to cut your fabric according to your dress pattern. Be sure to follow the pattern instructions carefully to ensure that your dress fits well. You can use pins or weights to keep the fabric in place while cutting.
Once you have cut out all of the pieces, you are ready to start sewing your DIY dress!

Sewing the Dress
Now that you have gathered all the necessary materials and measurements, it’s time to start sewing your dress. This section will guide you through the process of sewing the bodice, skirt, sleeves, and putting it all together.
Working with a Sewing Machine
Before you start sewing your dress, make sure you are comfortable with your sewing machine. Familiarize yourself with its settings, threading, and tension adjustments. Practice sewing on a scrap piece of fabric to ensure everything is working correctly.
Sewing the Bodice
The bodice of the dress is the top part that covers the chest and upper body. Start by sewing the darts, if any, to create a fitted shape. Then, sew the front and back pieces together at the shoulders and side seams. Finish the edges with a serger or zigzag stitch to prevent fraying.
Sewing the Skirt
The skirt is the bottom part of the dress that starts at the waistline and falls to the desired length. Sew the front and back pieces together at the side seams, leaving a space for the zipper or buttons. Hem the bottom edge by folding it twice and sewing it in place.
Sewing the Sleeves
The sleeves of the dress can be short, long, or somewhere in between. Sew them to the bodice by matching the notches and easing in any excess fabric. Finish the edges with a serger or zigzag stitch and hem the bottom edge.
Putting it All Together
Once you have completed the bodice, skirt, and sleeves, it’s time to put it all together. Sew the bodice to the skirt at the waistline, making sure the seams match up. Insert the zipper or buttons, and finish any remaining edges. Try on the dress and make any necessary adjustments.
| Tips: |
|---|
| Always measure twice and cut once to avoid any mistakes. |
| Press your seams as you sew to create a professional-looking finish. |
| Take your time and don’t rush the process. Sewing a dress is a labor of love, and the end result will be worth it! |
Adding Finishing Touches
Once you have completed the main part of sewing your DIY dress, it’s time to add the finishing touches. These small details can make a big difference in the final look of your dress. Here are some tips for adding the finishing touches:
Hemming the Dress
The hem of your dress is an essential finishing touch. It gives the dress a polished look and ensures that it falls correctly on your body. To hem your dress, turn the bottom edge of the fabric under twice and sew it in place. Alternatively, you can use bias tape or lace to finish the hem.
Adding Buttons and Zippers
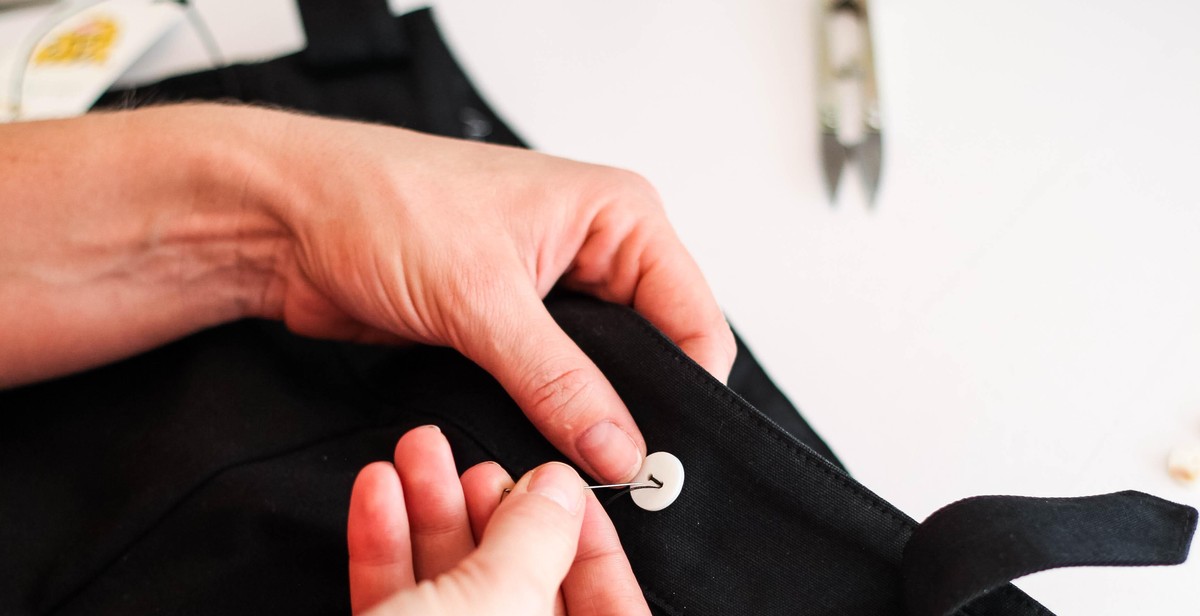
If your dress has a closure, such as buttons or a zipper, it’s important to add them carefully to ensure a secure fit. Buttons should be sewn on with strong thread and reinforced with a small piece of fabric on the inside. Zippers should be inserted evenly and sewn in place for durability.
Adding Embellishments
Adding embellishments, such as lace, appliques, or embroidery, can give your dress a unique and personalized touch. When adding embellishments, it’s important to choose a design that complements the style of your dress. Sew them on carefully, ensuring that they are securely attached and won’t fall off or fray.
| Tips: |
|---|
| • Always use thread that matches the color of your fabric for a seamless finish. |
| • Take your time when adding the finishing touches to ensure a professional-looking result. |
| • Don’t be afraid to experiment with different embellishments and closures to create a one-of-a-kind dress. |
Adding the finishing touches to your DIY dress can be a fun and creative process. With a little attention to detail, you can create a dress that looks and feels like it was made by a professional.
Conclusion
Learning how to sew a DIY dress is not only a fun and rewarding experience, but it also allows you to create unique and personalized clothing items that fit your style and body perfectly. By following the step-by-step guide for beginners outlined in this article, you can create a beautiful dress that you will be proud to wear.
Remember to choose the right fabric, take accurate measurements, and follow the instructions carefully. Don’t be afraid to make mistakes, as they are a natural part of the learning process. With practice and patience, you will become more confident and skilled in the art of sewing.
Additionally, keep in mind the importance of using high-quality materials and tools, as they can make a significant difference in the outcome of your project. Invest in a good sewing machine, sharp scissors, and quality thread to ensure that your dress looks and feels amazing.
Finally, don’t forget to have fun and enjoy the process! Sewing is a creative and fulfilling hobby that can bring you joy and satisfaction for years to come.
| Key Points to Remember: |
|
