
How to Perform Basic First Aid: Life-Saving Techniques for Common Injuries
Accidents happen when we least expect them. It could be a minor cut or a more serious injury that requires immediate attention. Knowing how to perform basic first aid can mean the difference between life and death.
As a professional content creator and writer, I have had my fair share of accidents and emergencies. My personal experience has taught me that knowing how to perform basic first aid is crucial in times of crisis.
What is First Aid?
First aid is the initial assistance given to someone who is injured or suddenly becomes ill. It is the immediate care given to a person before the arrival of professional medical help.
First aid can be provided by anyone, even those without medical training. Basic first aid techniques can help stabilize a person’s condition and prevent further harm.
Why is First Aid Important?
First aid is important because it can save lives. It can also prevent an injury from becoming worse and causing further damage.
Basic first aid techniques can be used in a variety of situations, including accidents, sudden illnesses, and natural disasters. By knowing how to perform basic first aid, you can help yourself and others in times of need.
In this article, I will share life-saving techniques for common injuries that you can use in emergency situations.
Why Basic First Aid is Important
Basic first aid is a critical skill that everyone should have. It involves providing immediate care to an injured or ill person until professional medical help arrives. Knowing how to perform basic first aid can mean the difference between life and death in some situations. In this section, we will discuss the importance of basic first aid in terms of personal safety and preventing further injury.
Personal Safety
One of the primary reasons why basic first aid is important is for personal safety. Accidents can happen anytime and anywhere, and it’s crucial to be prepared to handle them. By knowing basic first aid techniques, you can help yourself and others in an emergency situation. For example, if someone is choking, you can perform the Heimlich maneuver to save their life. Similarly, if someone is bleeding heavily, you can apply pressure to the wound to stop the bleeding.
Basic first aid can also help you stay safe in hazardous situations. For instance, if you work in a job that involves handling dangerous equipment or chemicals, knowing basic first aid can help you respond quickly in case of an accident. This can prevent further injuries and minimize the damage caused.
Preventing Further Injury
Another critical reason why basic first aid is important is to prevent further injury. In many cases, providing immediate care can help reduce the severity of an injury and prevent it from getting worse. For example, if someone has a broken bone, immobilizing the affected area can prevent further damage to the bone and surrounding tissues.
Basic first aid can also help prevent infections and other complications. For instance, cleaning and covering a wound can prevent bacteria from entering and causing an infection. Similarly, applying ice to a sprained ankle can help reduce swelling and prevent further damage to the affected area.
Overall, knowing how to perform basic first aid is crucial for personal safety and preventing further injury. It’s a skill that everyone should have, regardless of their profession or background. By taking a basic first aid course or learning from reliable sources, you can equip yourself with the knowledge and skills needed to respond quickly and effectively in an emergency situation.
Basic First Aid Techniques
Knowing basic first aid techniques can be the difference between life and death in emergency situations. Here are some of the most important techniques you should know:
CPR
CPR, or cardiopulmonary resuscitation, is a life-saving technique that can help someone who has stopped breathing. To perform CPR, follow these steps:
- Check for responsiveness by gently tapping the person and shouting, “Are you okay?”
- If the person is unresponsive, call for help and begin chest compressions. Place the heel of one hand on the center of the person’s chest and place the other hand on top of the first hand. Push down hard and fast, allowing the chest to recoil between compressions. Perform 30 compressions.
- Open the person’s airway by tilting their head back and lifting their chin.
- Give two breaths by pinching the person’s nose and breathing into their mouth for one second each time.
- Continue compressions and breaths until help arrives or the person starts breathing on their own.
Choking
Choking occurs when something blocks the airway and prevents breathing. To help someone who is choking, follow these steps:
- Ask the person if they are choking and cannot breathe or speak.
- Stand behind the person and wrap your arms around their waist.
- Make a fist with one hand and place it above the person’s navel.
- Grasp the fist with your other hand and give quick upward thrusts until the object is dislodged.
- If the person becomes unconscious, start CPR.
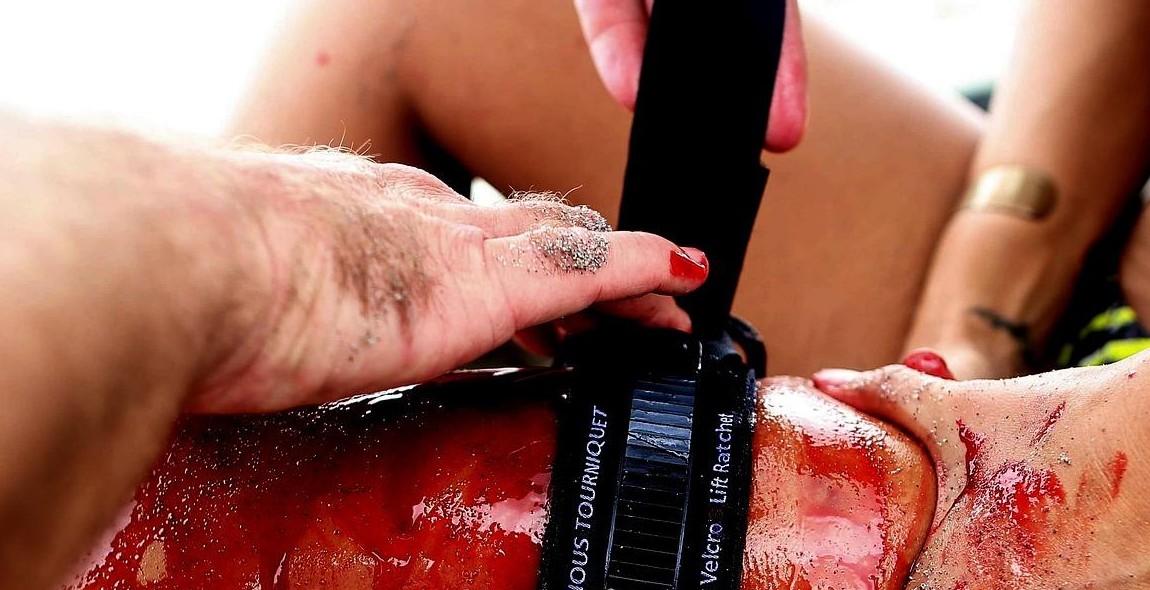
Bleeding
Severe bleeding can be life-threatening if not treated quickly. To stop bleeding, follow these steps:
- Apply direct pressure to the wound using a clean cloth or bandage.
- Elevate the injured limb above the level of the heart, if possible.
- If bleeding continues, apply additional pressure and seek medical attention.
Burns
Burns can range from minor to severe and require different treatment depending on the severity. For minor burns, follow these steps:
- Hold the burned area under cool running water for at least 10 minutes to reduce pain and swelling.
- Cover the burn with a sterile gauze bandage or wrap it loosely with a clean cloth.
- If the burn is severe or covers a large area, seek medical attention.
Sprains and Strains
Sprains and strains can be painful and limit mobility. To treat a sprain or strain, follow these steps:
- Rest the injured limb and avoid putting weight on it.
- Apply ice to the affected area for 20 minutes at a time, several times a day.
- Wrap the injured area with an elastic bandage to reduce swelling and provide support.
- Elevate the injured limb above the level of the heart, if possible.
- If pain and swelling persist, seek medical attention.
Table of Basic First Aid Techniques
| Technique | Steps | ||||||||||||||||||
|---|---|---|---|---|---|---|---|---|---|---|---|---|---|---|---|---|---|---|---|
| CPR | Check for responsiveness, perform chest compressions and breaths, continue until help arrives | ||||||||||||||||||
| Choking | Ask if choking, perform abdominal thrusts, start CPR if unconscious | ||||||||||||||||||
| Bleeding | Apply direct pressure, elevate limb, seek medical attention if bleeding continues | ||||||||||||||||||
| Burns | Hold under cool running water, cover with sterile gauze, seek medical attention if severe | ||||||||||||||||||
| Sprains and Strains | Rest, apply ice and elastic bandage, elevate limb, seek medical attention if pain and swelling persist | How to Perform CPR
| Burn Severity | Symptoms | Treatment |
|---|---|---|
| First-Degree Burn | Redness, minor swelling, and pain | Cool the burn area, cover with a sterile bandage, and take over-the-counter pain medication if necessary |
| Second-Degree Burn | Blisters, severe pain, and swelling | Cool the burn area, cover with a sterile bandage, and seek medical attention if the burn covers a large area or is on a sensitive area of the body |
| Third-Degree Burn | Charred skin, no pain (due to nerve damage), and possible shock | Seek emergency medical attention immediately |
How to Treat Sprains and Strains
Sprains and strains are common injuries that can occur during physical activities or accidents. These injuries can cause pain, swelling, and limited mobility. If you or someone you know has suffered a sprain or strain, it’s important to take immediate action to reduce pain and promote healing. Here are the steps to follow:
Step One: Rest and Ice the Injured Area
The first step in treating a sprain or strain is to rest the injured area. Avoid any activities that may cause further damage to the affected area. If possible, immobilize the injured area with a splint or brace. This will help to reduce pain and prevent further injury.
Applying ice to the injured area can also help to reduce pain and swelling. Wrap a cold pack or a bag of ice in a towel and apply it to the injured area for 20 minutes at a time, several times a day. Make sure to keep the injured area elevated to reduce swelling.
Step Two: Compress the Injured Area
Compression can also help to reduce swelling and promote healing. Wrap the injured area with an elastic bandage, making sure not to wrap it too tightly. The bandage should be snug enough to provide support, but not so tight that it cuts off circulation.
Step Three: Elevate the Injured Area
Elevating the injured area can help to reduce swelling and promote healing. Prop up the injured area on pillows or cushions to keep it elevated above the level of the heart. This will help to improve blood flow and reduce swelling.
Remember, it’s important to seek medical attention if you suspect a severe sprain or strain. These injuries can take weeks or even months to heal completely, and may require physical therapy or other treatments. By following these basic first aid steps, you can help to reduce pain and promote healing for minor sprains and strains.
Conclusion
Basic first aid knowledge can make a significant difference in emergency situations. The techniques discussed in this article can help you save a life and prevent further injury before professional medical help arrives. Remember, the key is to stay calm, assess the situation, and act quickly.
Review the Basics
Before an emergency occurs, it’s essential to review the basics of first aid. Keep a first aid kit handy and learn how to use its contents. Practice performing basic first aid techniques on family and friends to build your confidence and skills.
Stay Updated
First aid techniques and treatments are constantly evolving. Stay up-to-date by attending first aid training courses and reading the latest literature. This will ensure that you have the most current information and techniques available to you.
Stay Safe
Remember, your safety is just as important as the safety of the person in need. Always assess the situation for potential hazards before providing first aid. If you feel unsafe or unsure about how to proceed, call for professional medical help immediately.
| Important Points to Remember: |
|---|
| Stay calm and assess the situation |
| Act quickly but safely |
| Keep a first aid kit handy and know how to use it |
| Stay up-to-date with first aid techniques and treatments |
| Your safety is just as important as the safety of the person in need |
By following these basic first aid techniques and safety tips, you can make a significant difference in emergency situations. Remember, every second counts, so be prepared to act quickly and confidently to save a life.