
How to Perform a DIY Oil Change on Your Car
Regular oil changes are an essential part of maintaining your car’s longevity and performance. You may have taken your car to a professional mechanic for an oil change in the past, but did you know that you can perform a DIY oil change at home? Not only is it an easy task, but it can also save you money in the long run.
Why Perform a DIY Oil Change?
First and foremost, performing a DIY oil change can save you money. Professional mechanics charge a premium for oil changes, and doing it yourself can cut that cost significantly. Additionally, performing your own oil change allows you to have complete control over the quality of oil and filter used in your car. You can choose the best products for your specific car and driving needs.
Another benefit of performing a DIY oil change is the convenience it offers. You no longer have to schedule an appointment, wait in line, or even leave your home. You can perform the oil change on your own time and at your own pace.
Overall, performing a DIY oil change is a simple and cost-effective way to maintain your car’s health and performance. In the following sections, we will provide a step-by-step guide on how to perform a DIY oil change on your car.
Gathering the Materials
Performing a DIY oil change on your car is a great way to save money and learn more about your vehicle. Before you get started, it’s important to gather all the necessary materials to ensure a successful oil change.
What You Need
The following are the materials you will need to perform a DIY oil change:
- Oil filter wrench
- Oil drain pan
- New oil filter
- New oil
- Funnel
- Rags or paper towels
- Socket wrench set
- Oil filter pliers (optional)
It’s important to note that the type of oil and filter you need will depend on your specific vehicle make and model. Consult your owner’s manual or a trusted mechanic to determine the correct type and amount of oil and filter for your car.
Where to Buy Materials
You can purchase all the necessary materials for a DIY oil change at your local auto parts store or online. It’s important to purchase high-quality oil and filters to ensure the longevity and performance of your vehicle.
| Material | Store | Price |
|---|---|---|
| New oil filter | AutoZone | $10 |
| New oil | Walmart | $25 |
| Oil filter wrench | Advance Auto Parts | $15 |
| Oil drain pan | Amazon | $20 |
By gathering all the necessary materials and purchasing them from reputable stores, you can ensure a successful and cost-effective DIY oil change on your car.

Preparing Your Car
Before you start the oil change process, you need to prepare your car. Here are the steps to follow:
Getting Your Car in Position
The first step is to park your car on level ground. Avoid any incline as it can affect the oil draining process. Make sure the engine is turned off and has cooled down for at least 10 minutes.
Next, you need to lift the car with a jack and place it on jack stands. You can find the recommended jacking points in your car owner’s manual. Always use jack stands to support the weight of the vehicle and ensure your safety.
Draining the Old Oil
Once your car is in position, you can start draining the old oil. Here are the steps to follow:
- Locate the oil drain plug under the car. You can find it near the oil pan.
- Place an oil drain pan under the plug.
- Remove the plug using a wrench and let the old oil drain into the pan.
- Once the oil has completely drained, replace the drain plug and tighten it with a wrench.
It is important to properly dispose of the old oil. You can take it to a recycling center or an auto parts store that accepts used oil.
Now that you have drained the old oil, you can move on to the next step – replacing the oil filter.

Replacing the Oil Filter
Changing your car’s oil filter is an important step in performing a DIY oil change. Here’s how to do it:
Locating and Removing the Old Filter
The oil filter is typically located on the bottom of the engine. It may be covered by a plastic shield or metal plate. Consult your car’s owner’s manual to locate the filter.
Once you’ve located the filter, use an oil filter wrench to loosen it. Turn it counterclockwise until it’s loose enough to remove by hand. Be sure to place a drain pan under the filter to catch any oil that may spill out.
After removing the filter, use a clean rag to wipe away any debris or oil from the filter housing. Be sure to inspect the old filter for any signs of damage or excessive wear. If the filter is damaged, it may need to be replaced sooner than the recommended interval.
Installing the New Filter
Before installing the new filter, apply a small amount of oil to the rubber gasket on the filter. This will help create a proper seal and prevent leaks.
Next, screw the new filter onto the housing by hand. Once it’s snug, use the oil filter wrench to tighten it another ¾ turn. Be careful not to overtighten the filter, as this can cause damage and make it difficult to remove during the next oil change.
Finally, double-check that the filter is securely tightened and that the drain plug is back in place. Once you’ve completed these steps, you’re ready to add fresh oil to your car.
Remember to dispose of the old oil filter properly. Many auto parts stores and recycling centers will accept used filters for recycling.
Adding New Oil
After draining the old oil, it’s time to add fresh oil. Here are the steps to follow:
Step 1: Choosing the Right Oil
Before adding new oil, it’s important to choose the right one. Refer to your car’s owner manual to find out the recommended oil type and viscosity. You can also check the oil cap or dipstick for this information. There are different types of oils available in the market, such as conventional, synthetic, and blend. Choose the one that suits your car’s needs and your budget.
Step 2: Preparing the Oil Filter
Before adding new oil, make sure to prepare the oil filter. Apply a thin layer of oil on the rubber gasket of the new oil filter. This will help create a tight seal and prevent leaks. Screw the new filter onto the engine by hand.
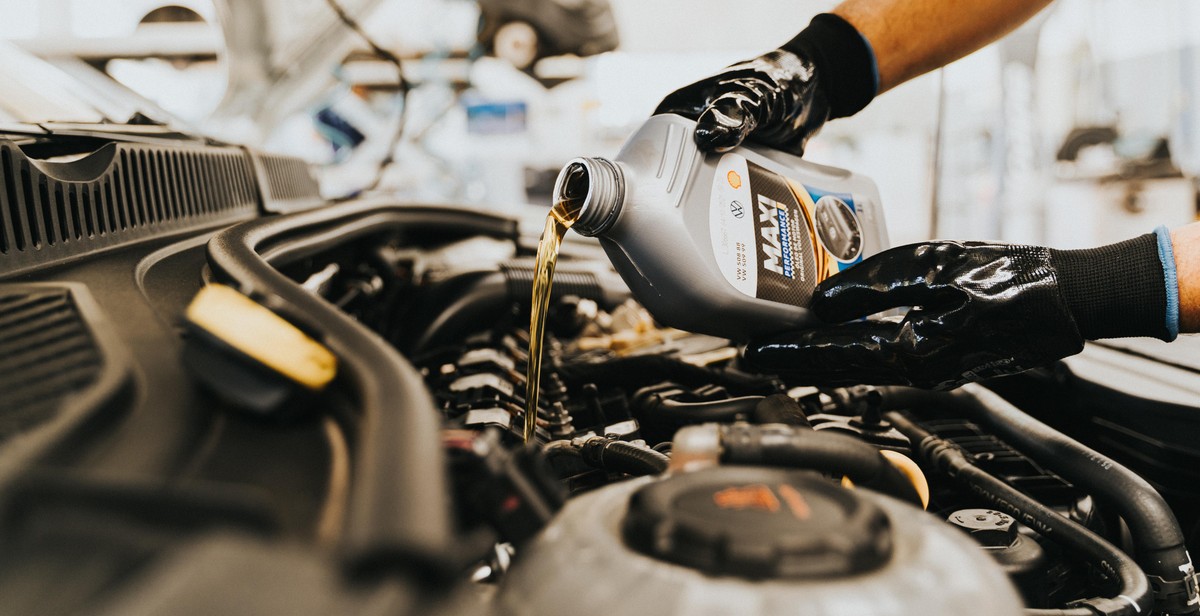
Step 3: Adding the New Oil
Locate the oil filler cap on top of the engine. Remove it and pour the new oil into the engine using a funnel. Make sure to add the oil slowly and check the oil level frequently using the dipstick. Do not overfill the engine as it can cause damage. Once you have added the recommended amount of oil, replace the oil filler cap.
Step 4: Checking the Oil Level
After adding the new oil, start the engine and let it run for a few minutes. Turn off the engine and wait for a few minutes to allow the oil to settle. Check the oil level using the dipstick and add more oil if necessary.
- Make sure to dispose of the old oil and filter properly.
- Check for any leaks after adding new oil.
- Check the oil level regularly and change the oil as recommended by the manufacturer.
| Oil Type | Recommended Change Interval |
|---|---|
| Conventional | Every 3,000 to 5,000 miles |
| Synthetic | Every 7,500 to 10,000 miles |
| Blend | Every 5,000 to 7,500 miles |
Wrapping Up
Congratulations! You have successfully performed a DIY oil change on your car. By doing so, you saved money and gained valuable knowledge about your vehicle. Remember to always follow the manufacturer’s recommendations for oil type and frequency of oil changes.
Checking for Leaks
Before starting your car, it is important to check for any leaks. Look under your vehicle and inspect the oil pan, drain plug, and filter. If you notice any leaks, tighten the bolts or replace the gasket or filter. Failure to fix leaks can result in damage to your engine and costly repairs.
Disposing of the Old Oil
Properly disposing of old oil is crucial for the environment. Do not pour old oil down the drain or in the trash. Instead, take it to a certified recycling center or auto parts store that accepts used oil. They will properly dispose of the oil and recycle it for future use.
| Do: | Don’t: |
|---|---|
| Follow the manufacturer’s recommendations for oil type and change frequency | Reuse old oil or mix different types of oil |
| Check for leaks before starting your car | Dispose of old oil improperly |
| Take old oil to a certified recycling center or auto parts store | Pour old oil down the drain or in the trash |
By following these simple steps, you can perform a DIY oil change on your car with confidence and ease.
Conclusion
Performing a DIY oil change on your car is not as daunting as it may seem. With the right tools and a little bit of knowledge, you can save money and learn a valuable skill that can be used throughout the life of your car. Remember to always follow the manufacturer’s recommended oil type and viscosity, and to dispose of used oil properly.
Tips for a successful DIY oil change:
- Always check your car’s owner manual for specific instructions and recommended oil type and viscosity.
- Use a quality oil filter and oil that meets the manufacturer’s recommended specifications.
- Make sure to properly dispose of used oil at a local recycling center or auto parts store.
- Keep a record of when you perform oil changes and what type of oil and filter you used. This will help you stay on top of regular maintenance and can be helpful when selling your car.
Remember, regular oil changes are essential to keeping your car running smoothly and efficiently. When in doubt, consult a professional mechanic for guidance or assistance.
 |
Performing your own oil change can be a satisfying and money-saving experience. With the right tools and knowledge, anyone can perform this essential maintenance task on their own. Follow these simple steps and enjoy the benefits of a well-maintained car! |