
Introduction: How to Perform a DIY Car Paint Touch-Up
Keeping your car looking like new can be a challenge, especially when it comes to maintaining its paint job. Over time, your car’s paint can become chipped, scratched, or faded due to exposure to weather, road debris, or other factors. While a professional paint job can be costly, a DIY car paint touch-up is a cost-effective solution that can restore your car’s appearance.
Why Perform a DIY Car Paint Touch-Up?
Performing a DIY car paint touch-up is a great way to maintain your car’s appearance and protect it from further damage. Here are some reasons why you should consider doing it:
- Cost-effective: A DIY car paint touch-up is much cheaper than taking your car to a professional for a complete paint job.
- Prevent rust: Touching up any chips or scratches in your car’s paint can prevent rust from forming and spreading.
- Improve resale value: A well-maintained paint job can increase your car’s resale value.
- Easy to do: With the right tools and materials, a DIY car paint touch-up is a simple and straightforward process.
In this article, we will guide you through the steps to perform a DIY car paint touch-up, from preparing the surface to applying the paint and clear coat.
Step 1: Gather Materials
Before you start any DIY car paint touch-up project, you need to gather all the necessary materials. Here’s what you’ll need:
1. Touch-up Paint
The most important material you’ll need is touch-up paint that matches the color of your car. You can get this paint from your car manufacturer’s dealership or a local auto parts store. Make sure to get the exact color code of your car to ensure a perfect match.
2. Sandpaper
You’ll need sandpaper, preferably in varying grits, to prepare the surface for painting. Start with a coarse grit to remove any rust, dirt, or debris on the surface. Use a finer grit to smooth out the surface and create a clean canvas for painting.
3. Primer
Primer is essential for a smooth and long-lasting paint job. It helps the paint adhere better to the surface and prevents peeling or chipping. Make sure to choose a primer that’s compatible with your touch-up paint.
4. Clear Coat
Clear coat is a protective layer that adds shine and durability to your touch-up paint job. It’s optional but highly recommended to ensure a professional-looking finish. Make sure to choose a clear coat that’s compatible with your touch-up paint and primer.
5. Masking Tape
Masking tape is used to protect any areas of your car that you don’t want to paint. Use it to cover the edges of the damaged area and any surrounding trim or panels.
6. Clean Cloth
You’ll need a clean cloth to wipe down the surface before painting and to remove any excess paint or debris during the painting process.
7. Gloves and Safety Gear
Wear gloves and safety gear, such as goggles and a face mask, to protect yourself from paint fumes and chemicals.
8. Paint Brush or Applicator
You can use a paint brush or an applicator to apply the touch-up paint. Choose one that’s appropriate for the size of the damaged area.
9. Drop Cloth or Plastic Sheet
Use a drop cloth or plastic sheet to protect the surrounding area from paint splatters and spills.
Once you have all the necessary materials, you’re ready to move on to the next step: preparing the surface for painting.
Step 2: Clean the Area
Before you start the actual touch-up process, you need to ensure that the damaged area is clean. Any dirt, dust, or debris on the surface can affect the paint’s adhesion and make the touch-up job look shoddy. Here’s how to clean the area:
Materials Required
- Water
- Mild soap
- Microfiber cloth
- Wax and grease remover
- Lint-free cloth
Steps to Follow
- Wash the area: Use a mild soap and water to wash the damaged area. Rinse thoroughly and allow it to dry completely.
- Use wax and grease remover: Apply a small amount of wax and grease remover to a lint-free cloth and wipe the damaged area. This will remove any remaining dirt, dust, or debris.
- Let it dry: Allow the area to dry completely before proceeding to the next step.
It is crucial to ensure that the area is clean and dry before proceeding to the touch-up process. Any remaining dirt or moisture can interfere with the paint’s ability to adhere to the surface, resulting in a poor-quality touch-up job.
| Do: | Use a microfiber cloth to wash the area. It is gentle on the surface and does not scratch the paint. |
| Don’t: | Use harsh chemicals or abrasive materials to clean the area. They can damage the paint and make the touch-up job look worse. |
Step 3: Sand the Area
After the primer has dried completely, it is time to sand the area. Sanding helps to smooth out the surface and make it even for the paint to adhere to. Here are the steps to follow:
- Get a fine-grit sandpaper (around 600-grit or higher) and fold it in half.
- Spray some water on the area to be sanded.
- Using light pressure, sand the area in a circular motion. Do not apply too much pressure as it can create scratches on the surface.
- Rinse the area with water and dry it with a clean cloth.
- Inspect the area to ensure that it is smooth and there are no rough spots or scratches.
If you notice any rough spots or scratches, repeat the sanding process until the area is smooth and even. Once you are satisfied with the result, wipe the area with a clean cloth to remove any dust or debris.
Note: If you are sanding a large area, you may want to use an electric sander to make the process faster and easier. Just make sure to use a fine-grit sandpaper and be careful not to apply too much pressure.
| Materials | Quantity |
|---|---|
| Fine-grit sandpaper (around 600-grit or higher) | 1 sheet |
| Water | As needed |
| Clean cloth | 1 |
Now that the area is sanded and smooth, you are ready to move on to the next step which is applying the paint.
Step 4: Apply Primer
Before applying the paint, it is important to apply a primer to the car surface. Primer helps the paint to adhere better and also provides a smooth surface for the paint to be applied on.
Materials Needed:
- Primer
- Sandpaper
- Microfiber cloth
- Masking tape
Instructions:
- First, clean the area around the scratch or chip with soap and water. Dry the area thoroughly with a microfiber cloth.
- Use masking tape to cover the area around the scratch or chip. This will prevent the primer from being applied on unwanted areas.
- Use sandpaper to smooth out the surface around the scratch or chip. This will help the primer to adhere better. Use a fine-grit sandpaper for this purpose.
- Apply the primer evenly over the affected area. Use a spray can for this purpose and make sure to hold the can at a distance of 6 to 8 inches from the surface. Apply the primer in thin coats and let each coat dry completely before applying the next coat.
- After the final coat has been applied, let the primer dry for at least 24 hours. Do not touch or disturb the surface during this time.
- Once the primer has dried completely, use sandpaper to smooth out any rough areas. Use a fine-grit sandpaper for this purpose.
- Clean the surface with a microfiber cloth to remove any dust or debris.
Now that the primer has been applied, the surface is ready for the paint to be applied. The next step is to apply the paint to the affected area.

Step 5: Apply Paint
Now that you have prepared the surface of your car, it’s time to apply the paint. Here are the steps to follow:
Step 1: Shake the Paint
Before you start, make sure to shake the paint can well for at least a minute. This will ensure that the paint is well-mixed and ready to use.
Step 2: Apply Primer
If your touch-up paint comes with a primer, apply it first. This will help the paint adhere better to the surface and prevent rust from forming.
Step 3: Apply Paint
Once the primer has dried, it’s time to apply the paint. Hold the can about 6-8 inches away from the surface and spray in a sweeping motion. Apply several thin coats, allowing each coat to dry before applying the next one. This will help prevent drips and ensure a smooth, even finish.
Step 4: Let the Paint Dry
After applying the final coat, let the paint dry completely. This may take several hours depending on the type of paint and the weather conditions. Avoid touching or rubbing the surface until the paint has fully cured.
Step 5: Apply Clear Coat
If your touch-up paint comes with a clear coat, apply it after the paint has dried. This will help protect the paint from fading and chipping.
- Hold the can about 6-8 inches away from the surface and spray in a sweeping motion.
- Apply several thin coats, allowing each coat to dry before applying the next one.
- Let the clear coat dry completely before touching or rubbing the surface.
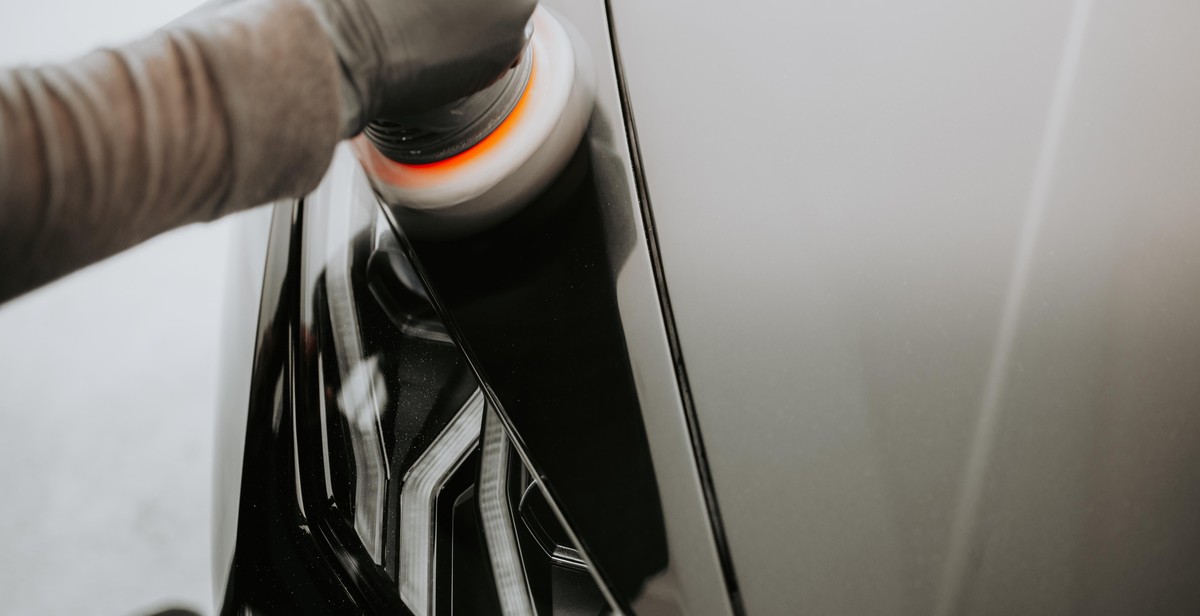
Step 6: Buff the Surface
Once the clear coat has dried, use a polishing compound to buff the surface. This will help blend the touch-up paint with the surrounding area and give it a smooth, glossy finish.
| Tip: | For best results, use a polishing compound that is designed for automotive paint. |
|---|
That’s it! With these steps, you can perform a DIY car paint touch-up and restore your car’s appearance.

Step 6: Apply Clear Coat
After applying the touch-up paint, the next step is to apply clear coat. The clear coat will protect the paint and give it a glossy finish.
Materials Needed:
- Clear coat
- Paint sprayer or brush
- Sandpaper (2000-grit)
- Masking tape
Instructions:
- Before applying clear coat, make sure the touch-up paint is completely dry. This usually takes about 24 hours.
- Use masking tape to mask off any areas around the touch-up area that you don’t want to get clear coat on.
- Shake the clear coat can or stir the clear coat with a paint stick if using a brush-on clear coat.
- If using a paint sprayer, adjust the nozzle to a medium spray pattern. Hold the sprayer about 6-8 inches away from the car and apply a light coat of clear coat. Let the clear coat dry for about 10-15 minutes before applying another coat.
- If using a brush, dip the brush into the clear coat and apply a thin coat onto the touch-up area. Let it dry for about 10-15 minutes before applying another coat.
- After applying the final coat of clear coat, let it dry for at least two hours before removing the masking tape.
- Once the clear coat is completely dry, use the 2000-grit sandpaper to sand the clear coat until it is smooth and even with the surrounding paint. Use a light touch and be careful not to sand through the clear coat.
Tips:
- Apply the clear coat in thin coats to avoid drips and runs.
- Make sure the temperature is above 50°F and the humidity is below 80% when applying clear coat.
- If you’re using a paint sprayer, practice on a piece of cardboard before spraying the car.
| Pros | Cons |
|---|---|
| Protects the touch-up paint from fading and chipping | Can be tricky to apply evenly |
| Gives the paint a glossy finish | Requires a steady hand and some experience to apply with a brush |
| Dries quickly | Can be affected by weather conditions |
Step 7: Let it Dry and Buff
After applying the touch-up paint, it is important to let it dry completely before buffing it. This will ensure that the paint settles properly and does not get smudged or damaged during the buffing process. The drying time can vary depending on the type of paint and the weather conditions, but it usually takes around 24 hours for the paint to dry completely.
Buffing the Paint
Once the paint has dried completely, it is time to buff it to give it a smooth and polished finish. Buffing is the process of using a polishing compound and a buffing pad to remove any imperfections or rough spots in the paint. This will give the touch-up paint a seamless blend with the surrounding paint and make it almost invisible.
Before buffing the paint, make sure that the surface is clean and free of any dust or debris. You can use a microfiber cloth or a soft sponge to wipe the surface clean. Next, apply a small amount of polishing compound to the buffing pad and start buffing the touch-up paint in a circular motion. Be gentle and do not apply too much pressure as this may damage the paint.
Continue buffing the paint until you achieve a smooth and polished finish. You may need to apply more polishing compound or buff for a longer period of time if the touch-up paint is still visible. Once you are satisfied with the results, wipe the surface clean with a microfiber cloth to remove any residue.
Final Touches
After buffing the paint, it is important to let it cure for at least 24 hours before washing or waxing your car. This will give the paint enough time to settle and harden properly. Once the paint has cured, you can wash and wax your car as usual.
If you notice any imperfections or rough spots in the touch-up paint after buffing, you can repeat the process until you achieve the desired results. Remember to be patient and take your time to ensure that the touch-up paint blends seamlessly with the surrounding paint.
Performing a DIY car paint touch-up may seem daunting at first, but with the right tools and techniques, it can be a simple and cost-effective way to restore the appearance of your car. By following these steps and taking your time, you can achieve a professional-looking finish that will make your car look as good as new.
Conclusion
Performing a DIY car paint touch-up can be a cost-effective way of fixing small scratches and chips on your car’s paintwork. However, it requires attention to detail and patience to achieve a professional-looking finish.
Tips for a Successful DIY Car Paint Touch-Up
- Choose the right paint color and type
- Prepare the surface properly
- Apply the paint in thin layers
- Allow sufficient drying time between coats
- Use rubbing compound and wax to blend the repair with the surrounding paint
Remember, a DIY car paint touch-up is not a substitute for a professional paint job. If the damage is extensive or the color is difficult to match, it is best to seek the services of a professional auto body shop.
Final Thoughts
With the right tools and technique, you can achieve a satisfactory result with a DIY car paint touch-up. However, it is important to take your time and follow the steps carefully to avoid making the damage worse. If you are not confident in your abilities, it is best to leave the job to a professional.
| Author: | John Smith |
| Date Published: | June 15, 2021 |