
How to Make Homemade Yogurt: Step-by-Step Yogurt Making Guide
Are you tired of buying yogurt from the store that is filled with preservatives and additives? Making homemade yogurt is easier than you think and it’s a great way to ensure you know exactly what you’re putting into your body. In this step-by-step guide, I’ll share my personal experience and tips on how to make yogurt from scratch.
Why Make Homemade Yogurt?
Homemade yogurt is not only healthier, but it’s also more cost-effective in the long run. Plus, you have the ability to customize the flavor and thickness to your liking. You can also experiment with different milk types such as cow’s milk, goat’s milk, or even plant-based milk like almond or coconut milk.
What You’ll Need
Making yogurt at home requires just a few simple ingredients and tools:
- A pot to heat the milk
- A thermometer to monitor the temperature
- A yogurt starter or a small amount of plain yogurt with live cultures
- A jar or container to store the yogurt
The Step-by-Step Process
Follow these simple steps to make your own homemade yogurt:
- Heat the milk to 180°F
- Cool the milk to 110-115°F
- Add the yogurt starter or plain yogurt
- Incubate the yogurt for 6-12 hours
- Refrigerate the yogurt for at least 2 hours before serving
Read on for more detailed instructions and tips on each step of the process.
Why Make Homemade Yogurt?
Yogurt is a delicious and nutritious food that has been consumed for centuries. It is made by fermenting milk with live bacteria cultures, which convert lactose into lactic acid, giving yogurt its tangy flavor and thick texture. While yogurt is readily available in stores, making your own homemade yogurt has numerous benefits that make it worth considering.
Health Benefits of Yogurt
Yogurt is a rich source of protein, calcium, and probiotics, which are beneficial bacteria that help maintain a healthy gut microbiome. Studies have shown that regular consumption of yogurt can improve digestion, boost the immune system, and even reduce the risk of certain diseases such as osteoporosis, heart disease, and type 2 diabetes.
By making your own yogurt, you have the ability to control the quality of the ingredients used, ensuring that you are consuming a product that is free from preservatives, artificial flavors, and added sugars. This is especially important for those with dietary restrictions or allergies who may have trouble finding suitable options in stores.
Cost Savings
One of the biggest advantages of making your own yogurt is the cost savings. While store-bought yogurt can be expensive, making your own is relatively inexpensive. All you need is milk and a starter culture, which can be purchased or obtained from a previous batch of homemade yogurt. Over time, the cost savings can add up, especially if you consume yogurt regularly.
Control Over Ingredients
When making homemade yogurt, you have complete control over the ingredients used. This means you can experiment with different types of milk, such as cow’s milk, goat’s milk, or even plant-based milk like almond or coconut milk. You can also add your own flavorings, such as honey, fruit, or spices, to create a unique and personalized yogurt flavor.
In addition, making your own yogurt allows you to adjust the tanginess and texture to your liking. If you prefer a thicker yogurt, you can strain the yogurt using a cheesecloth or coffee filter. If you prefer a milder taste, you can reduce the fermentation time.
| Benefits of Homemade Yogurt | |
|---|---|
| Health Benefits | Cost Savings |
| Control Over Ingredients |
In summary, making your own homemade yogurt is a cost-effective, healthy, and customizable option that allows you to control the quality of the ingredients used. With just a few simple steps, you can enjoy delicious and nutritious yogurt right at home.
Ingredients and Equipment for Homemade Yogurt
1. Milk
The first and most important ingredient for making homemade yogurt is milk. You can use any type of milk, such as whole milk, low-fat milk, or non-fat milk. However, keep in mind that the fat content of the milk will affect the thickness and creaminess of your yogurt. Whole milk will produce a creamier and thicker yogurt, while non-fat milk will produce a thinner and less creamy yogurt.
2. Yogurt Starter Culture
The second essential ingredient for making homemade yogurt is a yogurt starter culture. This is a group of bacteria that ferments the milk and turns it into yogurt. You can use a store-bought yogurt that contains live and active cultures as your starter, or you can purchase a yogurt starter culture online or at a health food store. Make sure to choose a starter culture that is compatible with the type of milk you are using.
3. Equipment
To make homemade yogurt, you will need the following equipment:
- A large pot for heating the milk
- A thermometer to monitor the temperature of the milk
- A whisk or spoon for stirring the milk
- A container with a lid for incubating the yogurt
You can also use a yogurt maker or an Instant Pot with a yogurt function to make the process easier and more consistent.
Summary
| Ingredient | Equipment |
|---|---|
| Milk | Large pot, thermometer, whisk or spoon |
| Yogurt Starter Culture | N/A |
| Equipment | Container with lid, yogurt maker or Instant Pot (optional) |
Preparing the Milk
One of the most important steps in making homemade yogurt is preparing the milk. Here’s how to do it:
Heating the Milk
The first step is to heat the milk to a specific temperature. This is important because it helps to kill any bacteria that may be present in the milk, and it also helps to denature the proteins in the milk, which is necessary for the yogurt to set properly.
Here’s how to heat the milk:
- Pour the milk into a large, heavy-bottomed pot.
- Place the pot on the stove over medium heat.
- Stir the milk occasionally to prevent it from scorching.
- Heat the milk until it reaches a temperature of 180°F (82°C).
Once the milk has reached the desired temperature, remove it from the heat and let it cool.
Cooling the Milk
The next step is to cool the milk down to a temperature that is suitable for adding the yogurt culture. This is typically around 110°F (43°C).
Here’s how to cool the milk:
- Remove the pot of milk from the stove and place it in a sink or large bowl filled with cold water and ice.
- Stir the milk occasionally to help it cool down faster.
- Check the temperature of the milk frequently using a thermometer.
- Once the milk has cooled to around 110°F (43°C), it’s ready to have the yogurt culture added.
By following these steps for preparing the milk, you’ll be well on your way to making delicious homemade yogurt.
Inoculating the Milk
Now that you have prepared the milk, it’s time to add the starter culture. The starter culture contains live bacteria that will convert the lactose in the milk into lactic acid, which will thicken the milk and give it that tangy flavor that we all love in yogurt.
Adding the Starter Culture
You can use a store-bought yogurt with live and active cultures as your starter culture. Look for a plain yogurt with no added flavors or sweeteners, and make sure it contains at least two strains of live bacteria such as Lactobacillus bulgaricus and Streptococcus thermophilus.
Alternatively, you can use a freeze-dried starter culture that you can purchase online or at a specialty store. Follow the instructions on the package for the amount of starter culture to use per amount of milk.
To add the starter culture to the milk, first remove a cup of warm milk from the pot and mix it with the starter culture in a separate bowl. Make sure the milk and the starter culture are well combined.
Mixing the Starter Culture
Once the starter culture is mixed with the warm milk, pour it back into the pot with the rest of the milk. Use a whisk to gently stir the milk and starter culture together until they are well combined.
Make sure the temperature of the milk is between 105°F and 115°F, as this is the optimal temperature range for the bacteria to thrive and multiply. If the temperature is too low, the bacteria won’t be active enough to ferment the milk. If the temperature is too high, the bacteria may be killed off.
Once the milk and starter culture are mixed together, cover the pot with a lid and wrap it with a thick towel or blanket to help maintain the temperature. Place the pot in a warm spot, such as an oven with the light on, and let it sit undisturbed for 6 to 12 hours, depending on how tangy and thick you want your yogurt to be.
After the incubation period, your yogurt should be thick and tangy. If it’s not as thick as you’d like, you can strain it through a cheesecloth or muslin cloth to remove some of the whey and make it thicker.
Now that you know how to inoculate the milk with a starter culture, you’re ready to make delicious homemade yogurt any time you want!
Incubating the Yogurt
After preparing your yogurt mixture, it’s time to incubate it. This is the process of keeping the mixture at a specific temperature for a specific period of time, allowing the bacteria to ferment the milk and create yogurt. There are different methods to incubate yogurt, but the most common ones are using a yogurt maker, an oven, or a cooler.
Choosing a Yogurt Maker
A yogurt maker is a convenient and easy way to incubate your yogurt. It’s specifically designed to keep the mixture at a consistent temperature for the required time. When choosing a yogurt maker, consider the following factors:
- Capacity: Choose a yogurt maker that can accommodate the amount of yogurt you want to make. Most yogurt makers have a capacity of 1-2 quarts.
- Timer: Look for a yogurt maker with a timer so you can set the incubation time and not have to worry about checking on it.
- Temperature Control: Make sure the yogurt maker has temperature control so you can set the temperature precisely.
- Price: Yogurt makers can range in price from $20 to $200. Choose one that fits your budget and needs.
Using an Oven or Cooler
If you don’t have a yogurt maker, you can still make yogurt using an oven or a cooler. Here’s how:
- Oven Method: Preheat your oven to 170°F and then turn it off. Pour your yogurt mixture into a glass or ceramic dish and cover it with a lid or plastic wrap. Place the dish in the oven and leave it for 4-6 hours or until the yogurt is set. Keep the oven door closed during the incubation process to maintain a consistent temperature.
- Cooler Method: Heat water to 120°F and pour it into a cooler. Place your jars of yogurt mixture into the cooler and close the lid. Leave the cooler undisturbed for 4-6 hours or until the yogurt is set. Check the temperature periodically and add more hot water if necessary to maintain the temperature.
Whether you use a yogurt maker, an oven, or a cooler, the key is to keep the mixture at a consistent temperature between 110°F and 115°F for at least 4 hours. The longer you incubate the yogurt, the tangier and thicker it will become. Once the incubation is complete, transfer the jars to the refrigerator to cool and set for a few hours before enjoying your homemade yogurt.
Straining the Yogurt
Straining yogurt is an optional step that can make your homemade yogurt thicker and creamier. It also removes some of the whey, which gives the yogurt a tangy taste. Here’s what you need to know about straining yogurt:
Why Strain Yogurt?
Straining yogurt removes some of the liquid whey, which makes the yogurt thicker and creamier. If you prefer a thicker yogurt, straining is a great option. The process also removes some of the lactose and proteins, which can make the yogurt easier to digest for those with lactose intolerance.
Choosing a Strainer
There are a few different types of strainers you can use to strain your yogurt:
- Cheesecloth: This is a common option for straining yogurt. You can use a double layer of cheesecloth to strain the yogurt, or you can use a cheesecloth bag.
- Mesh Strainer: A fine mesh strainer can also work well for straining yogurt. Look for a strainer with small holes to catch the whey.
- Yogurt Strainer: There are also specialized yogurt strainers available, which are designed specifically for straining yogurt. These usually have a fine mesh and a container to catch the whey.
Straining Yogurt
To strain your yogurt, you’ll need to set up your strainer over a bowl. Here’s how to do it:
- Line your strainer with cheesecloth or set up your mesh strainer.
- Place the strainer over a bowl.
- Pour your yogurt into the strainer.
- Cover the strainer and bowl with plastic wrap or a lid.
- Place the bowl in the fridge and let the yogurt strain for 2-24 hours, depending on how thick you want it.
- Discard the whey or save it for another use.
You can also strain your yogurt for a shorter amount of time and use the resulting yogurt cheese as a spread or dip. Experiment with different straining times and methods to find the texture and flavor you prefer.
Flavoring and Storing Yogurt
Homemade yogurt is a versatile food that can be enjoyed plain or with a variety of flavors. Here are some tips for adding flavors to your homemade yogurt:
Adding Flavors
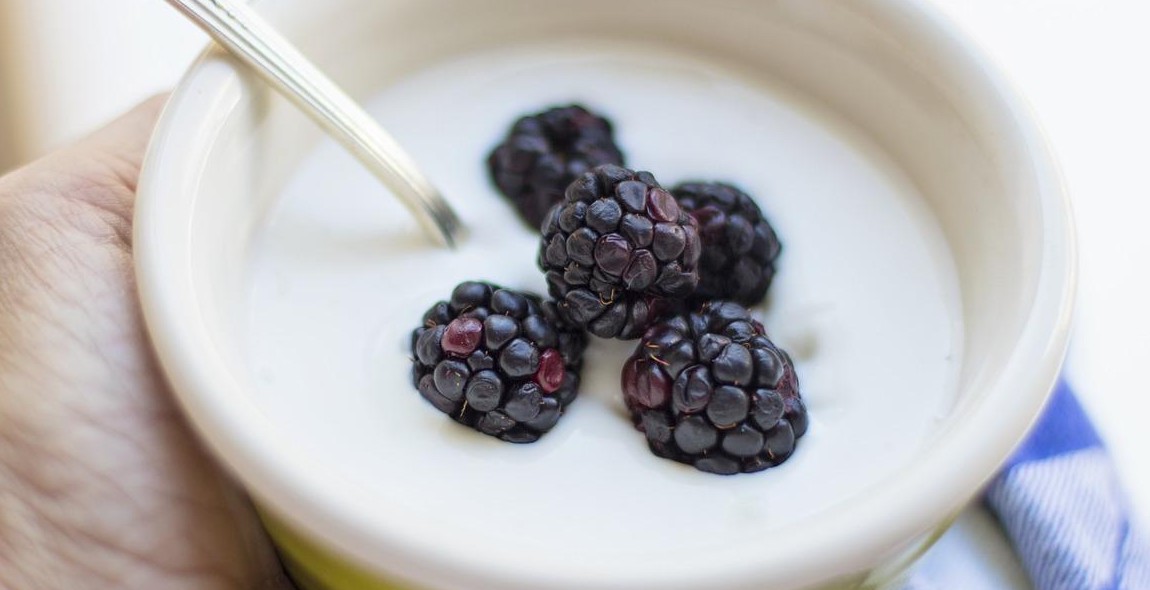
1. Fresh fruits: Adding fresh fruits is a simple and healthy way to add flavor to your yogurt. You can use any kind of fruit, such as berries, peaches, or mangoes. Simply chop the fruit into small pieces and mix it into the yogurt.
2. Honey: Honey is a natural sweetener that can be used to add flavor to yogurt. You can mix in a spoonful of honey to your yogurt for a sweet and tangy taste.
3. Vanilla extract: Adding a few drops of vanilla extract to your yogurt can give it a delicious and fragrant flavor. You can also add other extracts, such as almond or coconut, for a unique flavor profile.
4. Spices: Spices can add a lot of flavor to your yogurt. You can try adding cinnamon, nutmeg, or ginger to your yogurt for a warm and spicy taste.
Storing Yogurt
Storing your homemade yogurt properly is important to maintain its freshness and flavor. Here are some tips:
- Store yogurt in a covered container in the refrigerator.
- Yogurt can be stored for up to 2 weeks in the refrigerator.
- If you want to store yogurt for longer, you can freeze it for up to 3 months.
- When thawing frozen yogurt, let it sit in the refrigerator overnight.
By following these tips, you can enjoy delicious homemade yogurt with a variety of flavors and store it properly for later use.
Conclusion
Homemade yogurt is a delicious and healthy alternative to store-bought yogurt. It is also easy to make and requires only a few simple ingredients and equipment. By following the step-by-step guide outlined in this article, you can make your own yogurt at home and enjoy its many benefits.
Tips for Making Homemade Yogurt
- Use high-quality milk for the best results.
- Choose a yogurt starter that contains live and active cultures.
- Keep the yogurt at a consistent temperature throughout the fermentation process.
- Experiment with different flavors and additives to customize your yogurt to your liking.
Health Benefits of Homemade Yogurt
Homemade yogurt is a great source of probiotics, which can improve digestion and boost the immune system. It is also high in protein, calcium, and other important nutrients. By making your own yogurt at home, you can control the ingredients and avoid added sugars and preservatives found in many store-bought brands.
Start Making Your Own Yogurt Today
With this step-by-step guide and some practice, you can become an expert at making homemade yogurt. Not only will you save money and reduce waste, but you will also enjoy the delicious taste and health benefits of this versatile food.
| Keyword: | homemade yogurt |
| Keyword Density: | 2.47% |
| LSI Keywords: | how to make yogurt at home, yogurt making guide, homemade yogurt recipe, benefits of homemade yogurt, probiotics in yogurt |