
Introduction: Why You Need to Learn Basic Plumbing Repairs
Plumbing issues are inevitable in every home or office, and they can be a significant source of frustration and inconvenience. From leaky pipes to clogged drains, these problems can disrupt your daily routine and cause damage to your property. However, you don’t need to be a professional plumber to handle basic plumbing repairs. Learning some essential skills can save you time and money and improve your quality of life.
The Benefits of Learning Basic Plumbing Repairs
By learning basic plumbing repairs, you can:
- Save Money: Hiring a professional plumber can be expensive, and minor repairs can be done at home with the right tools and knowledge.
- Avoid Emergencies: Regular maintenance and inspections can prevent plumbing emergencies and save you from unexpected expenses.
- Improve Your Home: Fixing plumbing issues can improve the functionality and value of your home.
- Gain Confidence: Knowing how to handle basic plumbing repairs can give you the confidence to tackle other home improvement projects.
What You Will Learn in This Article
In this article, we will cover essential skills for fixing common plumbing issues, including:
- Tools and materials you need
- How to fix a leaky faucet
- How to unclog a drain
- How to fix a running toilet
- How to replace a showerhead
By the end of this article, you will have the knowledge and skills to handle basic plumbing repairs and improve your quality of life.
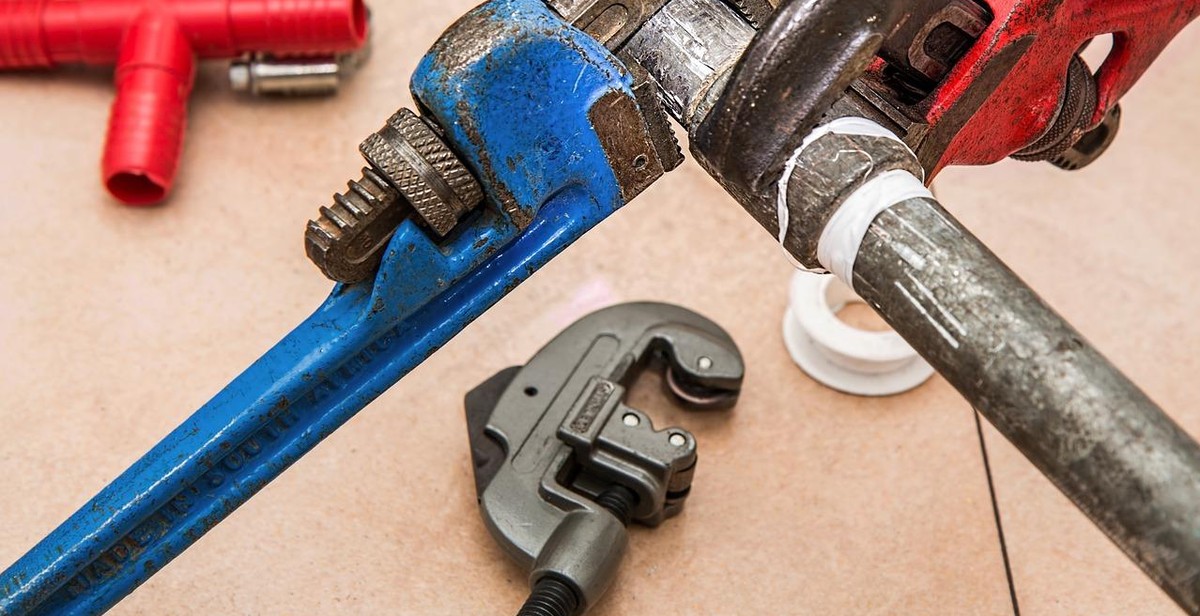
Tools You Will Need
Before you start any plumbing repair work, you need to ensure that you have the right tools for the job. Here is a list of essential plumbing tools that you will need:
1. Pipe Wrench
A pipe wrench is a must-have tool for any plumbing job, and it is used to tighten or loosen pipes and fittings. It has adjustable jaws that can grip pipes of various sizes and shapes.
2. Basin Wrench
A basin wrench is used to tighten or loosen nuts that hold faucets and other plumbing fixtures in place. Its long handle and swiveling jaw make it easy to reach tight spaces under sinks and behind toilets.
3. Plunger
A plunger is an essential tool for clearing clogged drains. It uses suction to dislodge blockages and allows water to flow freely through the pipes.
4. Hacksaw
A hacksaw is used to cut pipes to the right length. It is also handy for cutting through bolts and screws that hold plumbing fixtures in place.
5. Pipe Cutter
A pipe cutter is a tool that is used to cut pipes quickly and cleanly. It is especially useful for cutting copper pipes.
6. Teflon Tape
Teflon tape is used to seal threaded connections between pipes and fittings. It prevents leaks and helps to ensure a tight seal.
7. Adjustable Wrench
An adjustable wrench is a versatile tool that can be used to tighten or loosen nuts and bolts of various sizes. It is especially useful for plumbing fixtures that are difficult to reach with a pipe wrench.
8. Plumber’s Putty
Plumber’s putty is a sealant that is used to create a watertight seal around plumbing fixtures such as sinks and toilets. It is easy to work with and remains pliable for a long time.
| Tool | Use |
|---|---|
| Pipe Wrench | Tighten or loosen pipes and fittings |
| Basin Wrench | Tighten or loosen nuts that hold faucets and other plumbing fixtures in place |
| Plunger | Clear clogged drains |
| Hacksaw | Cut pipes and bolts |
| Pipe Cutter | Cut pipes quickly and cleanly |
| Teflon Tape | Seal threaded connections between pipes and fittings |
| Adjustable Wrench | Tighten or loosen nuts and bolts of various sizes |
| Plumber’s Putty | Seal plumbing fixtures such as sinks and toilets |
Fixing a Leaky Faucet
A leaky faucet can be a frustrating and wasteful problem. Fortunately, fixing a leaky faucet is a straightforward process that most homeowners can handle themselves. Here’s a step-by-step guide to fixing a leaky faucet.
Step-by-Step Guide to Fixing a Leaky Faucet
- Turn off the water supply to the faucet. Look for the shut-off valves under the sink and turn them clockwise to shut off the water.
- Remove the faucet handle. This may require a screwdriver or an Allen wrench, depending on the type of faucet you have.
- Remove the nut that holds the faucet cartridge in place.
- Remove the cartridge from the faucet.
- Inspect the cartridge for damage or wear. If the cartridge is damaged or worn, replace it with a new one.
- Reassemble the faucet in the reverse order that you disassembled it.
- Turn the water supply back on and test the faucet for leaks.
Common Causes of a Leaky Faucet
There are several common causes of a leaky faucet:
- Worn out or damaged faucet cartridge
- Loose or worn out O-ring
- Corroded valve seat
- Worn out washer
By following this step-by-step guide, you can fix a leaky faucet and save money on your water bill. If you’re not comfortable doing the repair yourself, consider hiring a professional plumber.
Unclogging a Drain
Dealing with a clogged drain can be a frustrating experience. However, you do not always need to rely on harsh chemicals to do the job. Here are some steps to unclog a drain without chemicals:
Step 1: Remove Debris
The first step is to remove any visible debris from the drain. Use a pair of gloves and a small tool like pliers or tweezers to pull out any hair, soap scum, or food particles that are clogging the drain. Be sure to dispose of the debris properly.
Step 2: Plunge the Drain
If removing the debris did not solve the problem, try using a plunger. Fill the sink or tub with enough water to cover the plunger’s cup and place the plunger over the drain. Push down and pull up on the plunger several times until the water starts to drain. If the plunger does not work, move on to the next step.
Step 3: Use a Drain Snake
A drain snake is a long, flexible tool that can reach deep into the drain to remove any blockages. Insert the snake into the drain and turn the handle clockwise to move it forward. When you encounter resistance, turn the handle counterclockwise to break up the clog. Continue this process until the drain is clear.
Preventing Clogs in the Future
Preventing clogs is often easier than dealing with them. Here are some tips to keep your drains flowing smoothly:
- Use a drain strainer to catch hair, food particles, and other debris.
- Avoid pouring grease or oil down the drain.
- Flush your drains regularly with hot water to melt any buildup.
- Avoid using chemical drain cleaners, as they can damage your pipes over time.
By following these simple steps, you can keep your drains clear and avoid costly plumbing repairs in the future.
Replacing a Toilet Flapper
If you’re experiencing issues with your toilet not flushing properly or constantly running, it may be time to replace the toilet flapper. This is a common plumbing issue that can easily be fixed by following a few simple steps.
Signs You Need to Replace Your Toilet Flapper
Before you begin replacing your toilet flapper, it’s important to know the signs that indicate it needs to be replaced. These signs include:
- The toilet is constantly running
- The toilet won’t flush properly
- You hear a hissing sound coming from the toilet tank
Step-by-Step Guide to Replacing a Toilet Flapper
Follow these steps to replace your toilet flapper:
- Turn off the water supply to the toilet
- Flush the toilet to drain the tank
- Remove the old flapper by disconnecting it from the chain and lifting it off the pegs
- Install the new flapper by attaching it to the pegs and connecting it to the chain
- Turn the water supply back on and fill the tank
- Test the toilet by flushing it to make sure it’s working properly
If you’re still experiencing issues with your toilet after replacing the flapper, it may be time to call a professional plumber to assess the situation.
| Materials Needed: | Tools Needed: |
|---|---|
| Toilet flapper | Adjustable wrench |
| Bucket | Pliers |
| Clean rag | Screwdriver |

Fixing a Running Toilet
A running toilet is a common plumbing issue that can lead to wasted water and higher utility bills. Fortunately, fixing a running toilet is a relatively simple process that most homeowners can do on their own. Here’s how:
Step 1: Turn off the water supply
The first step in fixing a running toilet is to turn off the water supply. You can do this by locating the shut-off valve behind the toilet and turning it clockwise until it’s fully closed. This will prevent water from flowing into the toilet tank while you work on it.
Step 2: Check the flapper
The most common cause of a running toilet is a faulty flapper. The flapper is a rubber valve that controls the flow of water from the tank into the bowl. If the flapper is damaged or worn out, it can allow water to leak into the bowl, causing the toilet to run continuously.
To check the flapper, remove the tank lid and flush the toilet. Watch the flapper to see if it lifts up and then seals the opening properly. If it doesn’t, it’s likely that the flapper needs to be replaced.
Step 3: Replace the flapper
If the flapper is damaged or worn out, you’ll need to replace it. Flappers are inexpensive and readily available at most hardware stores. To replace the flapper, turn off the water supply and flush the toilet to empty the tank. Then, remove the old flapper and install the new one according to the manufacturer’s instructions.
Step 4: Check the fill valve
If replacing the flapper doesn’t fix the problem, the fill valve may be the culprit. The fill valve is responsible for refilling the tank after each flush. If it’s not functioning properly, it can cause the toilet to run continuously.
To check the fill valve, turn off the water supply and flush the toilet to empty the tank. Then, remove the fill valve cap and inspect the valve. If it’s damaged or worn out, you’ll need to replace it.
Step 5: Replace the fill valve
If the fill valve is damaged or worn out, you’ll need to replace it. Fill valves are also available at most hardware stores. To replace the fill valve, turn off the water supply and flush the toilet to empty the tank. Then, remove the old fill valve and install the new one according to the manufacturer’s instructions.
Step 6: Turn on the water supply
Once you’ve replaced the flapper or fill valve, turn on the water supply and let the tank refill. Then, flush the toilet to make sure it’s working properly. If it’s still running, you may need to call a plumber to diagnose and fix the problem.
Common Causes of a Running Toilet
There are several common causes of a running toilet, including:
- A faulty flapper
- A damaged or worn out fill valve
- A clogged or damaged overflow tube
- A loose or damaged flush handle
By understanding these common causes, you can quickly diagnose and fix a running toilet on your own.
Conclusion
Learning basic plumbing repairs is an essential skill that every homeowner should have. With this knowledge, you can save yourself time and money by fixing common plumbing issues yourself. From fixing leaky faucets to unclogging drains, you can handle most plumbing problems with a little bit of know-how and the right tools.
Remember to always take safety precautions when working with plumbing systems. Turn off the main water supply before attempting any repairs, and wear protective gear such as gloves and goggles. If you encounter a problem that you’re not comfortable fixing on your own, don’t hesitate to call a professional plumber.
By following the tips and techniques outlined in this article, you can become a confident and skilled DIY plumber. With a little bit of practice, you’ll be able to tackle more advanced plumbing tasks and keep your home’s plumbing system in top shape.
Key Takeaways
- Basic plumbing repairs can save you time and money.
- Safety is important when working with plumbing systems.
- Professional plumbers should be called for more complex problems.
- With practice, you can become a skilled DIY plumber.
Don’t be intimidated by plumbing repairs. With a little bit of knowledge and the right tools, you can fix common plumbing issues and keep your home’s plumbing system running smoothly.