
How to Build a DIY Vertical Wall Garden with PVC Pipes
Vertical wall gardens are a great way to grow plants in limited space, and PVC pipes make for an inexpensive and easy-to-use building material. With a little creativity and some basic tools, you can create a beautiful and functional vertical garden that will not only enhance the aesthetic appeal of your living space but also provide you with fresh produce and herbs.
Tools and Materials Required
Before you get started, you will need a few tools and materials:
- PVC pipes (4-inch diameter)
- Saw or PVC pipe cutter
- Measuring tape
- Drill and drill bits
- Potting soil
- Plants or seeds
- Zip ties
Step-by-Step Guide
Follow these simple steps to build your own DIY vertical wall garden:
- Measure and mark the PVC pipes into sections of equal length.
- Cut the PVC pipes into sections using a saw or a PVC pipe cutter.
- Drill holes into the PVC pipes using a drill and drill bits. The holes should be large enough to accommodate the plants.
- Fill the PVC pipes with potting soil.
- Plant your desired plants or seeds into the holes.
- Secure the PVC pipes to a wall or fence using zip ties.
With these simple steps, you can create a beautiful and functional vertical wall garden with PVC pipes. Get creative with your plant choices and design to make a unique and personalized garden that is perfect for your space.
Materials Needed
Building a DIY vertical wall garden with PVC pipes requires the following materials:
| Materials | Description |
|---|---|
| PVC Pipes | Choose PVC pipes with a diameter of 4 inches or more for stability. The length of the pipes depends on the size of the wall garden you want to build. |
| End Caps | You will need end caps for each PVC pipe to prevent soil and water from leaking out. |
| PVC Primer and Cement | These are used to join the PVC pipes and elbows together. |
| PVC Elbows | Use PVC elbows to connect the pipes at the corners. Choose the right angle for your design. |
| Plants and Soil | Choose plants that are suitable for vertical gardens, such as succulents, herbs, and small vegetables. The soil should be lightweight and well-draining. |
| Screws and Wall Anchors | These are used to attach the PVC pipes to the wall. Make sure to use sturdy screws and anchors that can support the weight of the wall garden. |

Step 1: Measure and Cut PVC Pipes
The first step in building a DIY vertical wall garden with PVC pipes is to measure and cut the pipes. You will need to measure the length of each pipe based on the height of your wall and the number of plants you want to grow. The pipes should be cut to the same length to ensure that the garden is level.
Materials Needed
- PVC pipes
- Saw or PVC pipe cutter
- Measuring tape or ruler
Instructions
- Measure the height of your wall and the desired length of each pipe.
- Mark the measurements on the PVC pipes using a measuring tape or ruler.
- Using a saw or PVC pipe cutter, cut the pipes to the desired length.
- Repeat this process for each pipe needed for your wall garden.
It’s important to note that when cutting PVC pipes, you should wear safety glasses and gloves to protect yourself from any flying debris. Also, be sure to cut the pipes in a well-ventilated area to avoid inhaling any fumes.
| Tip: | Make sure to measure twice and cut once to avoid any mistakes or wasted materials. |
|---|
Once you have measured and cut your PVC pipes, you are ready to move on to the next step of building your DIY vertical wall garden.
Step 2: Prime and Cement the Pipes
After cutting the PVC pipes into the desired lengths, it’s time to prime and cement them. This step is crucial to ensure that the pipes are firmly connected and won’t leak water or soil.
Materials Needed:
- PVC primer
- PVC cement
- Small brush
Instructions:
- Start by applying PVC primer to the outside of one end of a pipe and the inside of a PVC elbow joint. Be sure to follow the manufacturer’s instructions for the primer and use it in a well-ventilated area.
- Next, apply PVC cement to the same areas where the primer was applied. Use a small brush to spread the cement evenly.
- Quickly insert the primed end of the pipe into the cemented end of the elbow joint and give it a quarter turn to ensure a secure fit. Hold the joint in place for a few seconds to allow the cement to set.
- Repeat the process until all the pipes are connected to form the desired shape.
- Let the cement dry completely according to the manufacturer’s instructions before moving on to the next step.
Once the cement has dried, the PVC pipes should be firmly connected and ready for the next step in building your DIY vertical wall garden.
Step 3: Assemble the Pipes into a Frame
Now that you have cut and drilled all the pipes, it’s time to assemble them into a frame for your vertical wall garden. Follow these steps:
- Take four 1.5-inch PVC pipes and two 2-inch PVC pipes.
- Connect the two 2-inch pipes to the top of the four 1.5-inch pipes using T-joints.
- Connect the two 2-inch pipes to the bottom of the four 1.5-inch pipes using elbow joints.
- Connect the bottom of each 1.5-inch pipe to a 2.5-inch PVC pipe using elbow joints.
- Connect the two 2.5-inch pipes at the bottom using a T-joint.
- Place the assembled frame against the wall where you want to install your vertical garden.
Make sure the frame is level and secure it to the wall using screws and anchors. Once the frame is in place, you can start inserting the cut pipes into the frame. Begin by inserting the top row of 2-inch pipes, followed by the second row of 1.5-inch pipes, and so on until all the pipes are in place.
Once all the pipes are inserted, you can start filling them with soil and plants. Make sure to pack the soil tightly to prevent it from falling out of the pipes.
Congratulations! You have now assembled your DIY vertical wall garden using PVC pipes.

Step 4: Attach the Frame to the Wall
Now that you have assembled the frame for your vertical wall garden, it’s time to attach it to the wall. Follow these steps:
- Hold the frame against the wall in the location where you want to install it.
- Use a pencil to mark the locations of the screw holes on the wall.
- Drill pilot holes into the wall at the marked locations.
- Place the frame back against the wall and insert screws through the holes in the frame and into the pilot holes in the wall.
- Tighten the screws until the frame is securely attached to the wall.
Note that the size and type of screws you use will depend on the material of your wall. If you are unsure, consult with a hardware store expert to determine the appropriate screws for your specific situation.
Once the frame is attached to the wall, you can begin filling the PVC pipes with soil and planting your favorite herbs, flowers, or vegetables. Be sure to water your plants regularly to keep them healthy and thriving.
Congratulations! You have successfully built a DIY vertical wall garden using PVC pipes.
Step 5: Fill the Pipes with Soil and Plants
Now that your PVC pipes are securely mounted on the wall, it’s time to fill them with soil and plants. Here are the steps:
- Fill the bottom of each pipe with gravel or small stones to improve drainage.
- Add a layer of landscaping fabric or mesh to prevent soil from falling out of the drainage holes.
- Fill each pipe with a good quality potting soil, leaving about an inch of space at the top.
- Choose your plants carefully. Consider the amount of sunlight your wall garden will receive and choose plants that are appropriate for that amount of light. You can also choose plants based on their color, texture, and growth habits.
- Plant your chosen plants in the soil, starting from the bottom of the pipe and working your way up to the top. Make sure to press the soil around the plants firmly to keep them in place.
- Water your plants thoroughly, making sure the soil is evenly moist. You may need to water your wall garden more frequently than traditional gardens, as the soil in the pipes will dry out faster.
Here are some plant suggestions for a vertical wall garden:
- Herbs such as basil, oregano, and thyme
- Succulents such as sedum and echeveria
- Flowers such as petunias, pansies, and impatiens
- Vines such as ivy and morning glory
Remember to regularly check your wall garden for pests, and prune your plants as needed to keep them healthy and looking their best.
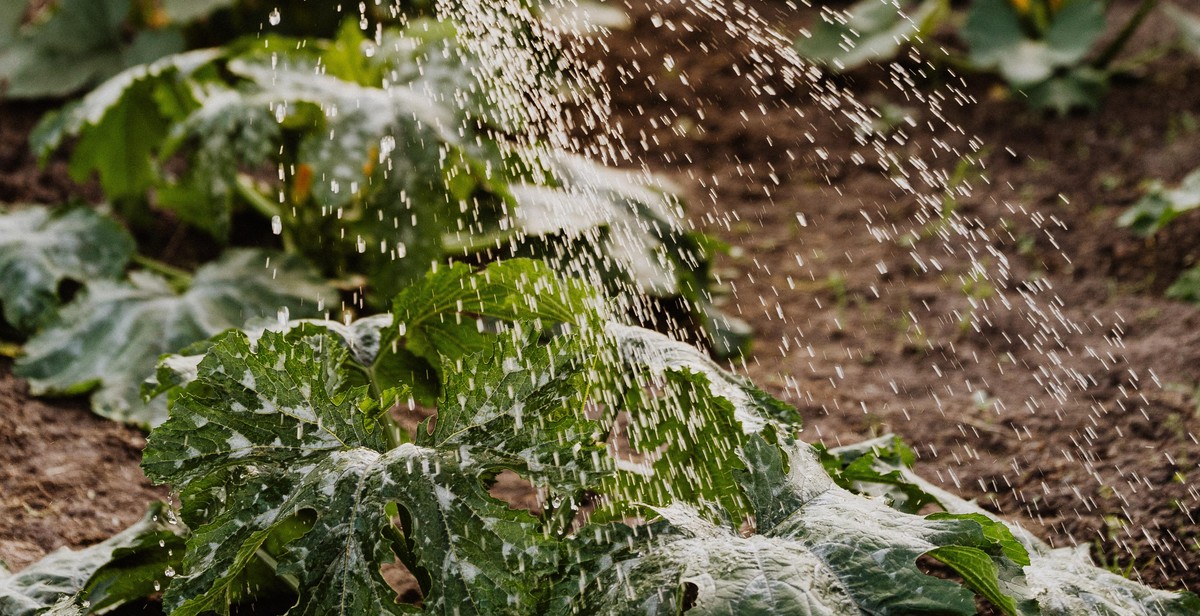
Step 6: Water and Care for Your Vertical Wall Garden
Once your DIY vertical wall garden is complete, it is important to give it the proper care and attention to ensure that your plants thrive. Here are some tips on how to water and care for your vertical wall garden:
Watering Your Vertical Wall Garden
Watering your vertical wall garden will depend on the type of plants you have chosen and the climate in your area. In general, it is important to keep the soil moist, but not waterlogged. Here are some tips:
- Water your plants in the morning or evening when the sun is not too strong.
- Use a watering can or a hose with a gentle spray to water your plants.
- Water slowly and evenly to make sure the soil is evenly moist.
- Check the soil regularly to ensure it is not too dry or too wet.
Caring for Your Vertical Wall Garden
Caring for your vertical wall garden involves regular maintenance to ensure your plants are healthy and thriving. Here are some tips:
- Remove any dead or damaged leaves or stems to encourage new growth.
- Fertilize your plants regularly to provide them with the nutrients they need.
- Monitor your plants for any signs of pests or diseases and take action immediately if you notice any problems.
- Trim your plants as needed to keep them from getting too large or out of control.
By following these tips, you can enjoy a beautiful and thriving vertical wall garden for years to come.