Introduction: How to Build a DIY Vertical Wall Garden with Pallets
If you’re looking for a fun and creative way to add some greenery to your home or garden, a DIY vertical wall garden made from pallets might be just the thing you need. Not only is it a unique and eye-catching way to display your plants, but it’s also an excellent space-saving solution for those who don’t have a lot of room to work with.
What is a Vertical Wall Garden?
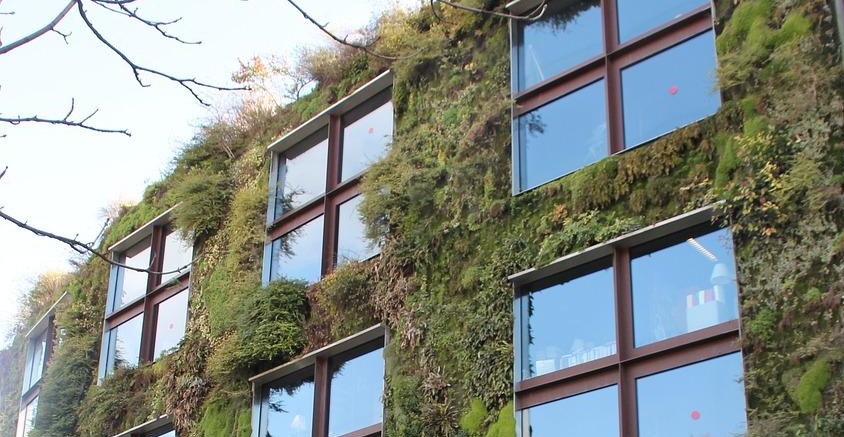
A vertical wall garden, also known as a living wall or green wall, is a type of garden that is grown vertically against a wall or other vertical surface. This type of garden is becoming increasingly popular in urban areas where space is limited, as it allows people to grow plants in areas that might not otherwise be suitable for gardening.
Benefits of a Vertical Wall Garden
There are many benefits to building a DIY vertical wall garden. For one, it allows you to grow plants in a small space, making it perfect for those who live in apartments or other small living spaces. Additionally, vertical wall gardens are great for improving air quality, as plants are natural air purifiers. They can also help to insulate your home, reducing energy costs and keeping your home cooler in the summer and warmer in the winter.
With all these benefits, it’s no wonder that more and more people are turning to vertical wall gardens as a way to add some greenery and life to their homes and gardens.

Materials Required
If you’re looking for an affordable and sustainable way to create a vertical wall garden, pallets are an excellent choice. Here’s what you’ll need to get started:
Pallets
You’ll need at least one pallet to build your vertical wall garden. Ideally, you should choose a pallet that’s in good condition and hasn’t been treated with any harmful chemicals. If you’re not sure where to find pallets, try checking with local businesses or searching online classifieds.
Tools
You’ll need a few basic tools to build your vertical wall garden, including:
- Measuring tape
- Saw
- Hammer
- Screws or nails
- Drill
You may also want to consider using a level to ensure that your garden is straight and even.
Soil
When it comes to soil, you’ll want to choose a high-quality potting mix that’s specifically formulated for container gardening. This type of soil is designed to provide the right balance of nutrients and drainage for your plants. You’ll need enough soil to fill each pallet planter box, so be sure to measure carefully.
Plants
The type of plants you choose for your vertical wall garden will depend on your personal preferences and the growing conditions in your area. Some good options for a pallet garden include herbs, succulents, and small flowering plants. Be sure to choose plants that are well-suited to container gardening and that will thrive in the amount of sunlight and moisture your garden will receive.

Preparing the Pallets
Before starting to build your DIY vertical wall garden with pallets, it is important to properly prepare the pallets. This will ensure that your finished product is not only aesthetically pleasing but also safe for your plants. There are three main steps to preparing your pallets: cleaning, sanding, and painting.
Cleaning the Pallets
The first step in preparing your pallets is to clean them thoroughly. Since pallets are often used for shipping and storage, they can be covered in dirt, dust, and other debris. Start by using a stiff-bristled brush to remove any loose dirt and debris. Then, use a mild detergent and warm water to scrub the pallets clean. Be sure to rinse them thoroughly with clean water and allow them to dry completely before moving on to the next step.
Sanding the Pallets
Once your pallets are clean and dry, the next step is to sand them down. This will help to smooth out any rough spots or splinters that could harm your plants. Start by using a coarse-grit sandpaper to remove any large splinters or rough areas. Then, switch to a finer-grit sandpaper to smooth out the surface of the pallets. Be sure to sand all sides of the pallets, including the top, bottom, and sides.
Painting the Pallets
The final step in preparing your pallets is to paint them. While this step is optional, it can help to protect your pallets from the elements and give them a more finished look. Choose a paint that is safe for outdoor use and that will not harm your plants. Apply the paint evenly, using a brush or roller. Be sure to allow the paint to dry completely before moving on to the next step.
| Cleaning the Pallets | Sanding the Pallets | Painting the Pallets |
|---|---|---|
| Remove loose dirt and debris with a stiff-bristled brush | Use coarse-grit sandpaper to remove large splinters and rough areas, then switch to fine-grit sandpaper to smooth out the surface | Choose a paint that is safe for outdoor use and apply it evenly using a brush or roller |
| Scrub the pallets with a mild detergent and warm water | Sand all sides of the pallets, including the top, bottom, and sides | Allow the paint to dry completely before moving on to the next step |
| Rinse the pallets thoroughly with clean water and allow them to dry completely |
By following these three steps, you can ensure that your pallets are clean, smooth, and ready to use in your DIY vertical wall garden.

Building the Vertical Wall Garden
Building a DIY vertical wall garden with pallets is a great way to bring life to any outdoor space. Follow these steps to create your own:
Attaching the Pallets
The first step is to attach the pallets together. Place the pallets on a flat surface, ensuring that they are level. Then, using screws and a power drill, attach the pallets together. It is important to ensure that the pallets are securely attached to each other, as this will prevent them from falling over once the planters are added.
Adding the Planters
Once the pallets are securely attached, it’s time to add the planters. There are a few different options for planters, including plastic or metal containers, or even repurposed mason jars. Whatever you choose, make sure that the planters are securely attached to the pallets. One option is to use zip ties to attach the planters to the pallets. Another option is to use screws and brackets to attach the planters to the pallets.
Filling the Planters with Soil and Plants
Now that the planters are securely attached, it’s time to fill them with soil and plants. Choose plants that are suitable for the amount of sunlight and shade that your wall garden will receive. Succulents and herbs are great options for a vertical wall garden. Fill the planters with soil, leaving enough room for the plants to grow. Then, add the plants to the planters, ensuring that they are securely planted.
With these simple steps, you can create a beautiful DIY vertical wall garden with pallets. Adding a vertical garden to your outdoor space is a great way to add life and color to your surroundings.

Maintenance
Watering the Plants
Watering your vertical wall garden is essential for the growth and health of your plants. The frequency of watering will depend on the type of plants you have and the climate you live in. As a general rule, you should water your plants when the top inch of soil feels dry to the touch. Overwatering can lead to root rot, so it’s important not to water too frequently.
One way to ensure that your plants are getting enough water is to install a drip irrigation system. This can be set up to water your plants at specific intervals throughout the day. Alternatively, you can water your plants manually using a watering can or hose.
Fertilizing the Plants
Fertilizing your plants is important to provide them with the necessary nutrients for growth. You can use a balanced fertilizer that contains equal amounts of nitrogen, phosphorus, and potassium. Alternatively, you can use an organic fertilizer such as compost or worm castings.
It’s important not to over-fertilize your plants as this can lead to nutrient burn. Follow the instructions on the fertilizer packaging and apply it to your plants at the recommended intervals.
Pruning the Plants
Pruning your plants is important to promote healthy growth and prevent them from becoming too crowded. You should prune any dead or yellowing leaves as soon as you notice them. This will prevent the plant from using energy to maintain these leaves and allow it to focus on new growth.
You should also prune any branches or stems that are growing in the wrong direction or are blocking light from other plants. This will help to ensure that all of your plants are getting enough light and space to grow.
| Task | Frequency | Tools/Supplies Needed |
|---|---|---|
| Watering | When the top inch of soil feels dry to the touch | Drip irrigation system, watering can, hose |
| Fertilizing | Follow instructions on packaging | Balanced fertilizer, organic fertilizer |
| Pruning | As needed | Pruning shears |
Conclusion
Building a DIY vertical wall garden with pallets is a great way to add some greenery to your living space while also upcycling materials. With some basic tools and materials, you can create a beautiful and functional garden that will thrive in even the smallest of spaces.
Remember to choose the right plants for your vertical garden and to take care when installing the pallets to ensure they are securely attached to the wall. You can also customize your garden with paint or other decorative elements to suit your personal style.
Vertical gardening is a great way to maximize your living space and bring the beauty of nature indoors. Whether you live in a small apartment or a large house, a DIY vertical wall garden is a fun and rewarding project that will provide you with fresh herbs, vegetables, or flowers all year round.
Tips for Maintaining Your Vertical Garden
- Water your plants regularly, but be careful not to overwater.
- Monitor the soil moisture level and adjust as needed.
- Prune your plants to encourage healthy growth.
- Use organic fertilizers to nourish your plants.
- Check for pests and diseases regularly and take action if necessary.
Final Thoughts
Building a DIY vertical wall garden with pallets is a fun and rewarding project that can be done by anyone with some basic DIY skills. With a little bit of creativity and some careful planning, you can create a beautiful and functional garden that will bring joy and beauty to your living space for years to come.
