
How to Build a DIY Vertical Wall Garden with Clay Pots
Vertical wall gardens are a great way to add greenery to your living space, especially if you have limited floor space. One of the best ways to create a vertical garden is by using clay pots. Not only are they affordable and easily available, but they also add a rustic charm to your garden.
In this article, we will guide you through the process of building a DIY vertical wall garden with clay pots. We will cover everything from choosing the right location, selecting the suitable plants, and assembling the wall garden. You don’t need to be a gardening expert to build this vertical wall garden. With our step-by-step instructions, you can have a beautiful garden in no time.
Benefits of a Vertical Wall Garden
- Maximizes limited space
- Improves air quality
- Reduces noise pollution
- Provides insulation
- Enhances aesthetic appeal
Choosing the Right Location
The first step in building a vertical wall garden is to select the right location. The ideal location should have adequate sunlight, good air circulation, and easy access to water. You can choose to build your wall garden indoors or outdoors, depending on your preference and space availability.

Benefits of a Vertical Wall Garden
A vertical wall garden is an innovative and space-saving way to grow plants in a limited area. By using clay pots, you can create a beautiful and functional vertical garden that not only enhances the aesthetic appeal of your space but also offers numerous benefits.
Space-Saving
One of the most significant benefits of a vertical wall garden is that it saves space. You can hang the clay pots on a wall or fence, or even on a balcony or terrace, which means you can grow plants even if you have limited outdoor space. This makes it an ideal solution for apartment dwellers or those who live in urban areas with limited access to green spaces.
Improved Air Quality
A vertical wall garden can also help to improve the air quality in your home or outdoor space. Plants absorb carbon dioxide and release oxygen, which means they can help to purify the air and reduce pollutants. This can be particularly beneficial if you live in an area with high levels of air pollution.
Aesthetic Appeal
Another benefit of a vertical wall garden is that it can enhance the aesthetic appeal of your space. By using different colored clay pots and a variety of plants, you can create a beautiful and eye-catching display. This can be particularly effective if you have a blank wall or fence that needs some visual interest.
Overall, a vertical wall garden is a versatile and practical way to grow plants in a limited space. It offers numerous benefits, including space-saving, improved air quality, and aesthetic appeal, making it an ideal solution for anyone who loves plants but has limited outdoor space.

Choosing the Right Location
When building a DIY vertical wall garden with clay pots, choosing the right location is crucial to the success of your project. There are two main factors to consider when selecting a location: sunlight exposure and accessibility.
Sunlight Exposure
Plants need sunlight to grow, and different types of plants require different amounts of sunlight. Before choosing a location for your vertical garden, consider the amount of sunlight the area receives throughout the day. Ideally, you want a location that gets at least six hours of sunlight per day, but some plants may require more or less sunlight.
If your chosen location doesn’t receive enough sunlight, your plants may not grow properly, or they may become leggy and weak. On the other hand, if your location gets too much sunlight, your plants may become scorched and wilted.
Before planting, observe the area you have chosen throughout the day to determine the amount of sunlight it receives. You may also want to consider using shade cloth or other methods to protect your plants from excessive sunlight.
Accessibility
Accessibility is another important factor to consider when choosing a location for your vertical garden. You want a location that is easy to access for watering, pruning, and harvesting your plants. If your garden is difficult to access, you may be less likely to take care of your plants properly, which can lead to poor growth and health.
When selecting a location, consider the height of your vertical garden and how easy it will be to reach the top pots. You may also want to consider installing a drip irrigation system or using self-watering pots to make watering easier.
Finally, consider the weight of your vertical garden and whether the location you have chosen can support it. If you are attaching your garden to a wall, make sure the wall is sturdy enough to hold the weight of the pots and soil.
By considering both sunlight exposure and accessibility, you can choose the perfect location for your DIY vertical wall garden with clay pots.

Materials Needed
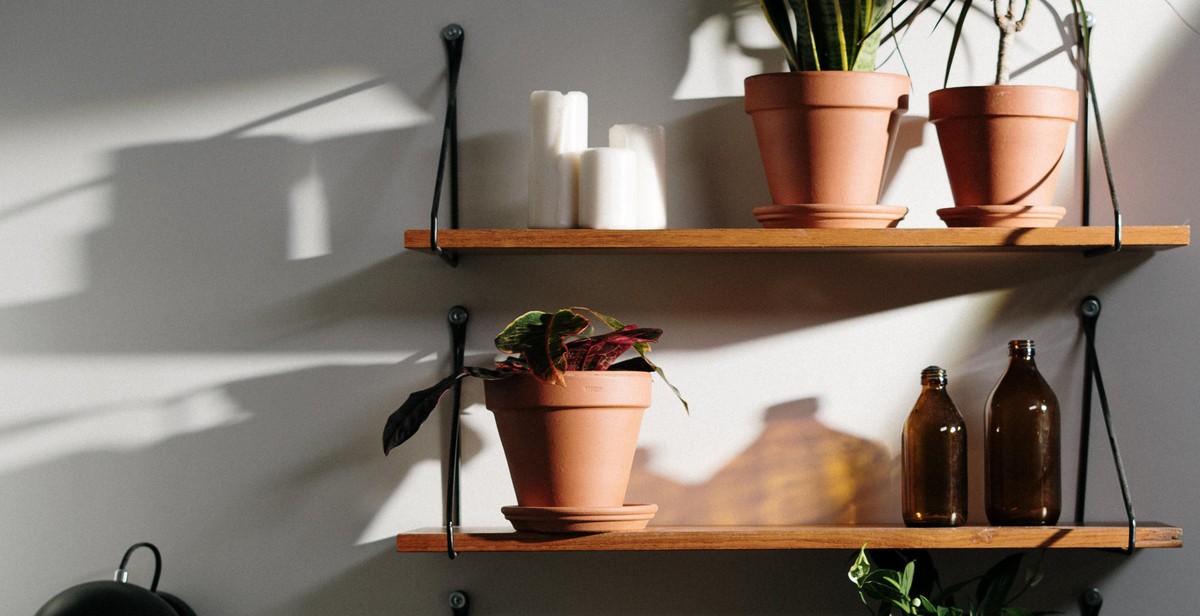
Clay Pots
Clay pots are the most important material required for building a vertical wall garden. The number of clay pots required will depend on the size of the wall garden you want to build. It is recommended that you use pots of different sizes to create an interesting and varied display.
Potting Soil
Potting soil is the next important material required. It is recommended that you use a high-quality potting mix that contains a blend of peat moss, vermiculite, and perlite. This will ensure good drainage and aeration for the plants.
Plants
The plants you choose for your vertical wall garden will depend on your personal preference and the amount of sunlight the wall receives. It is recommended that you choose plants that are suitable for vertical growing, such as succulents, ferns, and herbs. Make sure to choose plants that have similar water and sunlight requirements.
Wall-Mounting Hardware
Wall-mounting hardware is required to mount the clay pots on the wall. You will need screws, wall anchors, and brackets to secure the pots to the wall. Make sure to choose hardware that is suitable for the weight of the pots and the wall material.
| Materials | Quantity |
|---|---|
| Clay Pots | Varies |
| Potting Soil | Enough to fill pots |
| Plants | Varies |
| Wall-Mounting Hardware | Varies |

Preparing the Clay Pots
Before you start building your DIY vertical wall garden with clay pots, it’s important to properly prepare the pots. This involves cleaning them and drilling holes for drainage.
Cleaning the Pots
The first step in preparing your clay pots is to clean them thoroughly. This is important to remove any dirt, debris, or other contaminants that could affect the health of your plants. To clean your clay pots, follow these steps:
- Fill a bucket with warm water and add a small amount of dish soap.
- Using a scrub brush or sponge, gently scrub the inside and outside of the pot to remove any dirt or debris.
- Rinse the pot thoroughly with clean water to remove any soap residue.
- Allow the pot to dry completely before moving on to the next step.
Once your pots are clean and dry, you can move on to drilling holes for drainage.
Drilling Holes for Drainage
Proper drainage is essential for the health of your plants, so it’s important to drill holes in the bottom of your clay pots to allow excess water to escape. Here’s how to do it:
- Choose a drill bit that is appropriate for the size of your pot. A 1/4-inch bit is usually sufficient for small to medium-sized pots.
- Place the pot upside down on a sturdy surface, such as a workbench or table.
- Using the drill, carefully make a hole in the center of the pot’s bottom. Be sure to keep the drill perpendicular to the pot to avoid cracking or damaging the clay.
- If you are using larger pots, you may need to drill additional holes around the perimeter of the pot for proper drainage.
Once you have drilled the necessary holes, your clay pots are ready to be used in your DIY vertical wall garden.
Planting the Vertical Wall Garden
Now that you have built your DIY vertical wall garden with clay pots, it’s time to start planting. Follow these tips to ensure your plants thrive:
Filling the Pots with Soil
Before you start planting your vertical wall garden, make sure to fill each clay pot with soil. Use a high-quality potting mix that contains nutrients and good drainage. Fill each pot about three-quarters full with soil, leaving enough space for the plants to grow and for watering.
Choosing the Right Plants
When choosing plants for your vertical wall garden, consider the amount of sunlight and shade the wall receives. Select plants that are suitable for the environment and that will grow well in pots. Some good options for vertical wall gardens include herbs, succulents, and small flowering plants.
It’s also important to choose plants with similar watering needs, as it can be difficult to water each pot individually in a vertical garden.
Arranging the Pots
When arranging the pots in your vertical wall garden, consider the size and shape of each plant. Place taller plants at the top of the wall and smaller plants at the bottom. This will ensure that each plant receives enough sunlight and that the garden looks aesthetically pleasing.
You can also arrange the pots in a pattern or design to create a unique and beautiful display.
Remember to water your vertical wall garden regularly, as plants in pots tend to dry out more quickly than those in the ground. Use a watering can or hose with a gentle spray to avoid damaging the plants.

Mounting the Vertical Wall Garden
Once you have gathered all the materials needed and prepared your clay pots, it’s time to mount your vertical wall garden. This section will guide you through the process of measuring and marking the wall, installing wall-mounting hardware, and hanging the pots.
Measuring and Marking the Wall
The first step in mounting your vertical wall garden is to measure and mark the wall where you want to hang the clay pots. Use a tape measure to determine the height and width of the area you want to cover. Once you have the measurements, use a pencil to mark the top and bottom of the area you want to cover.
Next, use a level to ensure that the area you marked is straight and even. Make any necessary adjustments before proceeding to the next step.
Installing Wall-Mounting Hardware
After marking the wall, it’s time to install the wall-mounting hardware. You can use a variety of hardware, such as screws, hooks, or brackets, depending on the type of wall you have and the weight of your clay pots.
If you have drywall, use a stud finder to locate the studs in the wall. Then, drill pilot holes into the studs and insert screws or hooks. If you have a brick or concrete wall, use masonry screws to attach the hardware.
Make sure to install the hardware securely and at the correct distance apart to support the weight of the clay pots.
Hanging the Pots
Once the hardware is installed, it’s time to hang the clay pots. Start by attaching the S-hooks to the top rim of each pot. Then, hang the S-hooks onto the wall-mounting hardware.
Make sure to space the pots evenly and at the same height for a uniform look. You can adjust the height of the pots by using different lengths of chain or rope.
Finally, fill the pots with soil and plants, and your DIY vertical wall garden is ready to be admired!

Maintaining Your Vertical Wall Garden
Maintaining your vertical wall garden is an essential part of ensuring that your plants thrive and remain healthy. Here are some tips on how to keep your garden in top shape:
Watering
Watering is one of the most critical aspects of maintaining your vertical wall garden. Since the plants are growing vertically, they require more water than traditional gardens. Ensure that you water your garden frequently to keep the soil moist. However, be careful not to overwater as this can lead to root rot.
One way to ensure that your plants get enough water is to install a drip irrigation system. The system will deliver water directly to the plant’s roots, ensuring that they receive enough moisture without wasting water.
Fertilizing
Fertilizing your vertical wall garden is essential to provide the necessary nutrients that your plants need to grow. Choose a high-quality fertilizer that is suitable for your plants and follow the instructions carefully. Over-fertilizing can damage your plants, so be careful not to apply too much fertilizer.
One way to fertilize your vertical garden is by using organic compost. Compost provides a range of nutrients and also helps to improve soil structure and water retention. Spread a thin layer of compost on top of the soil in your garden, and your plants will thrive.
Pruning
Pruning is essential to keep your vertical wall garden looking neat and healthy. Regularly prune your plants to remove any dead or damaged leaves or stems. Pruning also helps to promote new growth and can help to prevent diseases and pests from spreading.
When pruning, be sure to use sharp and clean tools to avoid damaging your plants. Cut at a 45-degree angle just above the leaf node to encourage new growth.
By following these tips, you can maintain a beautiful and healthy vertical wall garden that will be the envy of your friends and neighbors.
Conclusion
Building a DIY vertical wall garden with clay pots is a great way to add greenery to your living space and enhance its aesthetic appeal. With the right tools and materials, you can easily create a beautiful and functional garden that will thrive for years to come.
Tips for Success
- Choose the right location for your garden. Make sure it gets enough sunlight and is easily accessible for watering and maintenance.
- Use high-quality potting soil and fertilizer to ensure healthy plant growth.
- Water your plants regularly and monitor them for signs of pests or disease.
- Consider using a drip irrigation system to make watering easier and more efficient.
- Be creative with your design and plant selection to make your garden truly unique.
Benefits of Vertical Wall Gardens
Vertical wall gardens offer a variety of benefits beyond just adding beauty to your home. They can help purify the air, reduce noise pollution, and even improve your mental health by providing a calming and relaxing environment.
Get Started Today
Now that you know how to build a DIY vertical wall garden with clay pots, it’s time to get started. With a little bit of creativity and patience, you can create a stunning garden that will bring joy and beauty to your home for years to come.