How to Grow Your Own Fresh Microgreens for Nutrient-Packed Meals
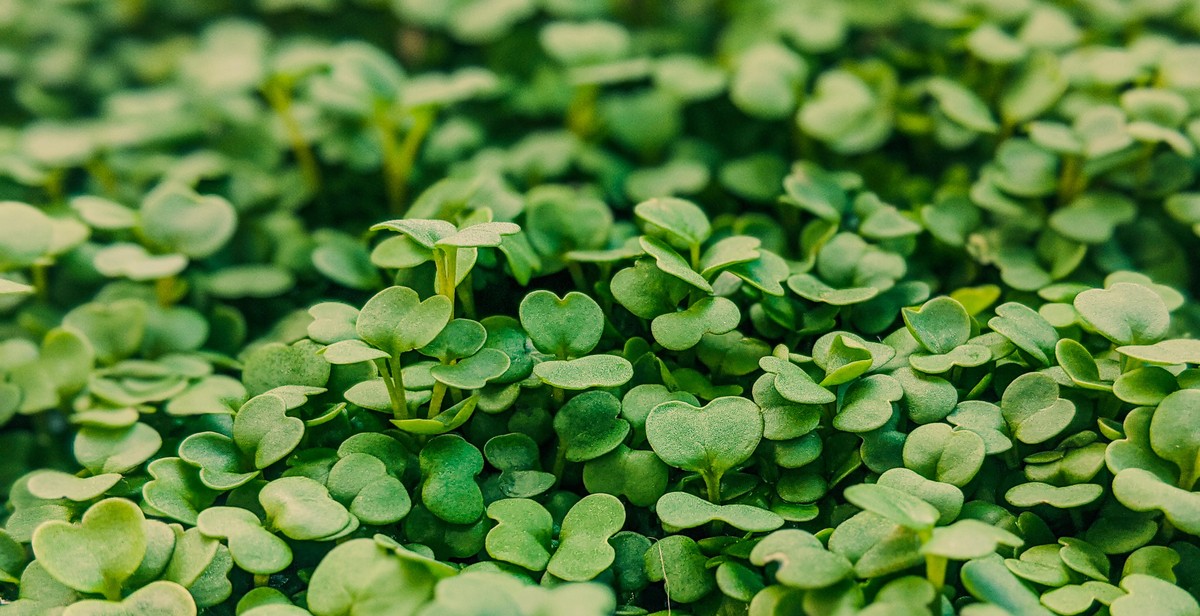
Microgreens are young plants that are harvested after just a few weeks of growth, making them a quick and easy way to add fresh flavor and nutrition to your meals. These tiny greens are packed with nutrients, including vitamins, minerals, and antioxidants, making them a great addition to any diet.
What are Microgreens?
Microgreens are small, edible plants that are harvested when they are just a few inches tall, typically after only 1-3 weeks of growth. They are often used as a garnish or added to salads, sandwiches, and other dishes to add flavor and texture.
Microgreens come in a variety of flavors and colors, from spicy radish and arugula to sweet pea shoots and sunflower sprouts. They are easy to grow at home and require very little space or equipment, making them a great option for anyone looking to add fresh greens to their diet.
Why Grow Your Own Microgreens?
Growing your own microgreens is not only a great way to add fresh flavor and nutrition to your meals, but it is also a fun and rewarding hobby. It allows you to have control over the quality and freshness of your greens, and can save you money in the long run.
Plus, growing your own microgreens is an eco-friendly alternative to buying pre-packaged greens, as it reduces packaging waste and carbon emissions from transportation.

The Benefits of Growing Microgreens
Microgreens are young plants that are harvested after the first leaves have developed. They are packed with nutrients and are considered to be a superfood. Here are some of the benefits of growing microgreens:
Nutritional Value of Microgreens
Microgreens are known to be highly nutritious. In fact, studies have shown that they can contain up to 40 times more nutrients than mature plants. They are rich in vitamins, minerals, and antioxidants, which can help to boost your immune system and improve your overall health. Microgreens are also a great source of fiber and can help to promote healthy digestion.
Cost-Effective
One of the best things about growing microgreens is that they are cost-effective. You can easily grow them at home using simple materials such as soil, seeds, and containers. This means that you can save money on buying expensive superfoods from the grocery store.
Easy to Grow at Home
Another advantage of growing microgreens is that they are easy to grow at home. You don’t need a lot of space or special equipment to grow them. All you need is a sunny spot, some soil, and seeds. You can even grow them indoors on a windowsill. This makes them a great option for people who want to start growing their own food but don’t have a lot of experience.
| Benefits of Growing Microgreens |
|---|
| Nutritional Value |
| Cost-Effective |
| Easy to Grow at Home |

Choosing the Right Seeds
When it comes to growing your own fresh microgreens, choosing the right seeds is crucial. There are many different types of seeds available, but not all of them are suitable for microgreens. Here are some things to consider when choosing your seeds:
Types of Seeds
There are many different types of seeds that can be used to grow microgreens, including:
- Broccoli
- Radish
- Arugula
- Mustard
- Kale
These seeds are all great choices for microgreens because they are easy to grow and packed with nutrients. However, it’s important to choose seeds that you enjoy eating, as you’ll be using them to add flavor and nutrition to your meals.
Quality of Seeds
The quality of your seeds is also important. Look for seeds that are organic, non-GMO, and untreated with any chemicals. This will ensure that your microgreens are as healthy and nutrient-packed as possible.
It’s also important to choose seeds that are fresh and viable. Check the expiration date on the seed packet and make sure the seeds are not discolored or damaged. If possible, buy your seeds from a reputable supplier or local nursery.
| Tip: | Start with a small batch of seeds to see how they grow and taste before investing in larger quantities. |
|---|
By choosing the right seeds and ensuring their quality, you can grow your own fresh microgreens that are packed with nutrients and flavor.

Preparing the Growing Containers
Before you start growing your own microgreens, you need to choose the right container for your plants. Microgreens can be grown in a variety of containers, including plastic trays, pots, and even recycled containers. However, it is important to choose a container that is shallow and has drainage holes to prevent water from accumulating and causing root rot.
Choosing the Right Container
When choosing a container, consider the type of microgreens you want to grow and the amount of space you have available. For example, if you want to grow a large quantity of microgreens, consider using plastic trays that can hold multiple plants. If you have limited space, opt for smaller containers or pots that can be easily moved around.
In addition to size, consider the material of the container. Plastic containers are lightweight and easy to clean, while terracotta pots are porous and allow for better air circulation. Whichever container you choose, make sure it is free of any chemicals or toxins that could harm your plants.
Preparing the Soil
Once you have chosen your container, it’s time to prepare the soil. Microgreens require a well-draining soil that is rich in nutrients. You can purchase pre-made soil mixes or create your own by combining equal parts of peat moss, vermiculite, and perlite.
Before adding soil to your container, make sure to moisten it with water. This will help the soil retain moisture and prevent it from drying out too quickly. Fill your container with soil, leaving a half inch of space at the top to allow for watering.
You are now ready to plant your microgreen seeds and start growing your own nutrient-packed greens!

Planting and Growing Microgreens
Microgreens are a great way to add fresh, nutrient-packed greens to your diet. They are easy to grow and can be harvested within a few weeks. Here are the steps to grow your own microgreens:
Sowing the Seeds
First, you need to choose the seeds you want to grow. Some popular microgreens include kale, arugula, radish, and broccoli. You can purchase seeds from your local nursery or online.
Next, you need to prepare your growing medium. You can use soil or a soilless medium like coconut coir or peat moss. Fill a shallow container with the growing medium and sprinkle the seeds evenly on top.
Cover the seeds with a thin layer of soil or growing medium and water gently. Place the container in a warm, well-lit area.
Watering and Lighting
Water your microgreens regularly to keep the soil moist but not waterlogged. You can use a spray bottle to mist the soil or water from the bottom by placing the container in a tray of water.
Microgreens need plenty of light to grow. Place the container in a sunny window or use artificial lighting. You can use grow lights designed for indoor plants or fluorescent bulbs.
Harvesting the Microgreens
Microgreens are ready to harvest when they have two or three leaves. This usually takes about two weeks. Use a pair of scissors to cut the greens just above the soil line.
Rinse the microgreens in cool water and pat dry with a paper towel. Store them in an airtight container in the refrigerator for up to a week.
With these simple steps, you can enjoy fresh, nutrient-packed microgreens in your meals.

Recipes with Microgreens
Microgreens are not only healthy but also delicious. They can add a unique flavor and texture to any dish. Here are three recipes you can try with your fresh microgreens:
Microgreen Salad
A microgreen salad is a simple and refreshing way to enjoy your microgreens. Here’s what you’ll need:
- A handful of fresh microgreens
- 1 cup of mixed greens
- 1/2 cup cherry tomatoes, halved
- 1/4 cup sliced cucumber
- 1/4 cup sliced red onion
- 1/4 cup crumbled feta cheese
- 2 tablespoons balsamic vinaigrette
Simply toss all the ingredients together in a bowl and enjoy!
Microgreen Smoothie
A microgreen smoothie is a great way to pack in some extra nutrients in your breakfast. Here’s what you’ll need:
- A handful of fresh microgreens
- 1 cup of spinach
- 1 banana
- 1/2 cup frozen berries
- 1/2 cup almond milk
- 1 tablespoon honey
Blend all the ingredients together until smooth and enjoy!
Microgreen Pesto
A microgreen pesto is a unique twist on the classic basil pesto. Here’s what you’ll need:
- A handful of fresh microgreens
- 1/2 cup basil leaves
- 1/2 cup grated parmesan cheese
- 1/4 cup pine nuts
- 2 garlic cloves, minced
- 1/4 cup olive oil
- Salt and pepper to taste
Pulse the microgreens, basil, parmesan cheese, pine nuts, and garlic in a food processor until finely chopped. Slowly add in the olive oil while pulsing until the pesto is smooth. Season with salt and pepper to taste and enjoy!

Conclusion
Growing your own fresh microgreens is a great way to add nutrient-packed ingredients to your meals. Not only are they easy to grow, but they can also be grown year-round indoors or outdoors. By following the steps outlined in this article, you can start growing your own microgreens in no time.
Tips for Successful Microgreen Growth
- Choose the right seeds for the type of microgreens you want to grow.
- Use a high-quality soil or growing medium.
- Ensure your microgreens get enough water and sunlight.
- Harvest your microgreens when they reach their optimal growth stage.
- Experiment with different types of microgreens to find your favorites.
The Benefits of Microgreens
Microgreens are not only delicious, but they are also packed with nutrients. They are a great source of vitamins, minerals, and antioxidants, making them a healthy addition to any meal. Additionally, growing your own microgreens can be a fun and rewarding hobby.
Start Growing Your Own Microgreens Today
With a little bit of time and effort, you can start growing your own fresh microgreens for nutrient-packed meals. By following the tips and techniques outlined in this article, you can enjoy the benefits of homegrown microgreens in no time.
