
How to Do Basic Plumbing Repairs: Essential Skills for Fixing Common Household Issues
Plumbing issues are common in every household, and they can be frustrating and costly if not fixed promptly. However, hiring a plumber for every problem can be expensive, and sometimes, it’s unnecessary. Learning how to do basic plumbing repairs is not only cost-effective but also essential for every homeowner or renter.
Why Learn Basic Plumbing Repairs?
Knowing how to fix common plumbing issues can save you time, money, and frustration. Basic plumbing repairs can be done with a few tools and some knowledge, and they can prevent further damage to your home. Additionally, learning basic plumbing repairs can also give you a sense of accomplishment and independence.
What Are the Essential Skills for Basic Plumbing Repairs?
Some of the essential skills for basic plumbing repairs include:
- Identifying common plumbing issues
- Shutting off water supply
- Using plumbing tools
- Replacing faucets and valves
- Fixing leaky pipes
- Clearing clogged drains
These skills may seem daunting, but with practice and patience, anyone can learn how to do basic plumbing repairs.
Conclusion
Learning how to do basic plumbing repairs is an essential skill for every homeowner or renter. It can save you time, money, and frustration, and it can also prevent further damage to your home. In this article, we will go through the essential skills required for basic plumbing repairs and provide you with step-by-step instructions on how to fix common plumbing issues.
Understanding Basic Plumbing Systems
Before embarking on any plumbing repair, it is essential to have a basic understanding of your home’s plumbing system. Plumbing systems comprise of pipes, valves, and fixtures that work together to supply and distribute water throughout your home.
Types of Pipes
There are different types of pipes used in plumbing systems. The most common types of pipes include:
- Copper pipes: Copper pipes are durable, long-lasting, and resistant to corrosion. They are commonly used for water supply lines and can last up to 50 years.
- PEX pipes: PEX pipes are flexible, easy to install, and are resistant to freezing. They are commonly used for water supply lines in modern homes.
- PVC pipes: PVC pipes are lightweight, easy to install, and are commonly used for drain and waste lines.
Water Pressure
Water pressure is the force at which water flows through pipes and fixtures in your home. Normal water pressure should be between 40-60 psi (pounds per square inch). High water pressure can cause damage to pipes, fixtures, and appliances. Signs of high water pressure include banging pipes, leaky faucets, and running toilets. A pressure regulator can be installed to regulate water pressure and prevent damage.
| Pipe Type | Pros | Cons |
|---|---|---|
| Copper | Durable, long-lasting, and resistant to corrosion | Expensive and can be difficult to install |
| PEX | Flexible, easy to install, and resistant to freezing | Can be more expensive than other options |
| PVC | Lightweight, easy to install, and inexpensive | Not as durable as other options and can be affected by temperature changes |
Common Plumbing Issues
Plumbing issues are common in every household. While some can be easily fixed with basic plumbing skills, others require professional help. Here are some of the most common plumbing issues:
Leaky Faucets
A leaky faucet is a common plumbing issue that can be annoying and wasteful. It is usually caused by worn-out washers or seals. To fix a leaky faucet, turn off the water supply and remove the handle. Replace the worn-out washer or seal with a new one and reassemble the faucet. If the problem persists, it might be time to replace the faucet altogether.
Clogged Drains
Clogged drains can be caused by a variety of things, including hair, soap, food particles, and grease. To unclog a drain, try using a plunger or a drain snake. If that doesn’t work, you can try using a mixture of baking soda and vinegar or a commercial drain cleaner. However, be careful when using chemical drain cleaners as they can be harmful to both you and your pipes.
Running Toilets
A running toilet is not only annoying but can also waste a lot of water. It is usually caused by a faulty flapper or fill valve. To fix a running toilet, turn off the water supply and remove the tank lid. Adjust the flapper or replace the fill valve if necessary. If you’re not comfortable doing it yourself, it’s best to call a professional plumber.
| Plumbing Issue | Cause | Solution |
|---|---|---|
| Leaky Faucets | Worn-out washers or seals | Replace the washer or seal |
| Clogged Drains | Hair, soap, food particles, or grease | Use a plunger, drain snake, or a mixture of baking soda and vinegar or a commercial drain cleaner |
| Running Toilets | Faulty flapper or fill valve | Adjust the flapper or replace the fill valve |
Tools You’ll Need
Before you start any plumbing repair work, you need to have the right tools. Here are the essential tools you should have in your toolbox:
Plunger
A plunger is a must-have tool for any homeowner. It is used to clear clogged sinks, toilets, and drains. Make sure you have a plunger with a good seal to create suction and clear the blockage effectively.
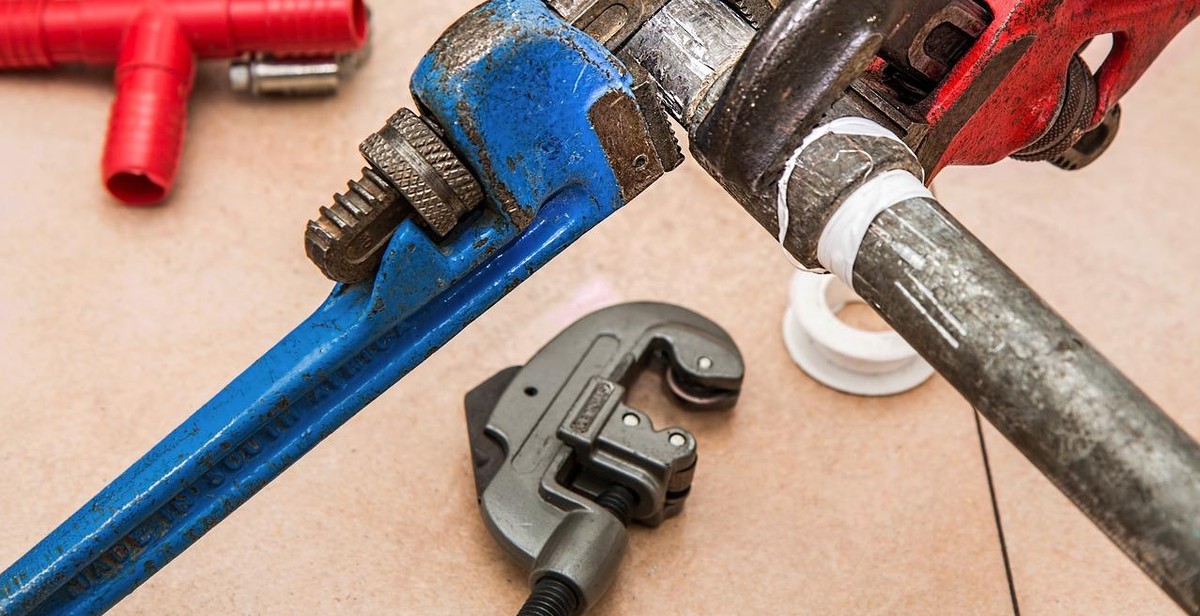
Pipe Wrench
A pipe wrench is used to tighten or loosen threaded pipes and fittings. It has sharp teeth that grip the pipe and provide leverage to turn it. Make sure you have a pipe wrench that can handle the size of the pipes you will be working on.
Adjustable Wrench
An adjustable wrench is a versatile tool that can be used to tighten or loosen nuts, bolts, and fittings. It has an adjustable jaw that can be set to fit different sizes of nuts and bolts.
Allen Wrench
An Allen wrench, also known as a hex key, is used to tighten or loosen hexagonal screws and bolts. It is a small L-shaped tool that can fit into tight spaces.
Screwdriver
A screwdriver is used to tighten or loosen screws. There are different types of screwdrivers, including flathead and Phillips head, so make sure you have the right one for the job.
Teflon Tape
Teflon tape is used to create a watertight seal on threaded pipes and fittings. It is a thin white tape that is wrapped around the threads before the fitting is screwed on. This helps prevent leaks.
Having these tools in your toolbox will make it easier to tackle basic plumbing repairs around your home.
Fixing a Leaky Faucet
A leaky faucet is one of the most common plumbing issues faced by homeowners. It can be a nuisance and can also lead to wastage of water. Here’s how you can fix a leaky faucet:
Step 1: Turn Off Water Supply
The first step in fixing a leaky faucet is to turn off the water supply. Locate the shut-off valve under the sink and turn it clockwise until the water supply is completely turned off.
Step 2: Disassemble Faucet
Next, disassemble the faucet by removing the handle and other parts. Use a screwdriver to remove the screws and gently pull off the handle. Use pliers to remove the retaining clip and unscrew the cartridge or stem.
Step 3: Replace O-Ring or Washer
Once the cartridge or stem is removed, inspect the O-ring or washer. If it is worn out, damaged or dirty, it needs to be replaced. Take the old O-ring or washer to the hardware store to find an exact match. Install the new O-ring or washer and reassemble the faucet.
Step 4: Reassemble Faucet
Reassemble the faucet by reversing the steps taken to disassemble it. Make sure all parts are properly aligned and tightened. Turn on the water supply and test the faucet for any leaks.
Fixing a leaky faucet is a simple plumbing repair that can save you money on your water bill and prevent water wastage. With these steps, you can fix a leaky faucet in no time.

Unclogging a Drain
One of the most common plumbing issues that homeowners face is a clogged drain. Fortunately, there are several ways to tackle this problem without having to call a plumber.
Step 1: Try a Plunger
If you have a clogged sink or toilet, a plunger is often the first tool you should reach for. To use a plunger, fill the sink or toilet with enough water to cover the plunger head. Place the plunger over the drain and pump it up and down vigorously. This creates suction that can help to dislodge the clog.
Step 2: Use a Drain Snake
If the plunger doesn’t work, the next step is to try a drain snake. This is a long, flexible tool that can be inserted into the drain to break up the clog. To use a drain snake, insert the tip into the drain and turn the handle to move it through the pipe. Once you reach the clog, twist the snake to break it up.
Step 3: Try a Chemical Drain Cleaner
If the plunger and drain snake don’t work, you can try a chemical drain cleaner. These products use powerful chemicals to dissolve the clog. However, they can be dangerous if not used properly, so be sure to follow the instructions carefully.
- Always wear gloves and eye protection when using a chemical drain cleaner
- Pour the cleaner down the drain and let it sit for the recommended amount of time
- Flush the drain with hot water to remove the clog
By following these steps, you can often unclog a drain without having to call a plumber. However, if these methods don’t work, or if you’re uncomfortable attempting the repair yourself, it’s always best to call in a professional.
Fixing a Running Toilet
A running toilet can be a frustrating and wasteful problem. Luckily, fixing a running toilet is a simple and easy task that can be done in a few minutes with basic tools.
Step 1: Check Flapper
The flapper is a rubber valve that seals the tank and prevents water from flowing into the bowl. If the flapper is not sealing properly, water will continuously flow into the bowl, causing the toilet to run. To check the flapper, lift the lid of the tank and flush the toilet. If the flapper does not seal properly, it may be worn or damaged and need to be replaced. Flappers are inexpensive and can be found at most hardware stores.
Step 2: Adjust Chain Length
If the chain connecting the flapper to the handle is too long, it can prevent the flapper from sealing properly, causing the toilet to run. To adjust the chain length, simply disconnect it from the handle and reattach it to a shorter link. Make sure the chain has enough slack to allow the flapper to fully close.
Step 3: Check Fill Valve
The fill valve is responsible for refilling the tank with water after a flush. If the fill valve is not working properly, it can cause the toilet to run. To check the fill valve, turn off the water supply to the toilet and flush the toilet to drain the tank. Then, turn the water supply back on and listen for water running. If water continues to run, the fill valve may need to be replaced.

Conclusion
Basic plumbing repairs are essential skills that every homeowner should have. By learning how to fix common household issues, you can save yourself time, money, and the hassle of calling a professional plumber.
Remember to always take safety precautions when attempting plumbing repairs, and if you are unsure of how to proceed, it’s best to call in a professional. However, with the right tools, knowledge, and a bit of confidence, you can handle many plumbing issues on your own.
Key takeaways
- Learn how to turn off the water supply before attempting any repairs
- Invest in a good set of plumbing tools
- Start with simple repairs and work your way up to more complex ones
- Don’t be afraid to call in a professional if you’re unsure of how to proceed
By following these basic guidelines, you can become a confident DIY plumber and tackle many common household plumbing issues. Remember to always approach plumbing repairs with caution and safety in mind, and don’t hesitate to call in a professional if you need assistance. With practice and experience, you’ll be able to handle more complex repairs and keep your plumbing system running smoothly for years to come.