
How to Build a Custom Computer for Gaming
If you are a serious gamer, then you know that having the right computer is essential to your gaming experience. Building a custom gaming PC can be a great way to ensure that you have the performance you need to play your favorite games at the highest settings.
Why Build a Custom Gaming PC?
Building a custom gaming PC allows you to tailor your computer to your specific needs and preferences. You can choose the components that will give you the best performance for your budget, and you can customize the look of your computer to match your style. Additionally, building your own PC can be a fun and rewarding experience.
Benefits of Building a Custom Gaming PC
There are several benefits to building a custom gaming PC. First and foremost, you can save money by building your own computer instead of buying a pre-built one. You can also ensure that your computer has the exact components you need for your specific gaming needs, which can improve your gaming experience significantly. Additionally, building a custom gaming PC can be a great way to learn more about how computers work and how to troubleshoot and fix issues that may arise.
Overall, building a custom gaming PC can be a great investment for serious gamers who want to take their gaming experience to the next level.
Step 1: Planning Your Build
Building a custom computer for gaming is an exciting project that requires careful planning. Before you start shopping for components, you need to set a budget, choose your components, and perform a compatibility check.
Budgeting
The first step in planning your custom gaming PC build is to set a budget. Your budget will determine the quality and performance of the components you can afford. A good gaming PC can cost anywhere from $500 to $2000, depending on your needs and preferences.
When setting your budget, consider the following:
- The cost of the components you need
- The cost of peripherals such as a monitor, keyboard, and mouse
- The cost of software such as operating system and games
Choosing Your Components
Once you have set your budget, it’s time to choose your components. The main components you will need for your gaming PC are:
- Processor (CPU)
- Graphics card (GPU)
- Motherboard
- Memory (RAM)
- Storage (hard drive or SSD)
- Power supply unit (PSU)
- Case
When choosing your components, consider the following:
- Your budget
- The compatibility of the components
- The performance you want
- The brand and warranty
Compatibility Check
Before purchasing your components, you need to perform a compatibility check to ensure that all the components are compatible with each other. The main factors to consider when checking compatibility are:
- The socket type of the CPU and motherboard
- The form factor of the motherboard and case
- The power requirements of the components and PSU
- The type and speed of the memory and motherboard
Use a compatibility checker tool or consult the specifications of the components to ensure that everything is compatible before making any purchases.
Step 2: Assembling Your PC
Now that you have gathered all the necessary components for your custom gaming PC, it’s time to assemble them. Follow these steps carefully to ensure that your PC works smoothly:
Preparing Your Workspace
Before you begin, ensure that you have a clean, well-lit workspace with adequate ventilation. It’s important to work on a flat surface, preferably a desk, to avoid any accidental damage to the components. Also, make sure you have all the necessary tools including a screwdriver, thermal paste, and cable ties.
Installing the Power Supply Unit
The power supply unit (PSU) is responsible for delivering power to all the other components in your PC. Mount the PSU in the designated area at the bottom of your case and secure it with screws. Then, connect the necessary cables to the motherboard, graphics card, and storage drives.
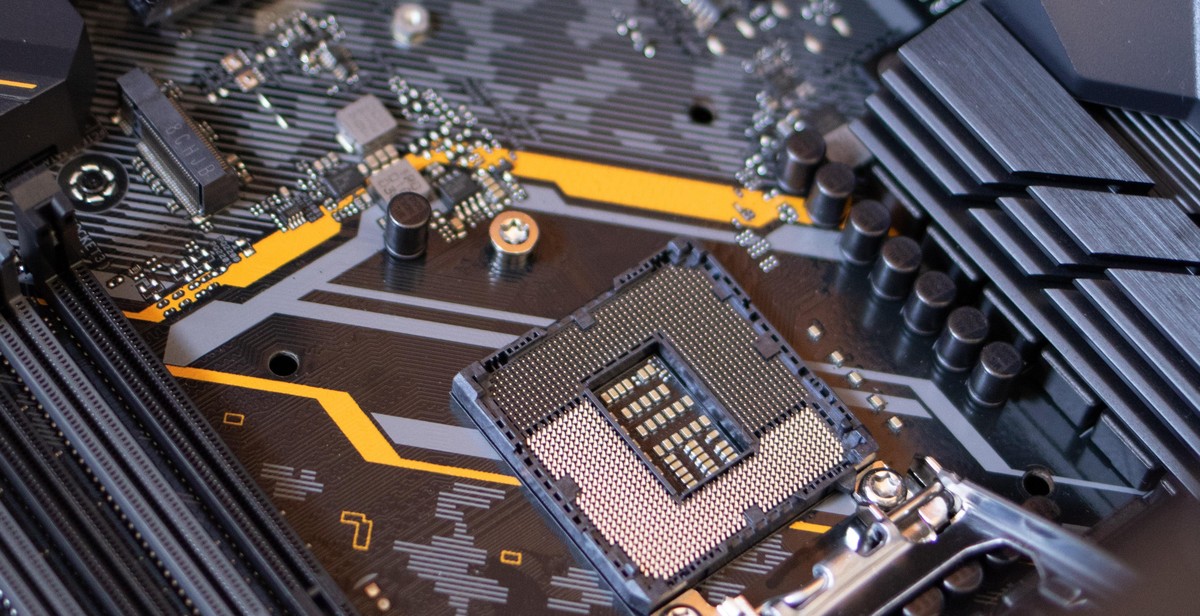
Mounting the Motherboard
Next, mount the motherboard onto the standoffs located inside the case. Align the screw holes on the motherboard with the standoffs and secure them with screws. Ensure that the motherboard is firmly in place and not touching any metal parts of the case.
Installing the CPU and RAM
Install the CPU onto the motherboard by lifting the retention arm and carefully placing the CPU into the socket. Secure it in place by lowering the retention arm. Then, install the RAM onto the motherboard by aligning the notches on the RAM stick with the slot on the motherboard. Press down firmly until the clips on either side click into place.
Installing the Storage Drives
Install your storage drives, such as your SSD or HDD, into the designated bays in the case. Secure them in place with screws or brackets provided with the case. Connect the necessary cables to the drives and the motherboard.
Installing the Graphics Card
If you have a dedicated graphics card, carefully insert it into the PCIe slot on the motherboard. Secure it in place with the screw provided with the case. Connect the necessary power cables to the graphics card.
Connecting the Cables
Finally, connect all the necessary cables to the motherboard, graphics card, and storage drives. Ensure that all the cables are securely connected and not interfering with any other components. Use cable ties to manage any excess cables and improve airflow inside the case.
With all the components assembled, you are now ready to power on your custom gaming PC and start installing your favorite games and software.

Step 3: Installing the Operating System and Drivers
After assembling the hardware components of your custom gaming PC, the next step is to install the operating system and drivers. Here’s how to do it:
Installing the Operating System
- Insert the installation media (DVD or USB drive) into the appropriate drive on your computer.
- Restart your computer and boot from the installation media. You might need to change the boot order in the BIOS settings to prioritize the installation media over other boot devices.
- Follow the on-screen instructions to install the operating system. You’ll need to choose a language, select the hard drive where you want to install the OS, and create a user account.
- Once the installation is complete, remove the installation media and restart your computer.
Congratulations! You’ve now installed the operating system on your custom gaming PC. But, your computer won’t work to its full potential until you install the necessary drivers.
Installing the Drivers
Drivers are software programs that allow your operating system to communicate with the hardware components in your computer. Without the proper drivers, your computer might not work properly or at all. Here’s how to install the drivers:
- Insert the driver installation disc that came with your motherboard or graphics card into the appropriate drive on your computer. Alternatively, you can download the latest drivers from the manufacturer’s website.
- Follow the on-screen instructions to install the drivers. You might need to restart your computer after each driver installation.
- Repeat this process for all the hardware components in your computer, including the motherboard, graphics card, sound card, and any other peripherals.
Once you’ve installed all the necessary drivers, your custom gaming PC should be ready to use. You can now install your favorite games, software, and applications, and enjoy the full potential of your new computer.

Step 4: Testing Your PC
Congratulations! You’ve finally finished building your custom gaming PC. But before you start playing your favorite games, it’s important to test your PC to ensure that everything is working properly.
Testing the Components
The first step is to test each component of your PC. This includes the motherboard, CPU, RAM, graphics card, storage devices, and power supply unit (PSU). To do this, you can use various diagnostic tools and software such as:
- MemTest86: This tool is used to test the RAM for errors.
- CrystalDiskInfo: This tool is used to check the health of your hard drive or solid-state drive (SSD).
- Prime95: This tool is used to stress test the CPU and check for stability.
- FurMark: This tool is used to stress test the graphics card and check for stability.
You should also check the temperatures of your PC components using software such as HWMonitor. Ideally, your CPU and GPU temperatures should be below 80°C to avoid overheating and performance issues.
Overclocking Your PC
If you plan to overclock your PC for better performance, it’s important to do it safely and test for stability. Overclocking your CPU and GPU can increase their clock speeds and improve performance, but it can also generate more heat and potentially damage your components if not done properly.
To overclock your CPU and GPU, you can use software such as MSI Afterburner or Intel Extreme Tuning Utility. However, it’s important to do it gradually and monitor the temperatures and stability of your PC using stress testing software such as Prime95 and FurMark.
Remember, overclocking your PC can void your warranty and potentially damage your components, so proceed with caution and at your own risk.
| Step | Action |
|---|---|
| 1 | Test each component of your PC using diagnostic tools and software. |
| 2 | Check the temperatures of your PC components using software such as HWMonitor. |
| 3 | Overclock your PC safely and test for stability using stress testing software such as Prime95 and FurMark. |
Conclusion
Congratulations! You have successfully built your custom gaming PC. Now it’s time to enjoy the fruits of your labor. You have created a powerful machine that will give you the best gaming experience possible. Not only will it be able to handle the latest games, but it will also be able to perform other tasks with ease.
Remember that building a custom gaming PC is not an easy task. It requires a lot of research, time, and effort. But the end result is worth it. You will have a machine that is tailored to your needs and preferences, and you will have learned a lot about computer hardware in the process.
Tips for Maintaining Your Custom Gaming PC
- Regularly clean your PC to prevent dust buildup.
- Keep your drivers and software up to date.
- Monitor your PC’s temperature to prevent overheating.
- Invest in a good surge protector to protect your PC from power surges.
Final Thoughts
Building a custom gaming PC is a fun and rewarding experience. It allows you to create a machine that is tailored to your needs and preferences. With the right components and a little bit of patience, you can build a powerful gaming PC that will give you years of enjoyment.
| Component | Price |
|---|---|
| Processor | $300 |
| Graphics Card | $500 |
| RAM | $150 |
| SSD | $100 |
| Motherboard | $200 |
| Power Supply | $100 |
| Case | $80 |
| Total | $1530 |
Keep in mind that prices may vary depending on where you live and where you buy your components. But with a budget of around $1500, you can build a powerful gaming PC that will give you the best gaming experience possible.